
A quick little video showing how this newest handpaw draft looks while moving. So far so good!
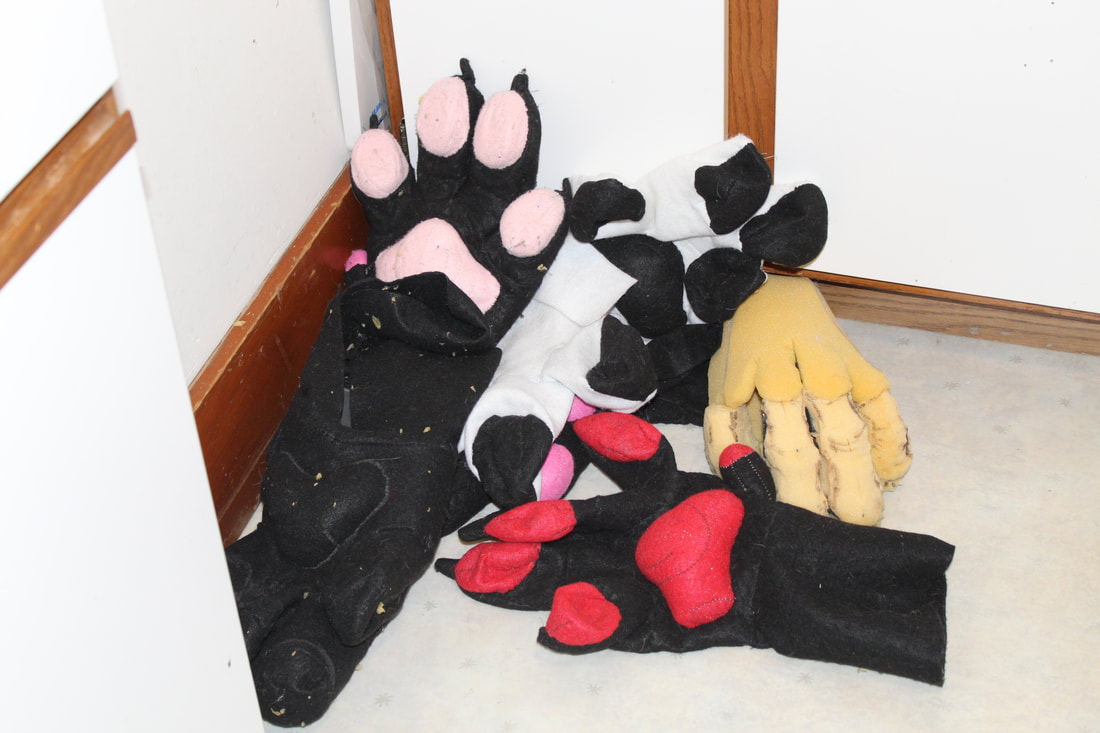
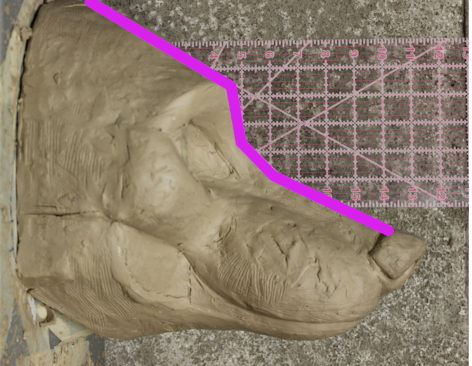
Attempt One! Attempt one. I came up with this version by enlarging and tracing top, bottom, and side views of an illustration of a paw onto a large piece of paper, cutting the tracings out, then transferring them onto foam. I then cut out the foam pieces and glued them together to make this paw. I never taped it up and made a pattern from it, as at this time I couldn't figure out how I'd pattern the area in between the toes. I did come back to this technique later on. Attempt Two!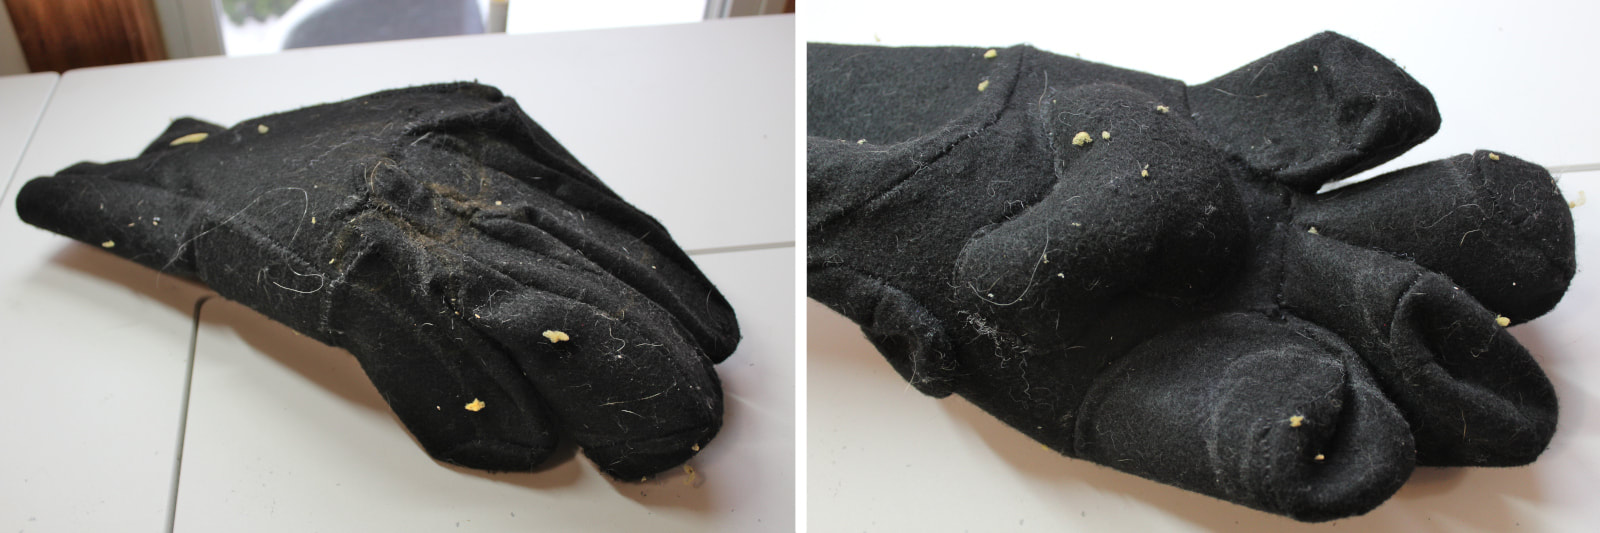 Let's call the above Attempt 2a. This paw was made from the pattern I got from sculpting a foot out of clay, taping it up, and enlarging the tape pattern to the correct size. (more here: http://www.sanssoucistudios.com/blog/onto-bigger-things) I believed I might better understand how to pattern in between the toes if I did this. 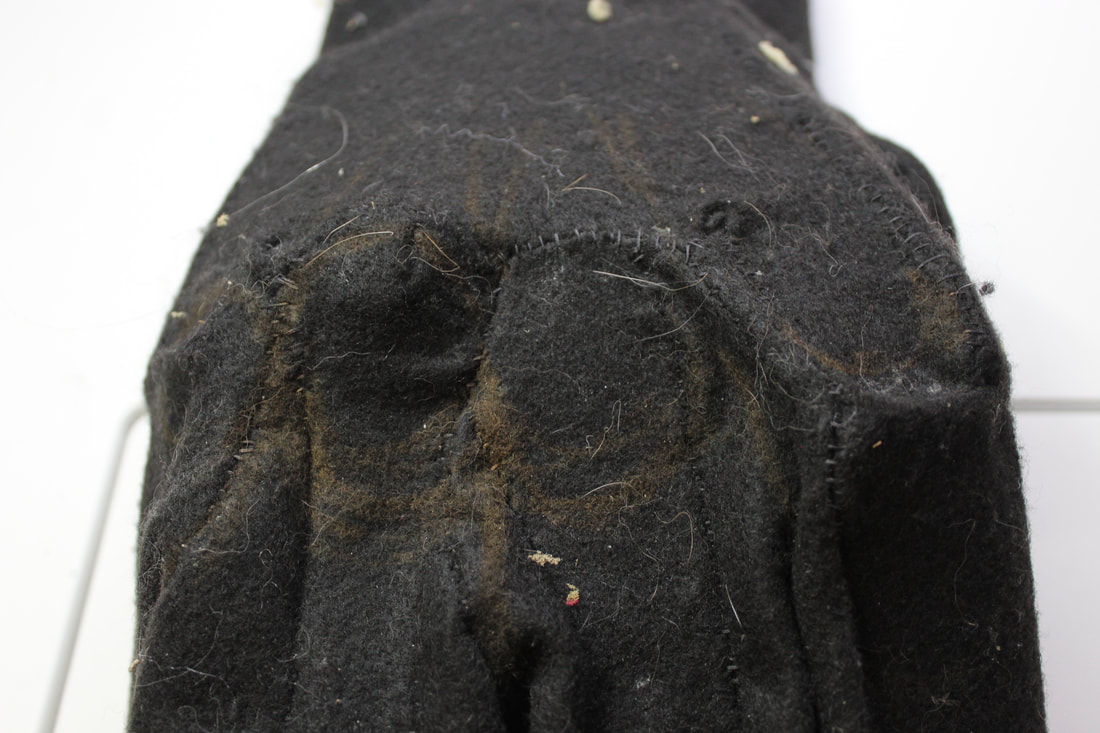 I'm looking at that seam across the knuckles, running higglety pigglety every which way, and wondering what the hell was I thinking?? Maybe that it might suggest different ways to approach that area, and to try them out on different parts of the paw? But it sure is a screaming mess. 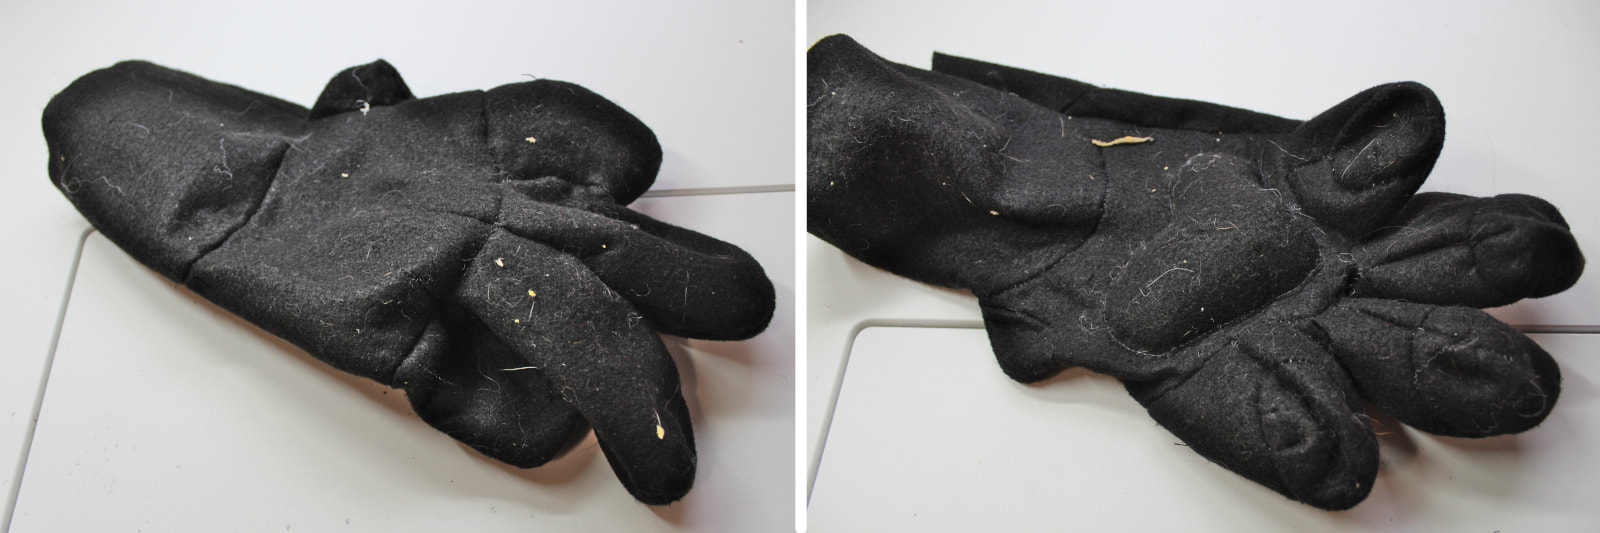 This one we'll call Attempt 2b, an attempt at neatening up the seams from 2a. The seams across the knuckles are ugly but at least they're consistent. This is also the only pattern where I ran a seam down the center of the underside of each toe. Future attempts would move the seams into a less visible spot along the sides of the toes. (I'm not sure I should letting these pictures see the light of day...) Attempt Three!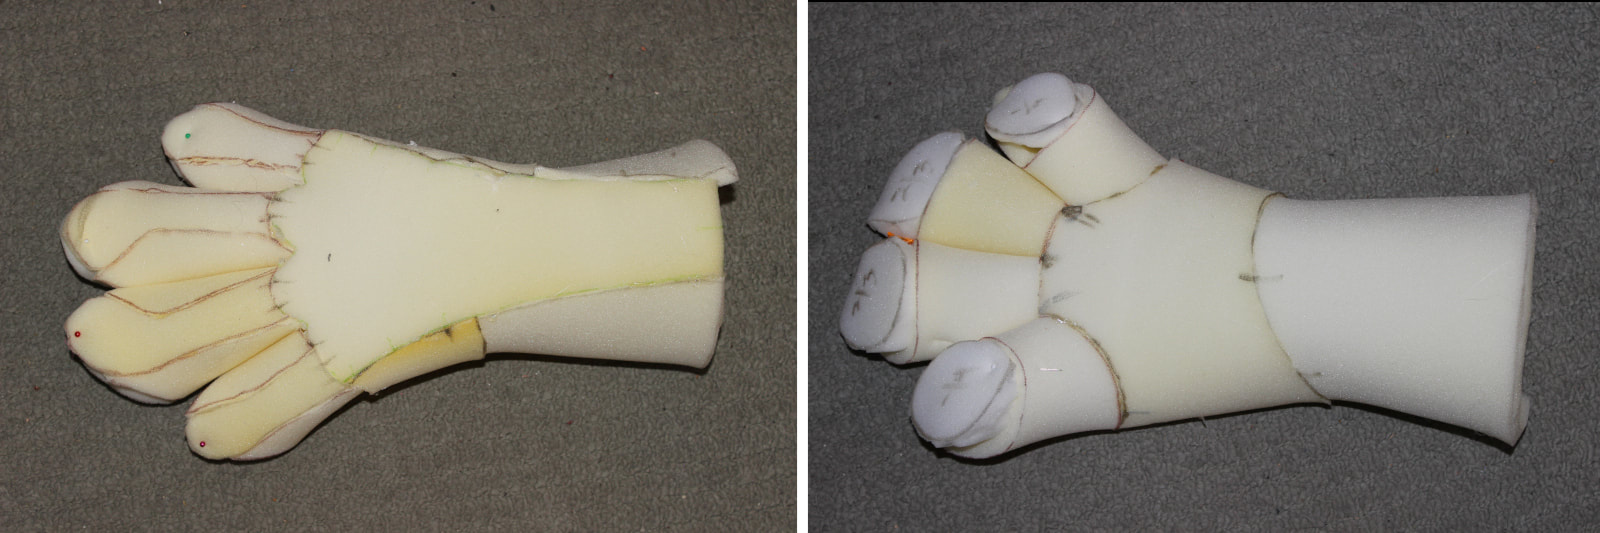 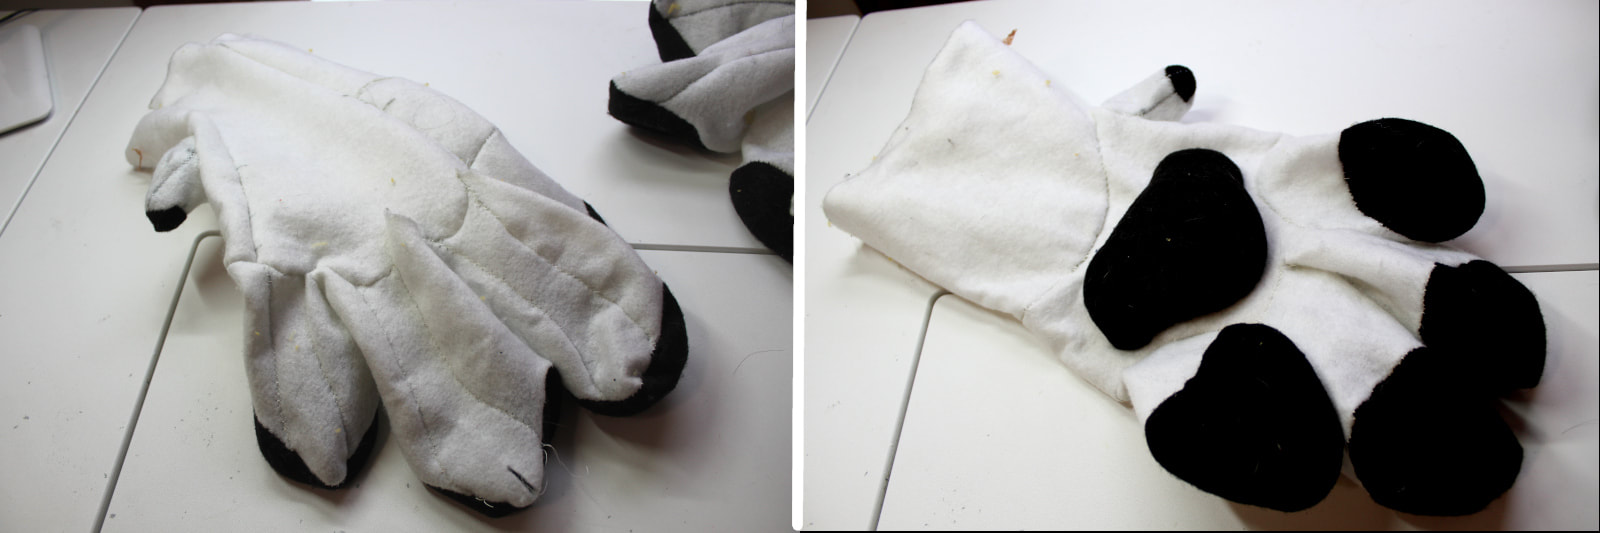 From this point forward I was building paws out of foam and making patterns from them. The above, my first such attempt. Reconstructing my thought process here, I made the fingers like tubes and the toebeans like plugs in the ends, as I could imagine how I'd tape up such an arrangement. You can also see how I changed the seams on the fingers from one central seam underneath to two more or less parallel seams on the top, where they blend in better with the overall design. More here: http://www.sanssoucistudios.com/blog/feet-of-foam Attempt Four!! Here I played more (a lot more!) with building up detail in the foam. The finger tubes are still under there, but they have carved knuckles and joints glued on top of them. I also gave the tubes a bit of a downward bend by cutting out notches on the undersides and gluing the edges together. 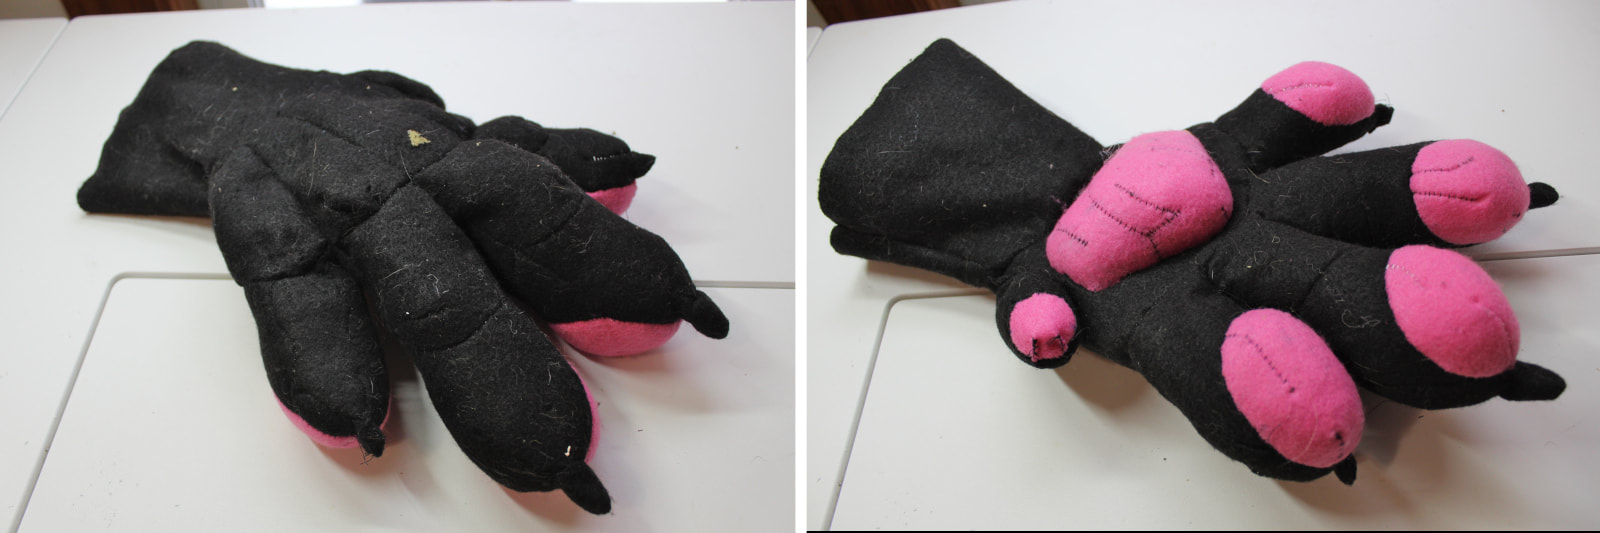 Above, mockup from first attempt at a pattern from this foam. We'll call this 4a. 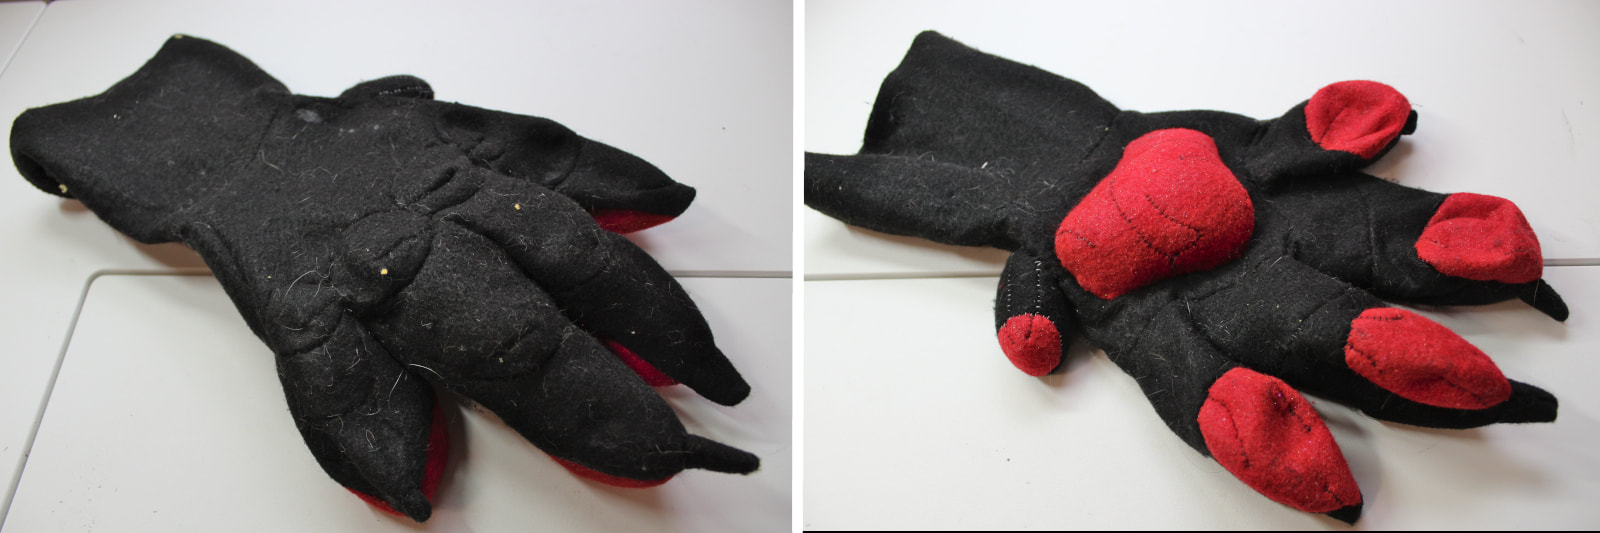 And, a second attempt from this foam paw and pattern. We'll call this 4b.   The big difference between 4a and 4b is that 4b has more refined seamlines between the toes and the top and bottom of the hand (compare the green lines). 4b also has shorter toes. In other words, it looks slightly more like a dog's foot and and less like a gecko's. For more: http://www.sanssoucistudios.com/blog/pause-for-paws Attempt Five!!!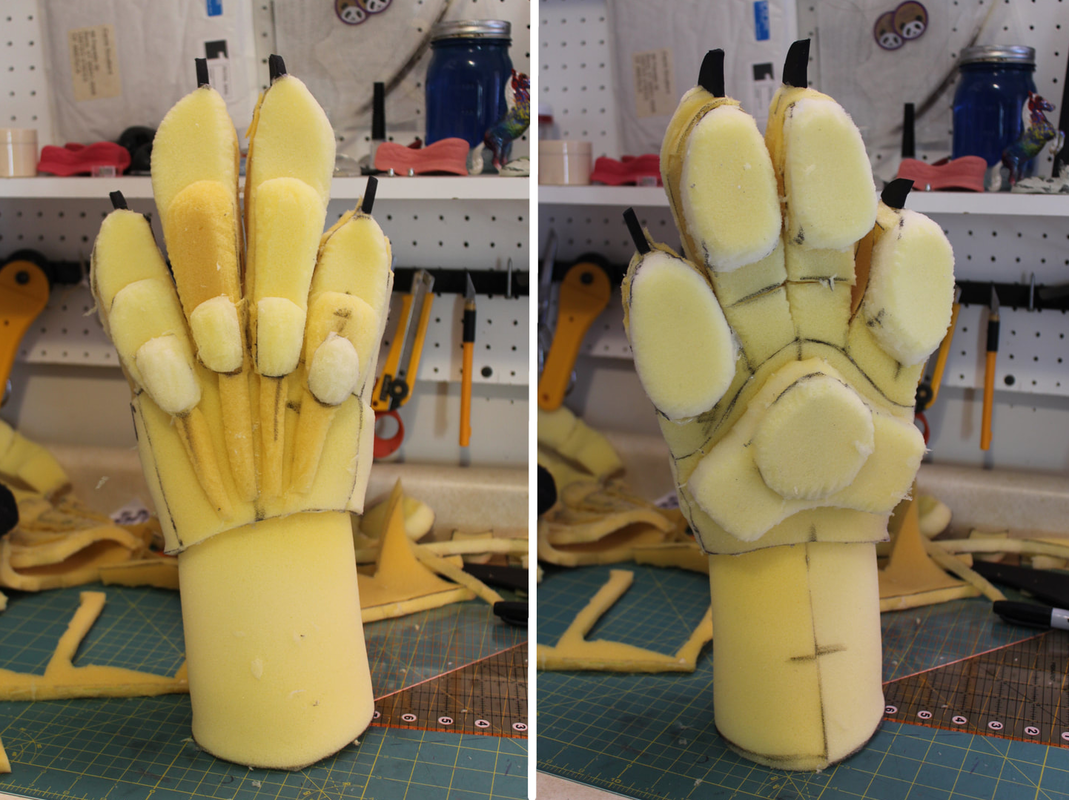 Above, the final (ish) foam paw build. I revisited what I did in Attempt One, which is, I enlarged top, bottom, and side views of an illustration of a paw onto a large piece of paper, traced and cut them out, transferred them onto foam, and then glued them all together. At this point I've also traded in the idea of cylindrical tubes for fingers for that of narrow rectangular boxes, hoping that this would allow the fingers to lie closer together, with less of a splayed appearance. I also did a lot less carving on this paw to keep the angles and edges as sharp and clear as possible. 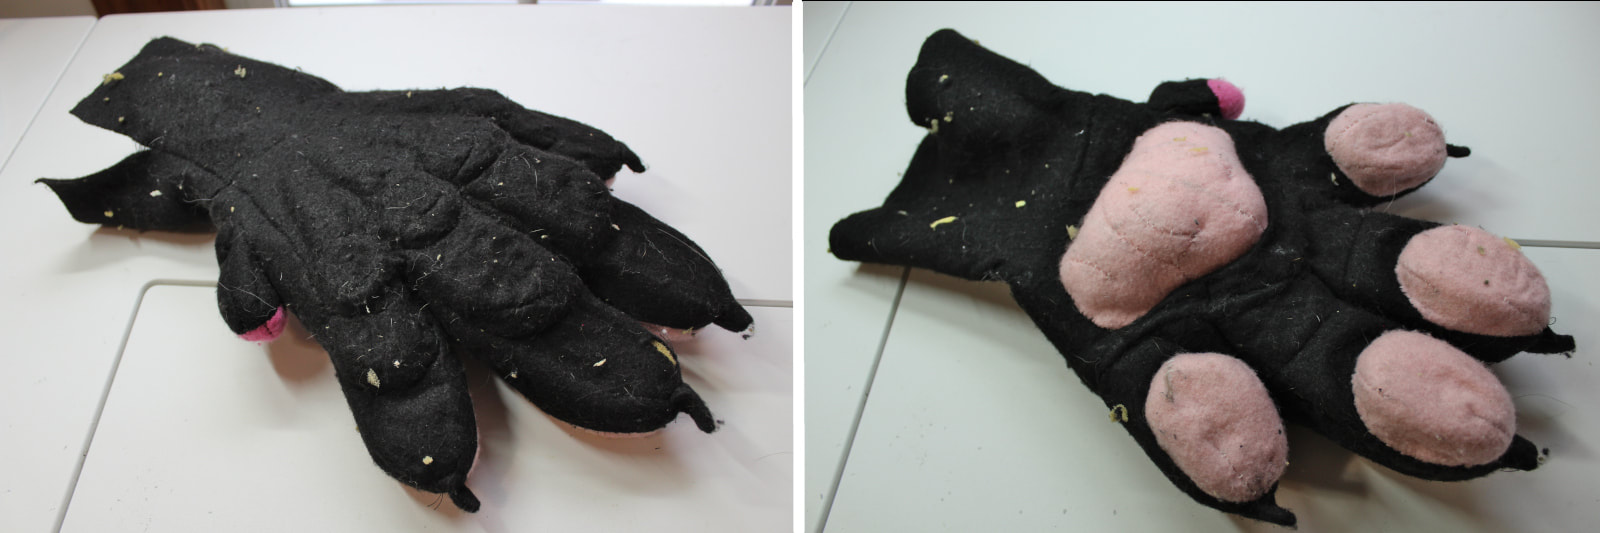 Here is the first attempt at a pattern from the above foot, which I shall dub 5a. This is also my is first attempt at translating the tendons into actual fabric. The toebean pattern has also been refined. More here: http://www.sanssoucistudios.com/blog/getting-out-of-hand  And, 5b. At some point I must have swapped out the toebeans on this foam paw, as they're noticeably larger here than the ones on 5a. I made several versions of the pattern, switching from tape to fabric and adhesive spray to be better able to get into all the little nooks and crannies. I also cut apart the resulting paws several times, tweaked them, and used those for patterns for further attempts as well. For more:. http://www.sanssoucistudios.com/blog/frankensteining 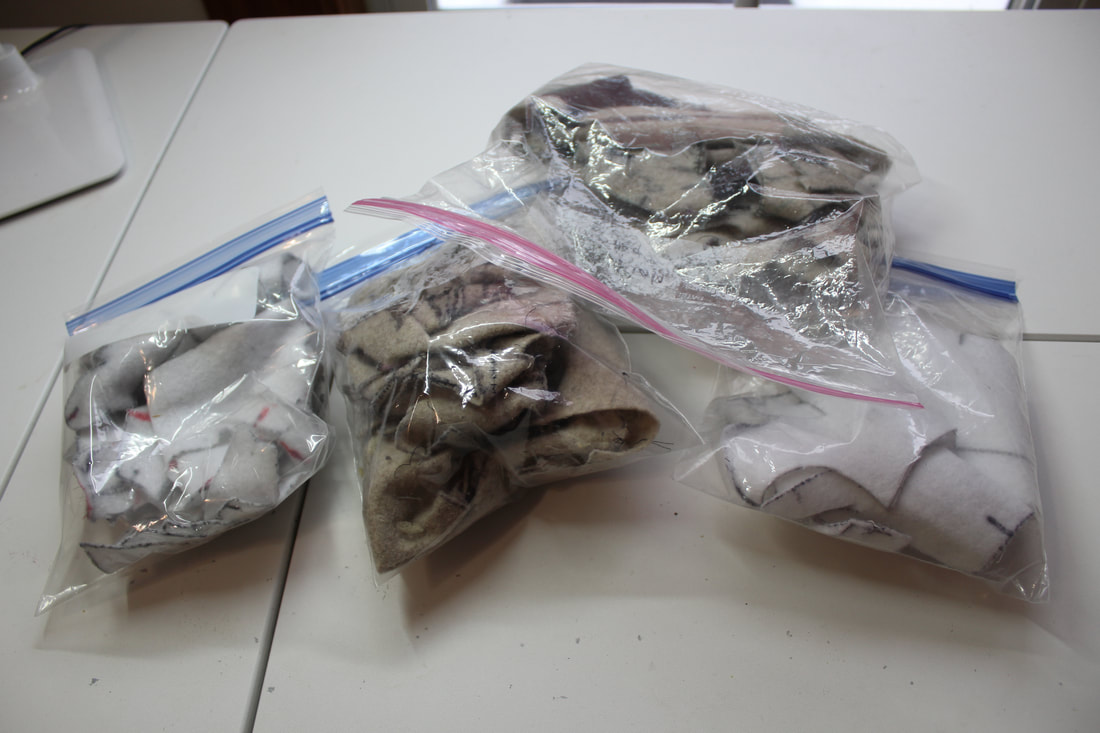 Which is what these poor things are, cut apart and tweaked paw attempts that have served as patterns. I think there are three different attempts contained in these four bags.
OK so let's tote it up!! 1a + 2a + 2b +3a +4a + 4b + 5a + 5b + 3 random extras and.... eleven paw attempts. That's a few!! Now to go and get some more work done in my (for the moment anyway) immaculately clean studio! 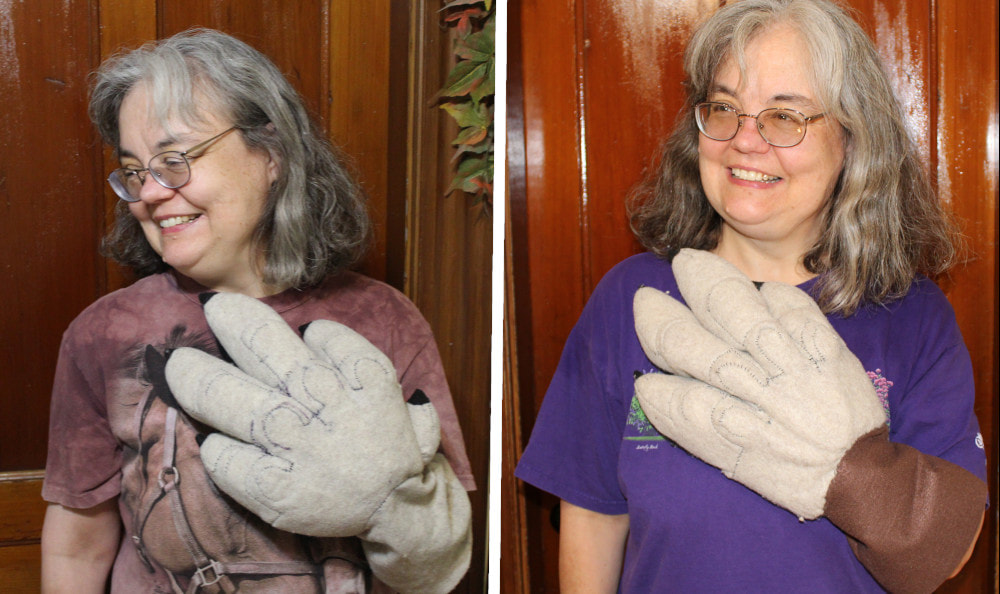 So here we have the before and after pic from my last post, in which I talked about deblobbinating the paw by repatterning it using "Frankensteining", a method using felt patches and temporary adhesive spray. Here I'll talk about deblobbinating by using inside supports. As this paw is so much bigger than the wearer's hand, it was clear from the get go it would need some kind of internal support, as otherwise it would look like a weird bag hanging from the end of the wearer's arm. I had some faint hopes that I could just stuff it with fiberfill and use the lining to hold the fiberfill in place, but nope, too blobby. See above left. The next solution to present itself was stuffing the original foam hand (from which I made the pattern) inside the fabric one. Remember this guy? Nice thought but nope, doesn't fit. The wrist is narrower than most other parts of the hand, and squish as I might the foam fingers don't really fit through the fabric sleeve at the wrist. Plus, there's a lot of bitty details to line up and glue down, like tendons and knuckles, and I don't know how I'd see to maneuver a glue gun between the foam and fabric once one is stuffed in the other. There is also the very significant consideration that I would really not want to recreate the entire foam hand every time I made one of these. So.. next approach, two considerations... First, can I use only parts of the foam hand? What is the minimum amount of foam I can get away with to get the look I want? Second, since I can't stuff a finished foam hand into a finished fabric one, to what degree can I add foam as I sew up the hand and build the support as I go? 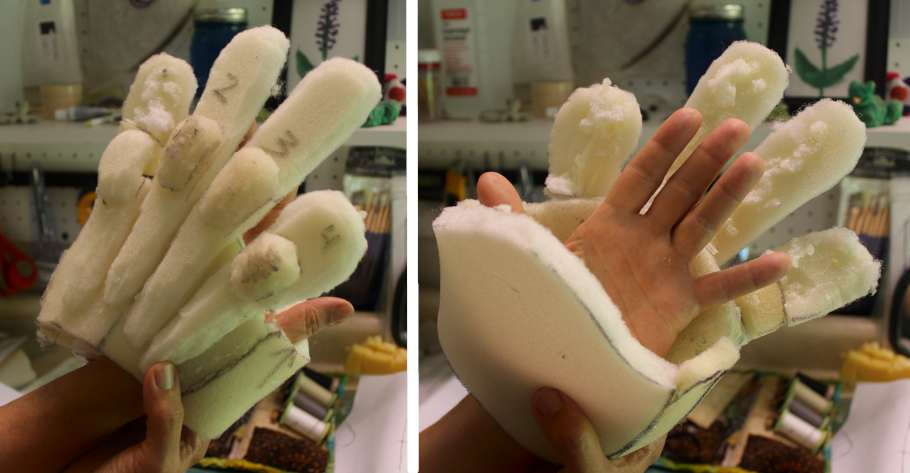 My first take on the bare minimum. A foam "tube" to support the palm and back of the paw, and foam detail to add definition to the knuckles, tendons, and first joints. 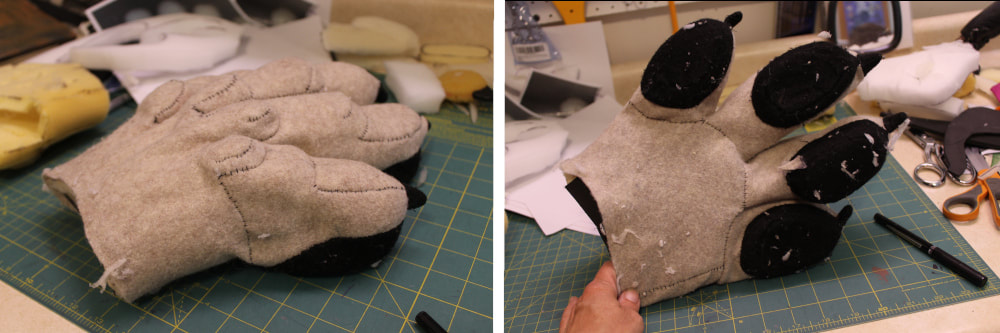 I removed the sleeve from the fabric paw so I could maneuver the foam inside, and held it all lightly together with temporary adhesive to get an idea of how it would work. (The palmar pad is missing, I know.. I hadn't added it onto this particular draft as I I was already pretty confident it worked. Pardon the little foam bitties.) 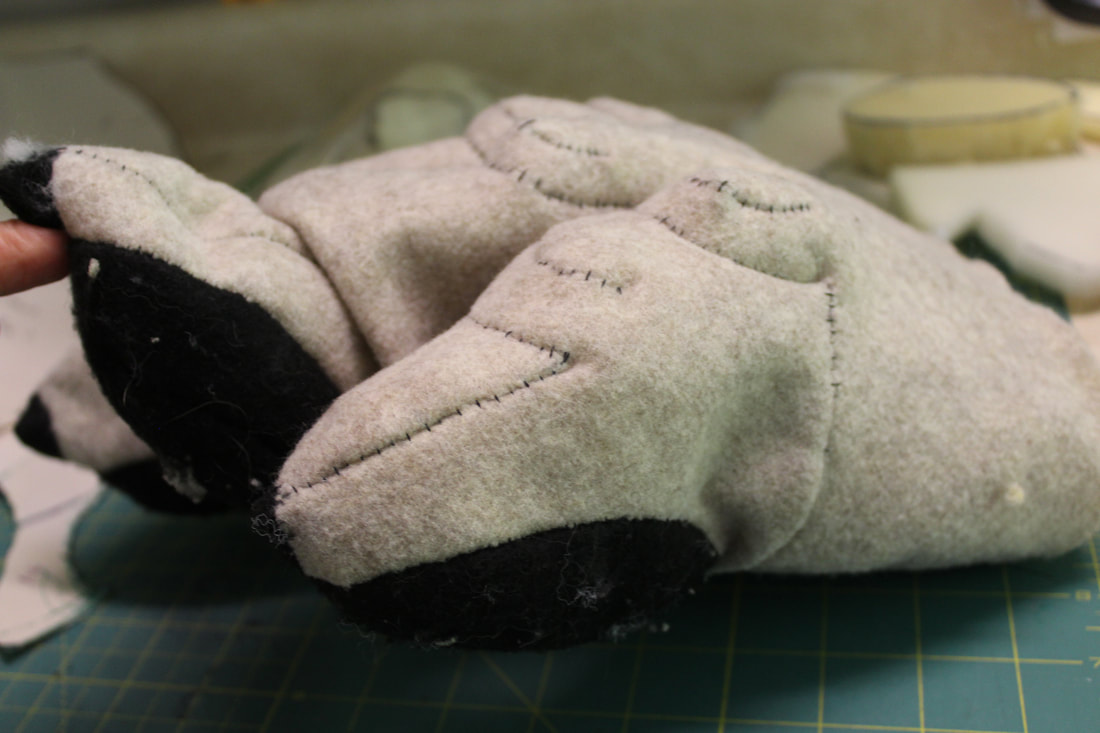 And, ouch. The toes could easily bend uncomfortably backwards at the spot where the foam support in the first joint ended. I did not like this at all. 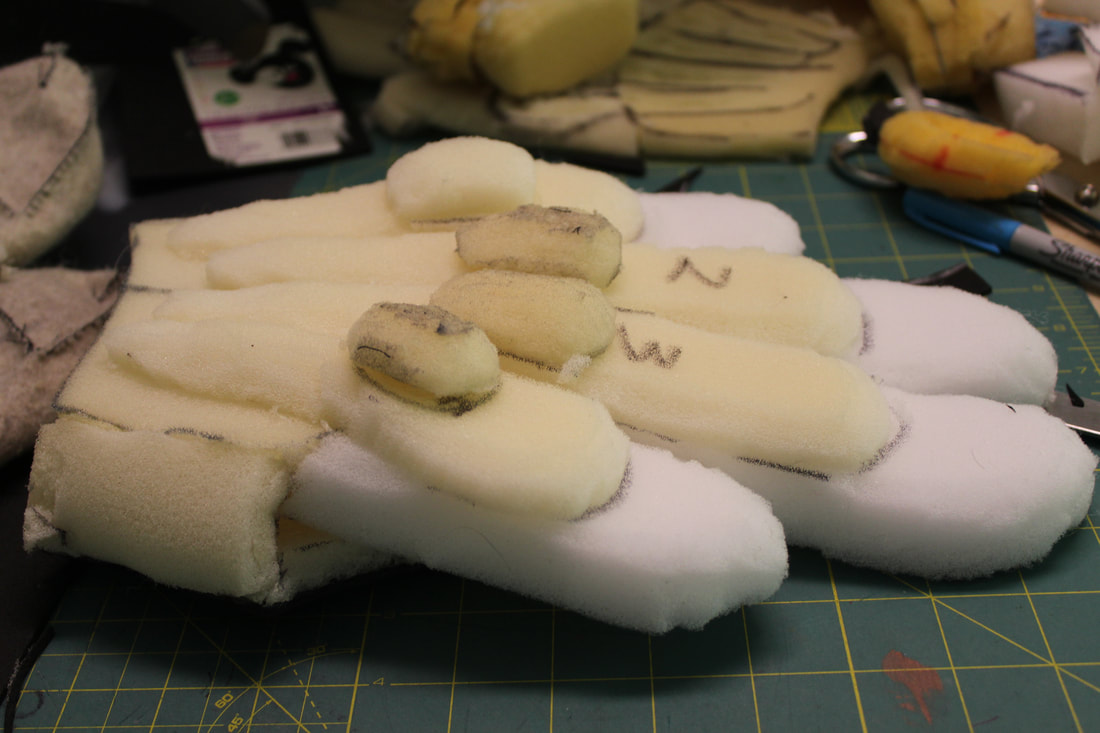 Here I've added foam that goes all the way to the tips of the fingers. 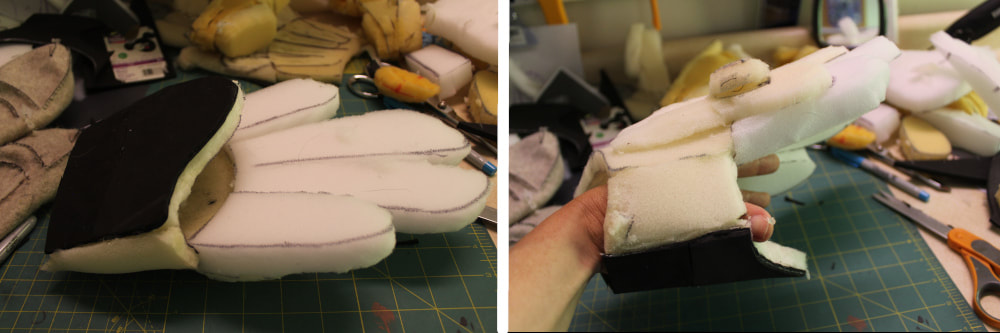 More views of the support piece with its additions. (The black thing is a patch of sorts, as I ripped a hole in that piece of foam in my zeal.) 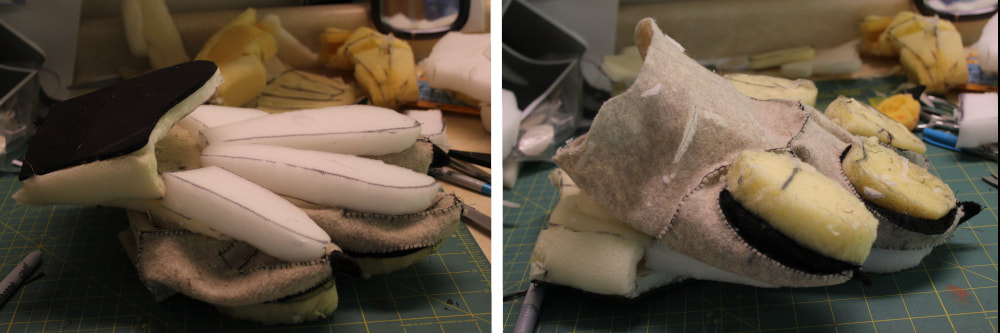 Now that the support piece is that much more complicated, I need to be able to better see what I am doing while installing it. I turned the fabric paw inside out, sprayed the support piece with temporary adhesive and laid the tops of the two parts against each other, tugging and fiddling to get everything lined up and in the right place. The tube thing for the palm will flip into the correct position when the hand is turned right side out, though with some difficulty. That stupid piece of black foam that I used as a patch did not help. I've also added foam to support the toebeans here, as I'm curious to see how that will look. When I flipped the whole thing right side out again, I was much happier with how the fingers looked while moving, from above anyway. When viewed from the underside, the palm and fingers bunched and folded in some pretty odd ways. Time for more supports? I decided to try adding some foam to the undersides of the fingers, in the process connecting the palm piece with the toebean pieces. Also, putting the parts together as above allows me to line up and glue the top carefully before turning it right side out, but not the bottom. (I imagine I could do it the other way too, lining up the bottom but not the top, though the top being the more complicated piece it makes sense to do it that way.) How could I line both the top and the bottom parts up carefully before turning everything right side out? If I left one end of the foam tube open, I could lay the tops of fabric and foam together, line them up and glue them down, roll the fabric and foam over like a giant burrito, repeat with the bottom pieces, glue the ends of the foam tube together, then turn right side out. Viola!! I also found that when the bottom of the finger was supported, the top didn't bend back as easily as it had before, so I could get away without foam all the way to the fingertips, just stuffing instead. 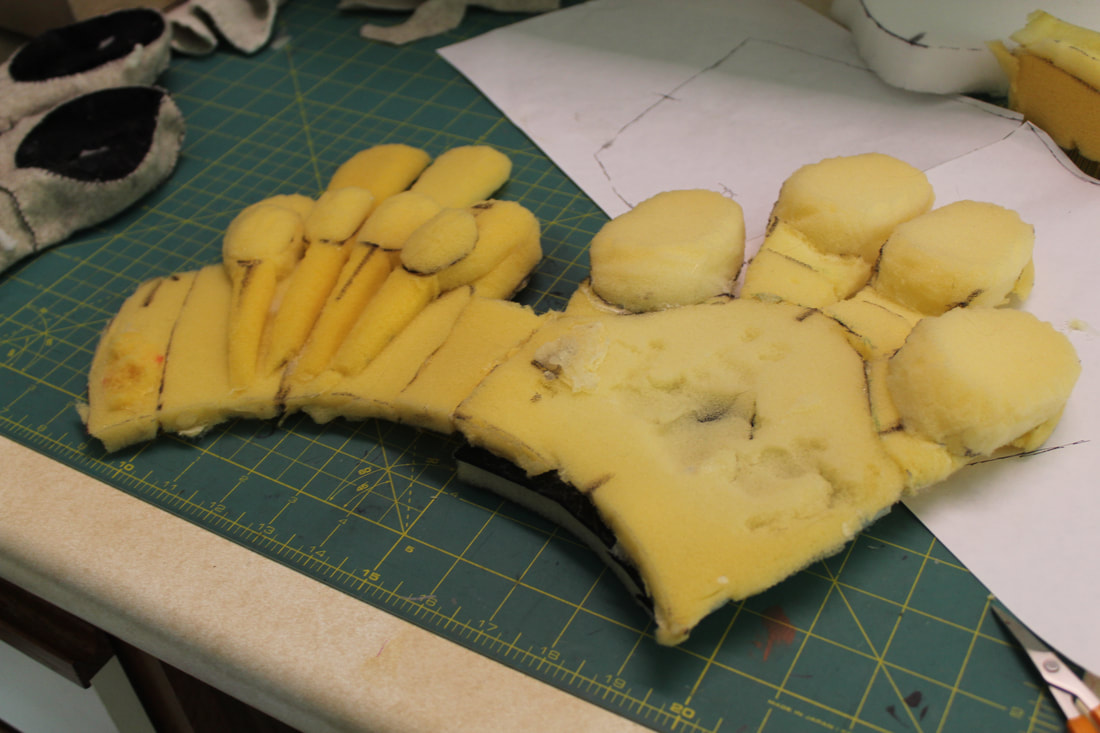 The support that's actually in the finished draft. Look familiar? That's because it was one of the paws I made a tape pattern from, partially disassembled.
Finally, I sewed the sleeve back on, using a ladder stitch as I had to sew on the "good" side (such as it is with felt) as opposed to the underside, as it was now very difficult to turn the paw inside out again. The spray adhesive complicated matters, as it wanted to collect on and knot up my thread and needle. I'm not sure if I'll be using the temporary adhesive for paws I plan on selling, so this may or may not be an issue. Next, to make a pair of finished paws using this pattern, and actually offering them for sale! Stay tuned! PS Fun fact!! Trying to describe hand parts in this post made me go on a somewhat useless Internet search for the terms. I did find the term "Flagina", which supposedly is a name for the fold of skin between your thumb and forefinger. Hee hee! 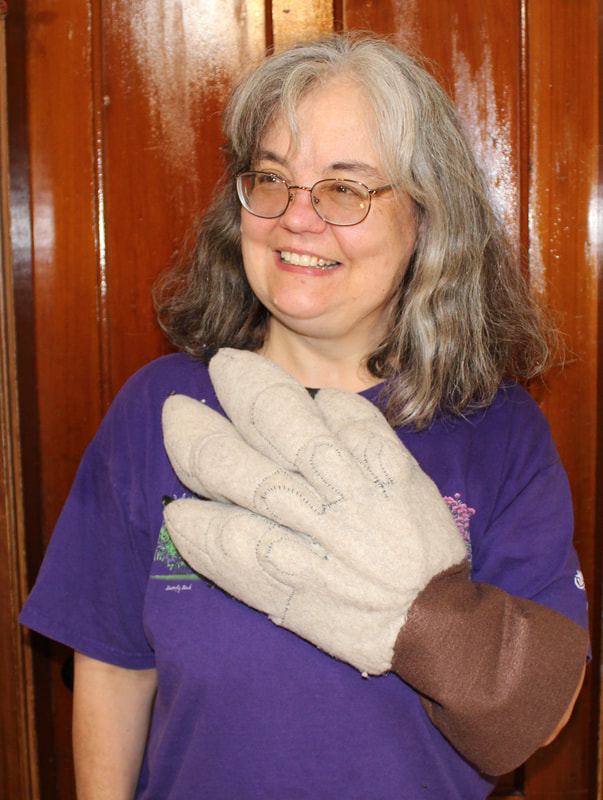 Can I be honest here? This brown sleeve drives me nuts. It soooo triggers my OCD. I wanted it to be the same color as the rest of the hand!! I had used up all my tan felt so I used this brown, the least offensive color I had in a large enough quantity in my stash. Normally I'd address this issue by running out to Joann Fabrics and buying some more tan felt, but... On July 10 much of Vermont was hit with catastrophic flooding and the local Joann Fabrics, along with all of the other stores in that particular shopping plaza, were wiped out. Four feet of water in the store. Sob!! As of this writing just about two months later, Joann's is still closed. Here is a video of the commercial area next to my hometown. Joann Fabric can be seen towards the very end, at 1:21 minutes. We ourselves at Sans Souci Studios are grateful we only suffered a damp basement, but our hearts ache for all the people who lost homes and businesses. 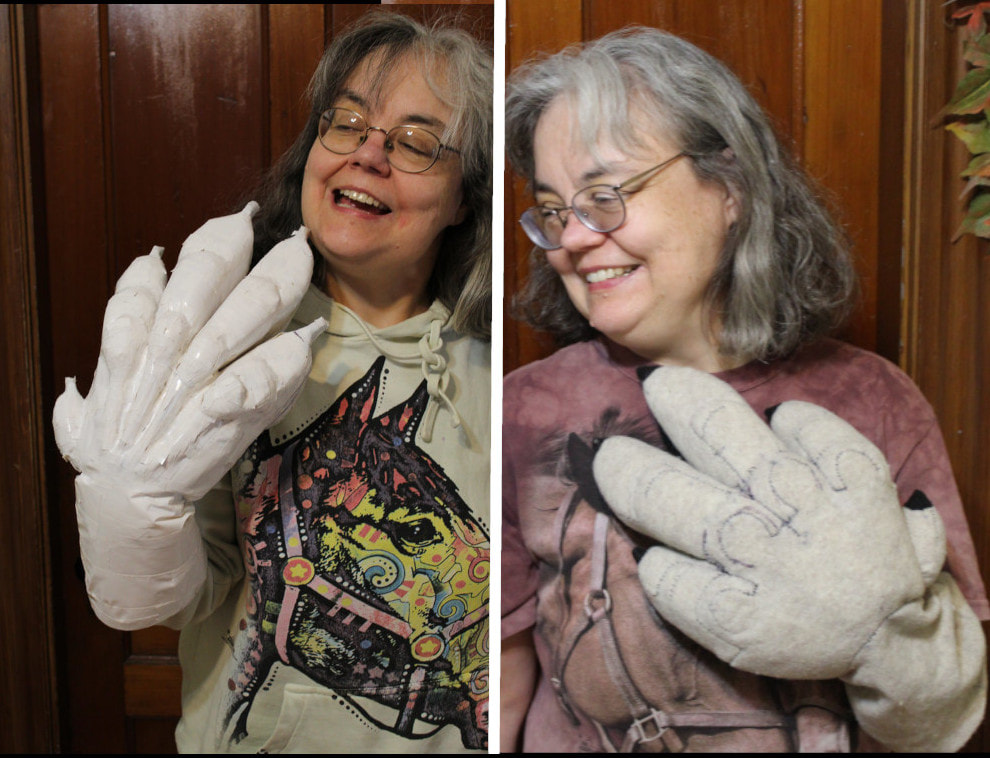 Ah, such high hopes. Previously I'd posted about my glorious latest paw draft, shown above taped up and ready for patterning. And also above, the paw I sewed up from that pattern. You can see the one does not look anywhere near as good the other. The sewn up paw looks short, chunky and blobby. 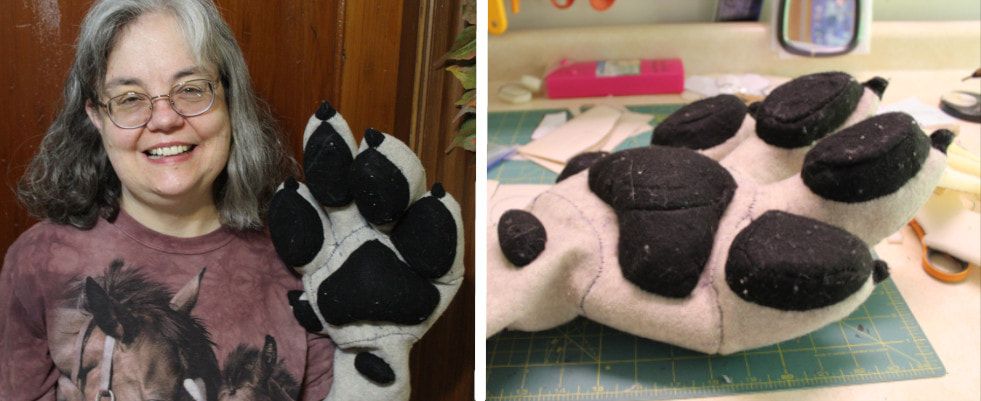 Well, at least the underside looks pretty good, though I think the wrist could use either some padding or other support. I came to the conclusion there were two issues here, one with the fiberfill used for support and another with the duct tape used for patterning. The duct tape often sticks to itself before it sticks to the model, so It's hard to get a pattern with any kind of fine detail. I had problems with the tape sticking to itself especially around the knuckles and tendons and in between the fingers. This post will be about the solution to this problem with the tape. Look for more about the issue with the fiberfill in my next post.
I combined this newfound willingness to work directly from a paw with the rediscovery of an overlooked supply in my studio- temporary fabric adhesive- and invented a new patterning method, which I dubbed... Frankensteining! Scary!!! 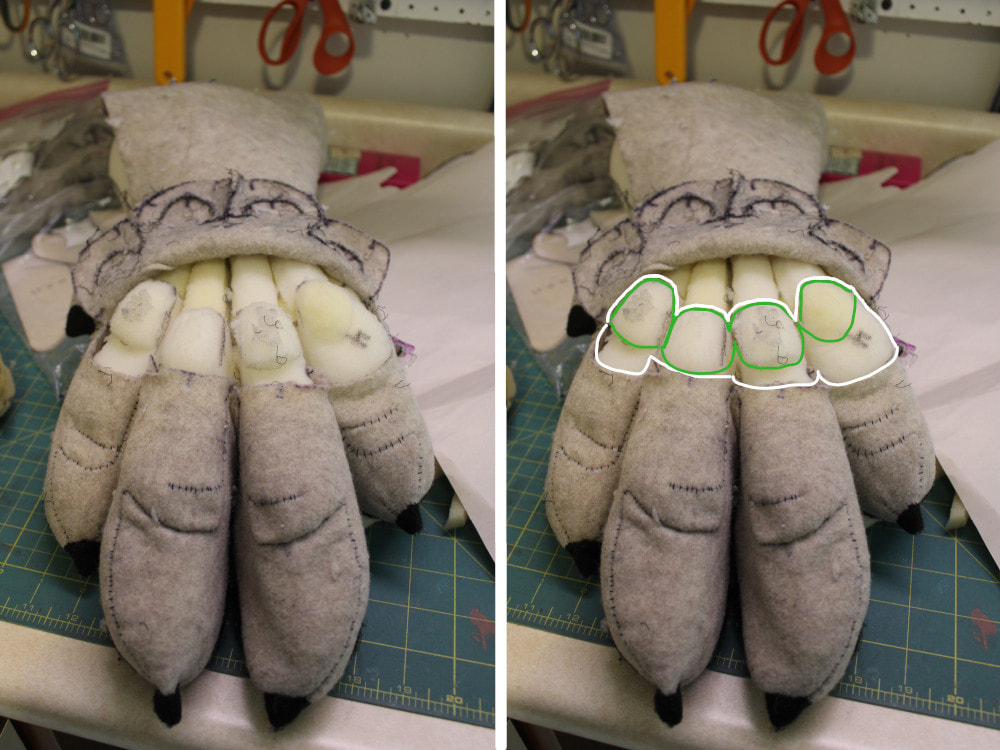 Starting the edits to the paw for realz. Here, I've cut the top of the paw along the line between the knuckles and the first joint of the fingers. Easy to see how the knuckles grew larger and shifted forward from the original foam paw to the fabric paw. (The original knuckles are outlined in green, the shifted fabric knuckles outlined in white.) It also appears that the knuckle and first joint of the pinky finger (here marked with a 4) merged completely. 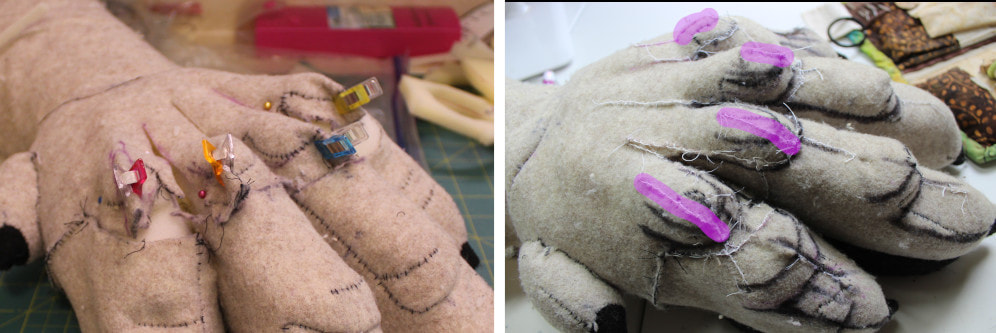 Reining in the oversized knuckles. I've pinched up the excess fabric with sewing clips, cut it off, and stitched it back together again with a blanket stitch, highlighted here in pink. (What are all the random thick black marks on the paw on the right hand side, you may ask? These are where I'm anticipating cutting the revised paw apart to make the new pattern.) 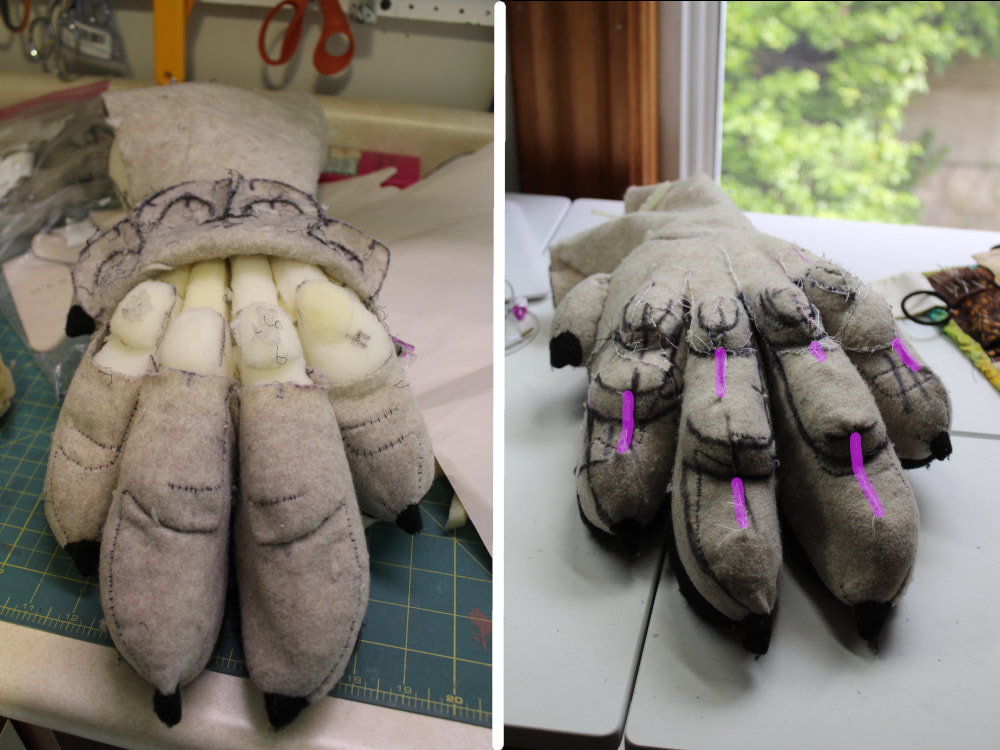 Tightening up the toes. Again, I pinched up the extra fabric, trimmed it off, and sewed the new edges together. I've highlighted those seams in pink. I like how this process made the finger joints more clearly defined. Now it's time for the temporary fabric adhesive! I sprayed some adhesive onto scraps of felt to make patches of sorts. I laid these patches over any gaps in the fabric on the paws, tucking the edges of the patches under the preexisting fabric. Then I traced along the edges of the fabric onto the patches with a Sharpie, cut off the excess, and stitched the patch onto the paw using a blanket stitch. 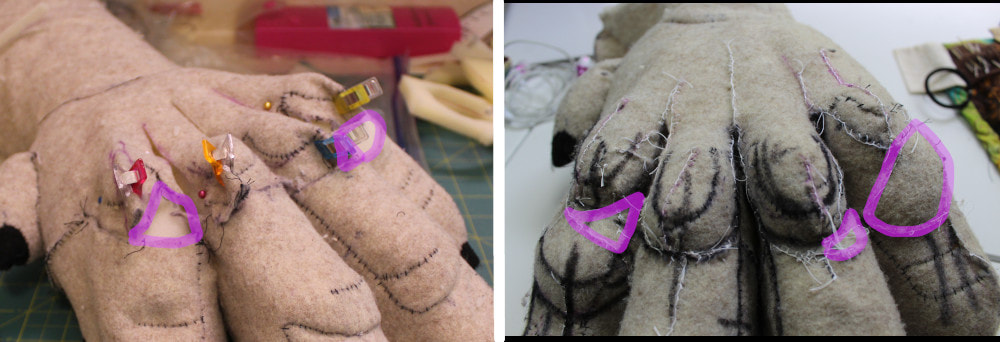 Above, showing the before and after of this process. There are gaps in the fabric between the knuckles and the first joint on the first, third, and fourth fingers. These gaps are outlined in pink in the picture on the left, and the finished patches outlined in the same manner on the right. 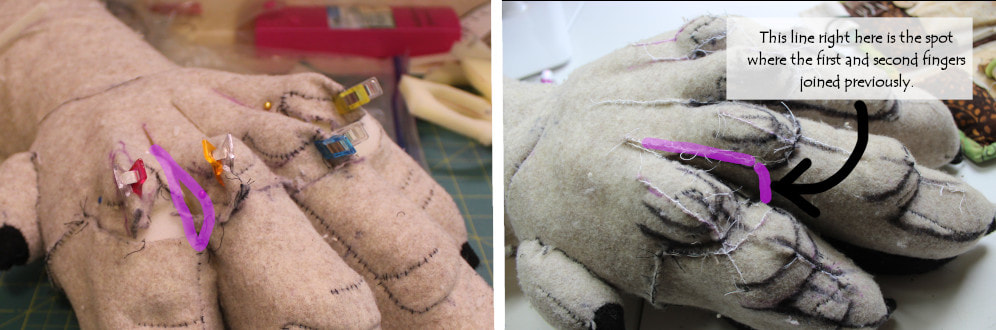 This next change was a critical one, though it's hard to see in photographs. The duck tape was too sticky to allow it to be positioned as far back between the fingers as it needed to be, which totally threw off the relative proportions of the fingers and the back of the hand in the resulting pattern. In other words, the back of the hand turned out too long and the fingers turned out too short and stumpy when I stitched them up!! You can see how much further back into the back of the paw the fingers join now. 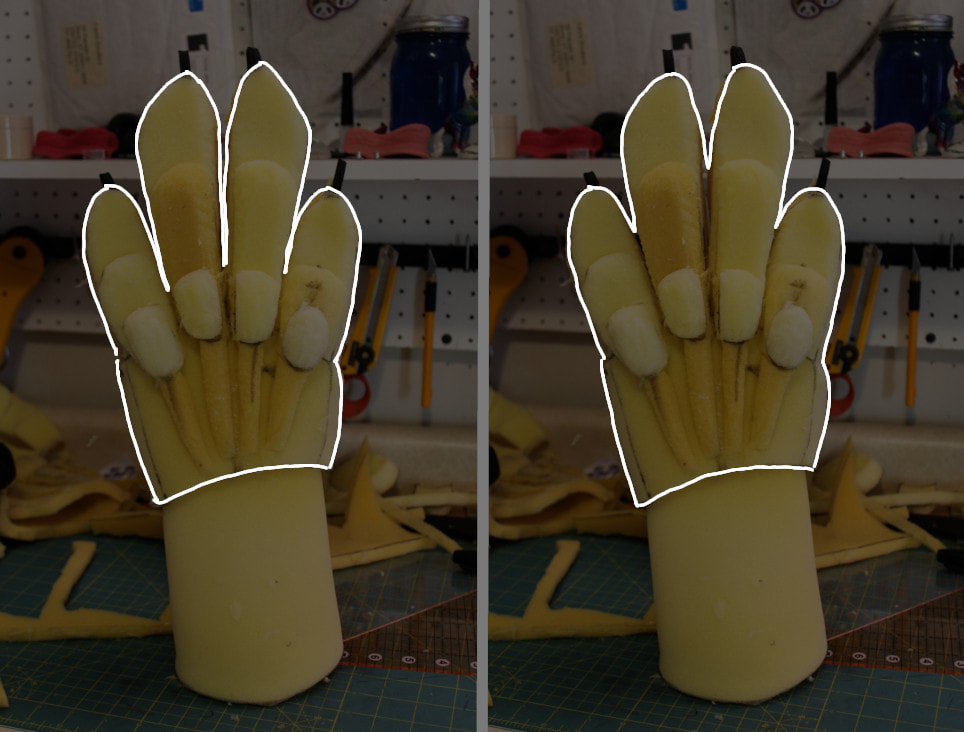 Here's another visual to help illustrate the problem with the fingers attaching to each other in the incorrect spot. The photo on the left hand side shows the fingers joined correctly and in the proper proportions to the back of the hand. The photo on the left shows the fingers joined incorrectly and too short in proportions to the back of the hand. Imagine also, how the two different paws would move. The one on the left could wiggle its fingers more easily, and spread them more widely than the one on the right. 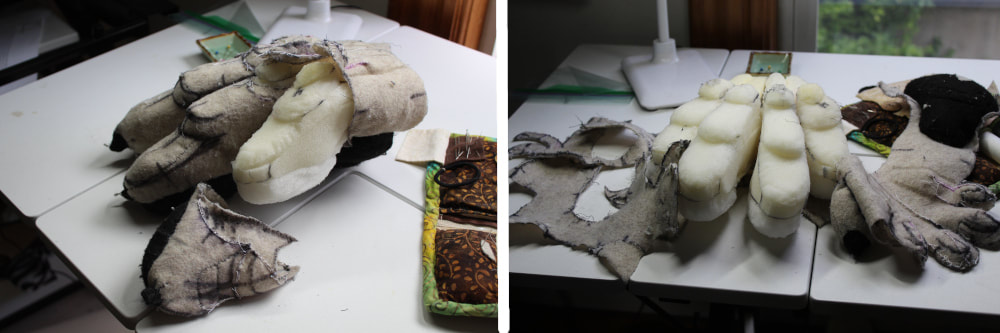 All edits made! Now, disassembling... cutting the Frankensteined paw into pieces in order to make the new, refined pattern. 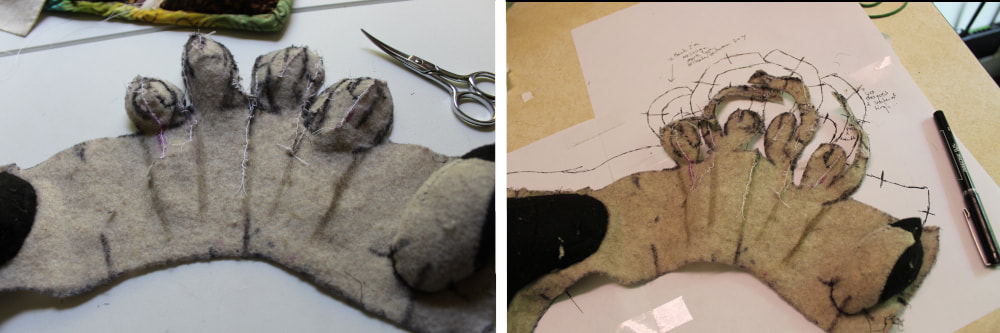 The various pieces need to be cut in a way that they'll lie flat in order to make a proper pattern. Here I've made the knuckles lie flat by cutting them into some pretty groovy shapes. Then I've traced this piece onto paper. I am planning to scan the traced patterns for all the handpaw pieces into the computer, make them pretty with GIMP, and make the whole thing available as a download. You can see the palmar pad and dew claw still attached to this piece. I am happy with the patterns I have for these parts already, and since whether or not they're there doesn't effect whether or not this piece lies flat, I've left them there. 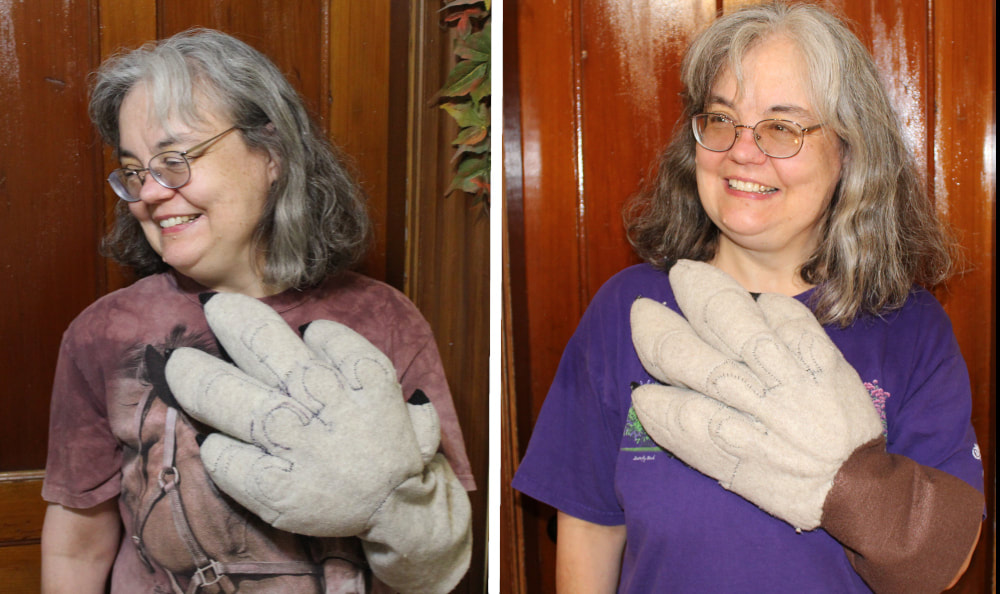 And here we have the official Before And After! The original blobby paw on the left, and the edited, refined paw on the right. I'm very happy with this progress.
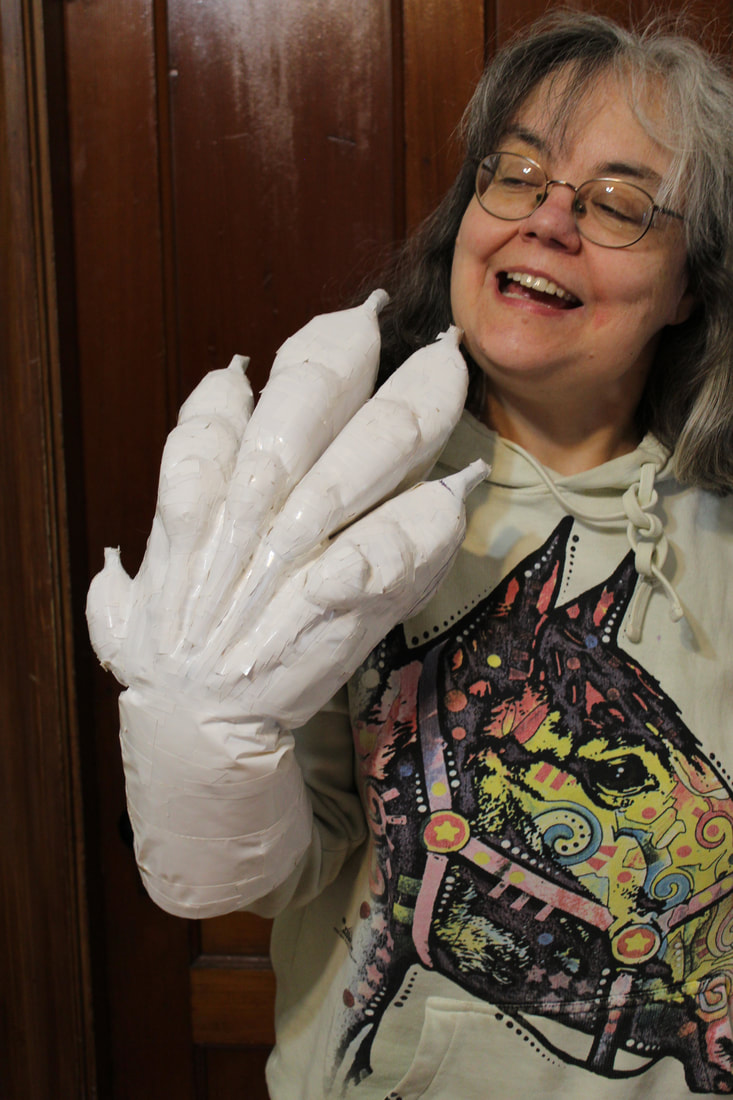
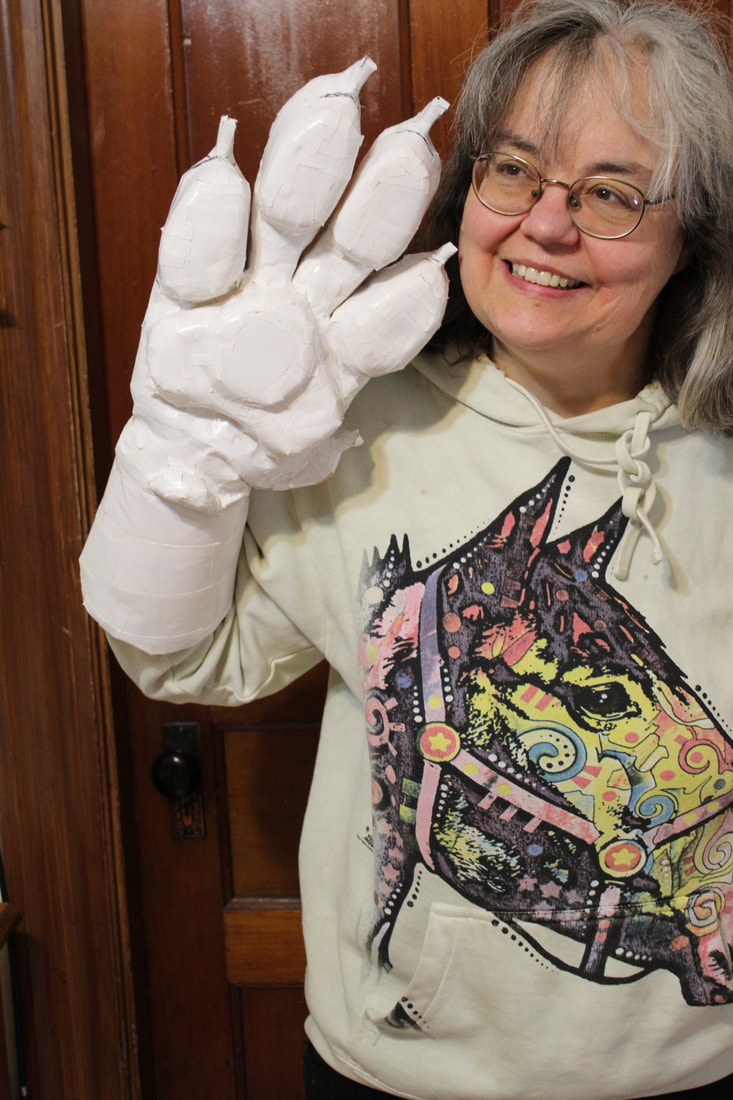
Really and truly. Here I am mugging with the new foam paw I made, all taped up and ready for patternmaking.
I get so excited about whichever phase of my paw I'm working on that I can't wait to make some more and then I think, you know what would make it *really* great?? And off I go again. I was so pleased I got a reasonable interpretation of tendons with the previous draft, and then I thought, the paw would be even better if the fingers lay closer together, tamping down a little more firmly on that inclination they have to spread out and morph into bird's or lizard's toes or something.
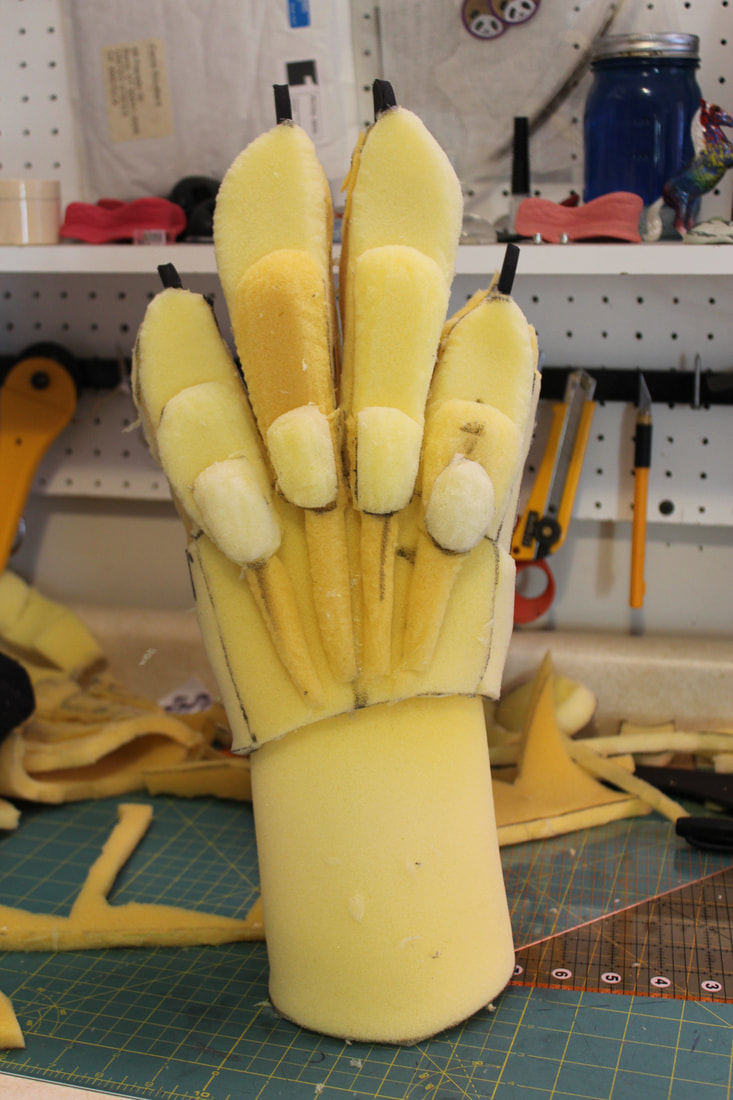
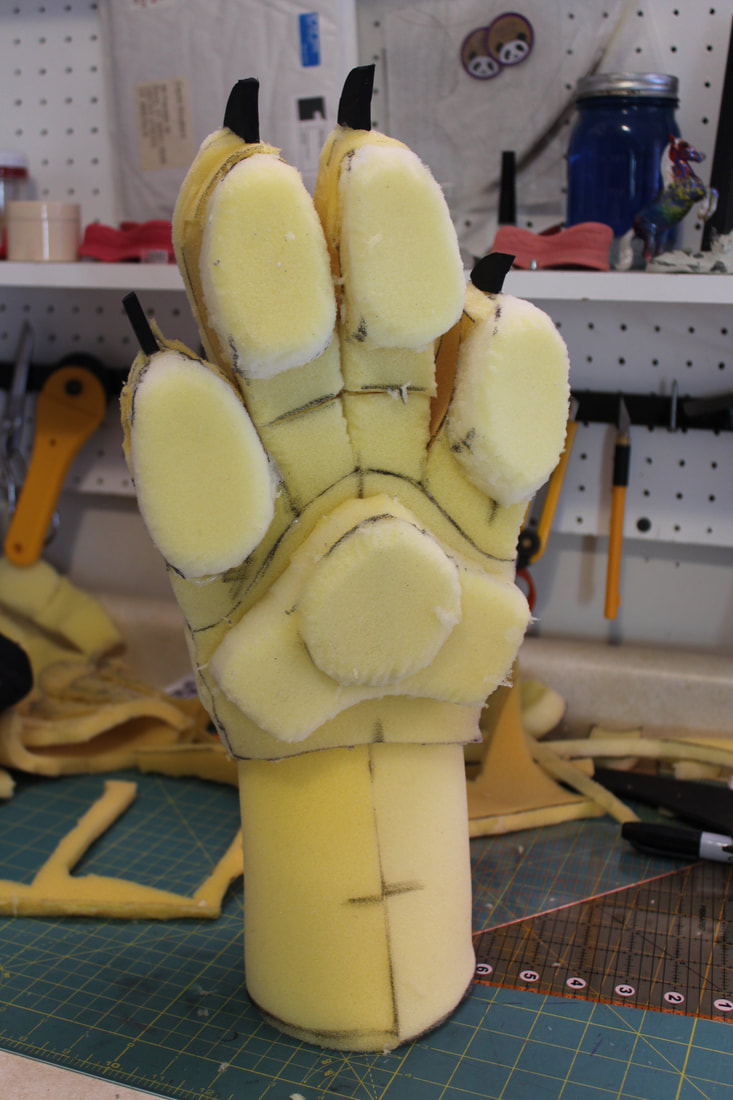
Here is this newest foam paw, prior to taping. 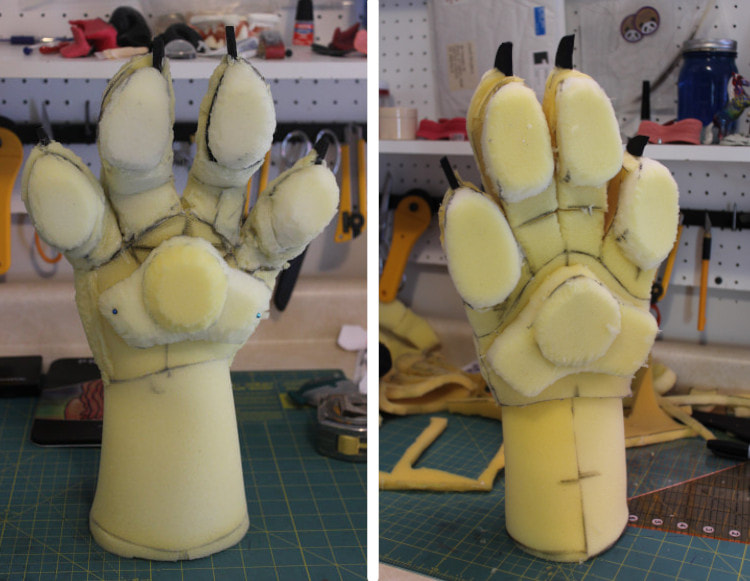 Here we have the previous foam paw compared to this newest paw. One big difference between them was my focus on getting the big, overall shapes of the new foot correct and worrying less about smaller details, such as carefully rounding all the edges and making sure the angles between the first and second joints of the toes were correct. Another big difference is the basic shape of the fingers. The fingers of the new foot are more or less elongated rectangles made from foam, rather like boxes, so they can lay fairly flush up against each other. Fingers from previous drafts were tubes, sheets of foam rolled up and the edges glued together. The curve of the tubes tended to push the fingers away from each other and make them spread out more.
I'm excited to sew up a felt version of this foot, stay tuned!!  It's been a while, hasn't it?? We've had hit after financial hit lately, with unplanned furnace and washing machine replacements delivering the final blow to a savings account already staggered by my hip operation, so when two full time coworkers took long vacations and a lot of extra hours became available, I signed up. I've wanted to use the scant time I have in the studio actually making stuff, and not posting on social media. But hopefully, I'm back to my regular schedule for the time being. I did take lots of pictures of my projects (and cute cats!) so there should be at least several new posts coming in short order. So I'm peeking in now to say hello and stay tuned!!
Above, photos comparing draft #5 (left side, with the red toebeans, featured in this previous blog post) and this newest draft (right side, pink toebeans.)
(It took me a bit to get photos of the paws, I got interrupted a lot...)
Backing up a bit. To make this new draft I needed to make a pattern for the tendons and devise support for them inside the paw, so they would hold their shape.
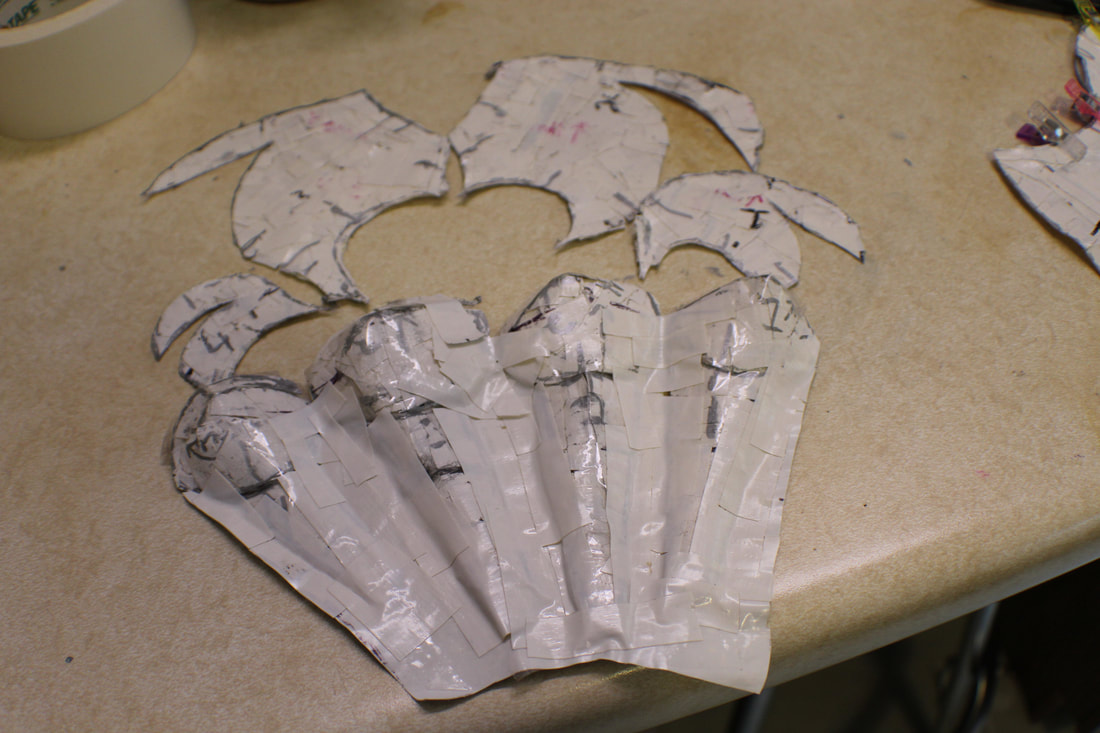
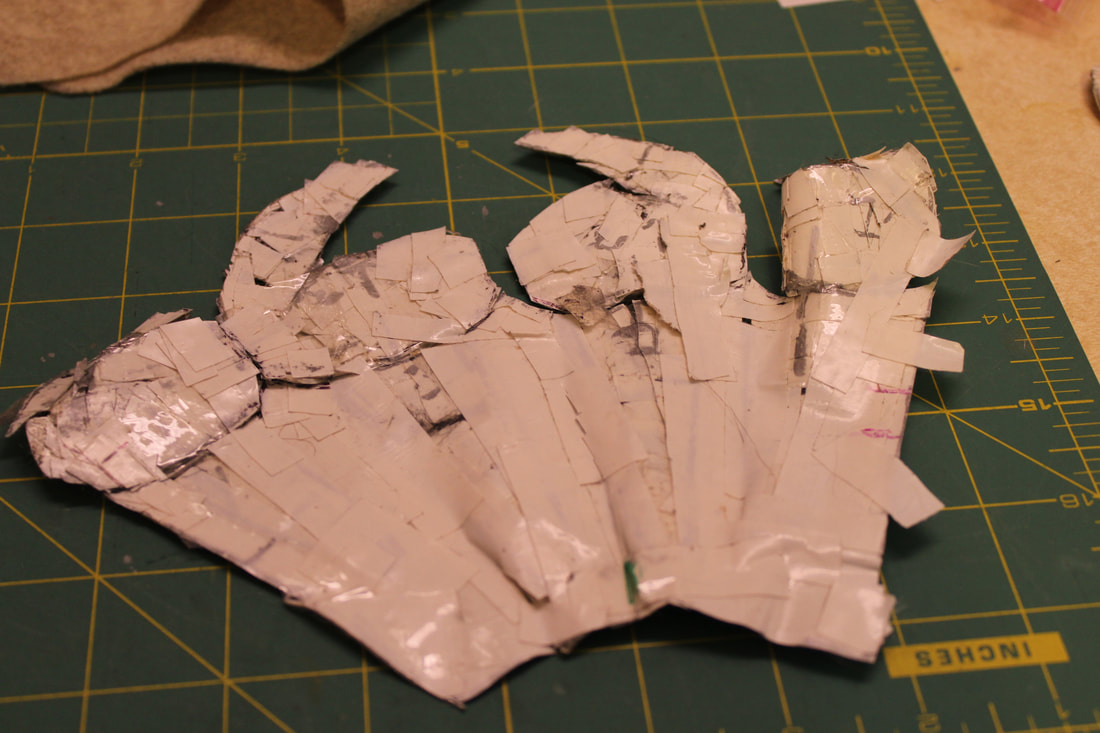
Here, making new pattern pieces by retaping the foam model (shown here in this earlier blog post) to include the tendons that I had left out previous drafts. The photo on the countertop shows the tape from the back of the hand before it was cut apart, as well as reworked patterns for the adjacent finger joints. The picture on the cutting board shows the tape after being cut apart and flattened, thus becoming the official pattern for the tendons that can be traced onto fabric and cut out.
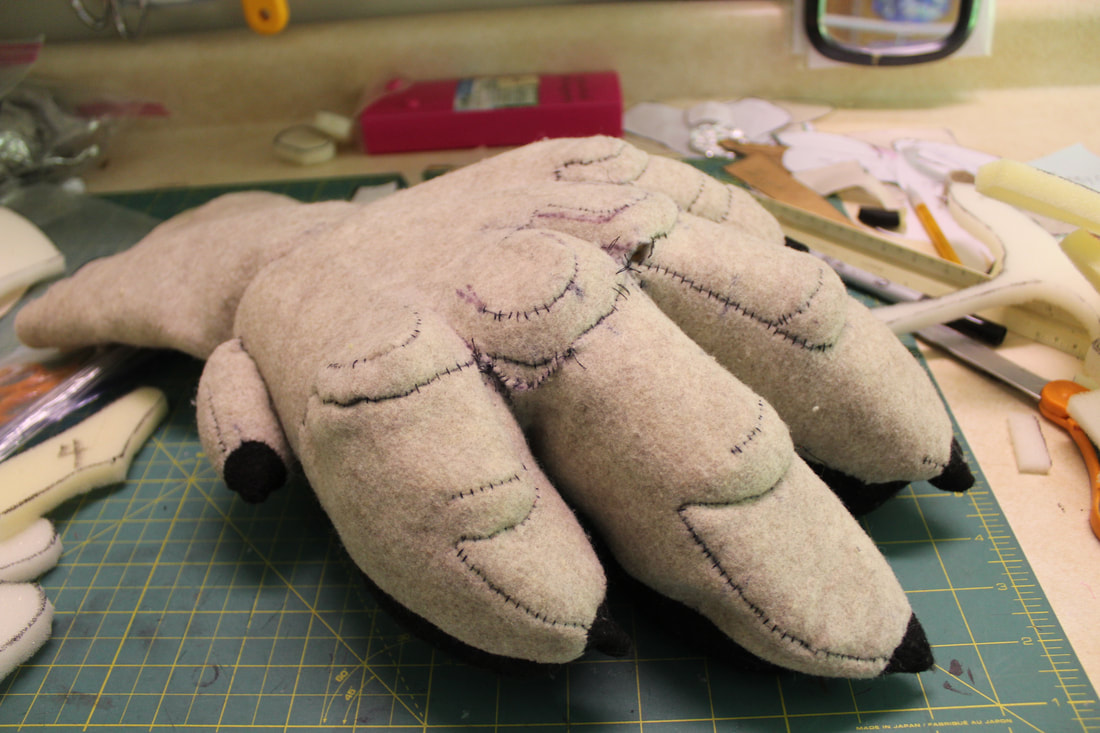
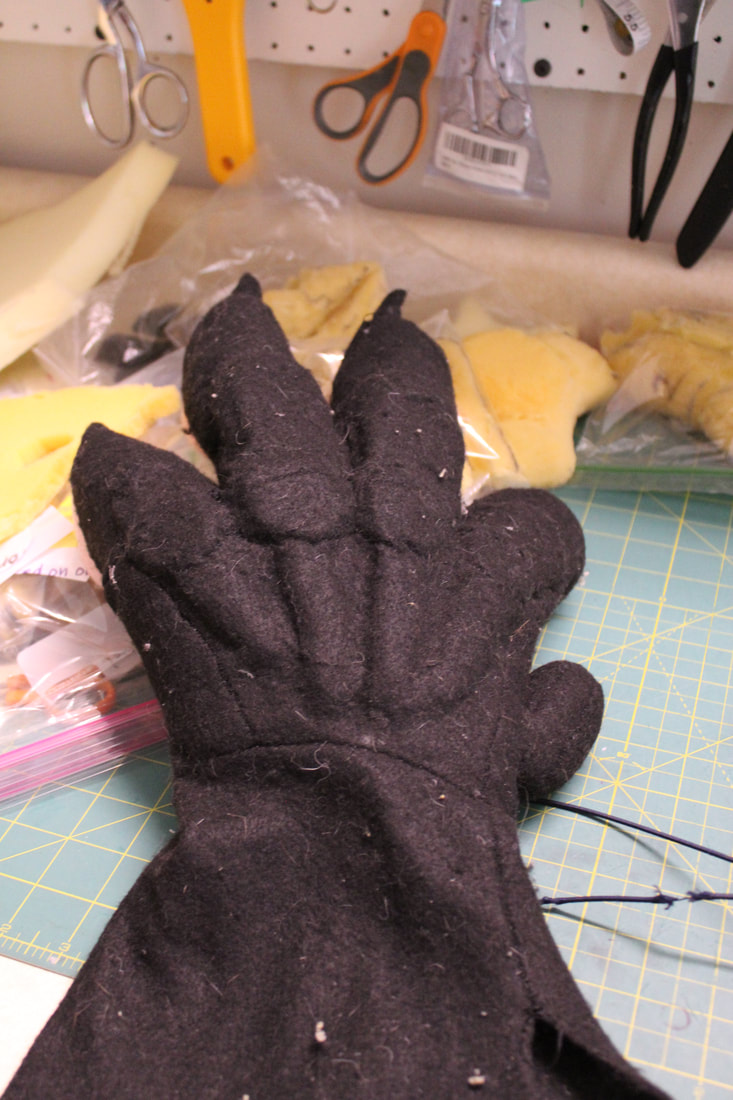
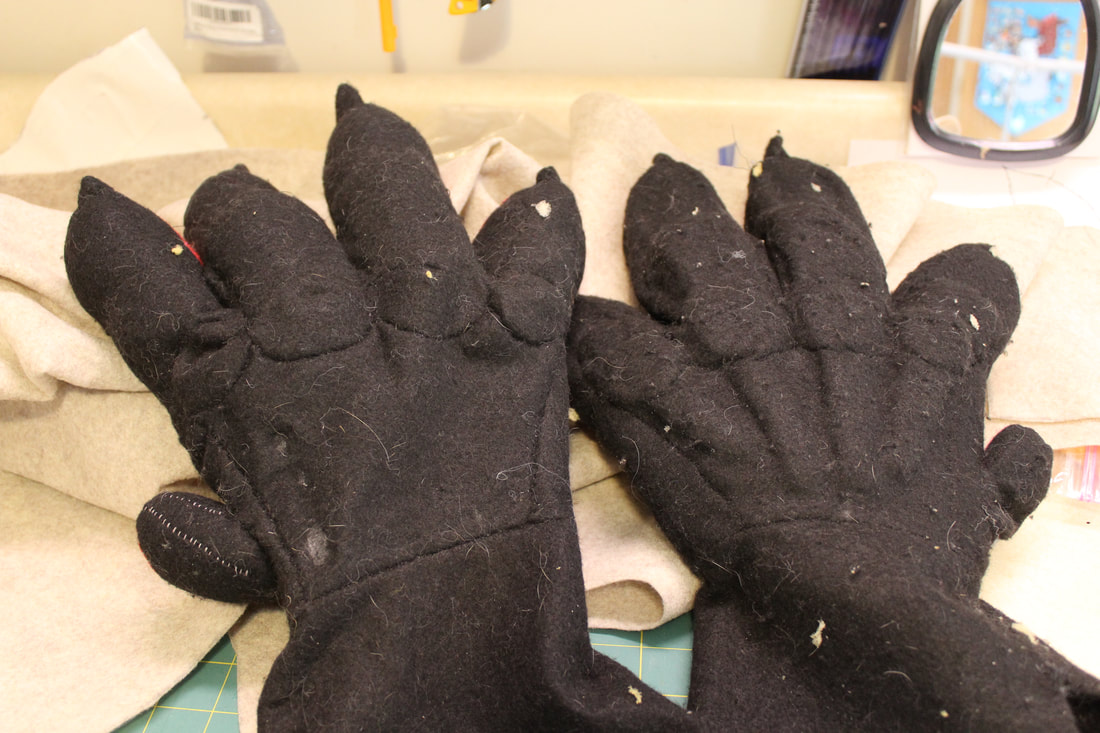
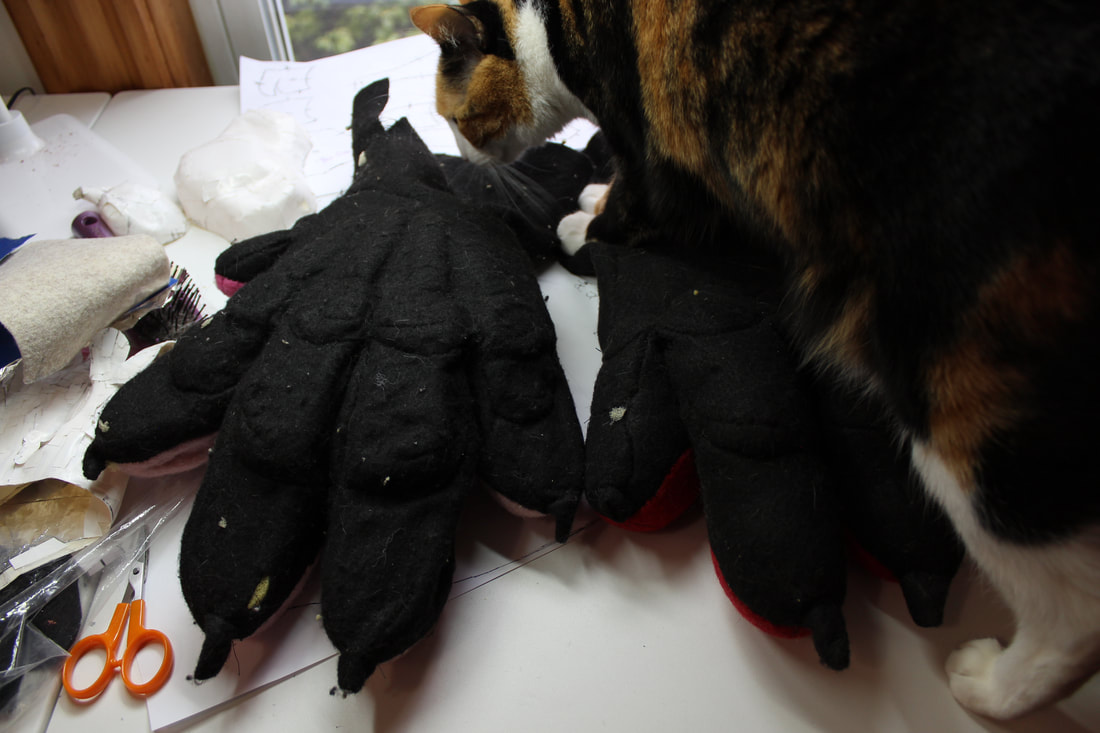
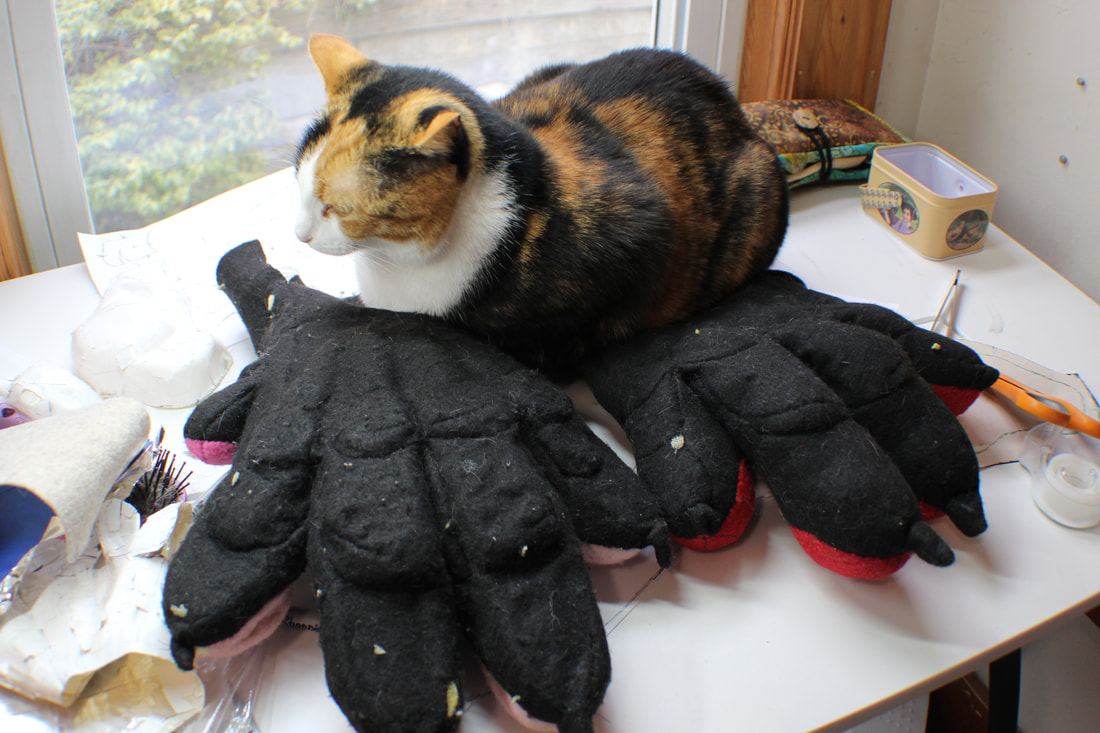
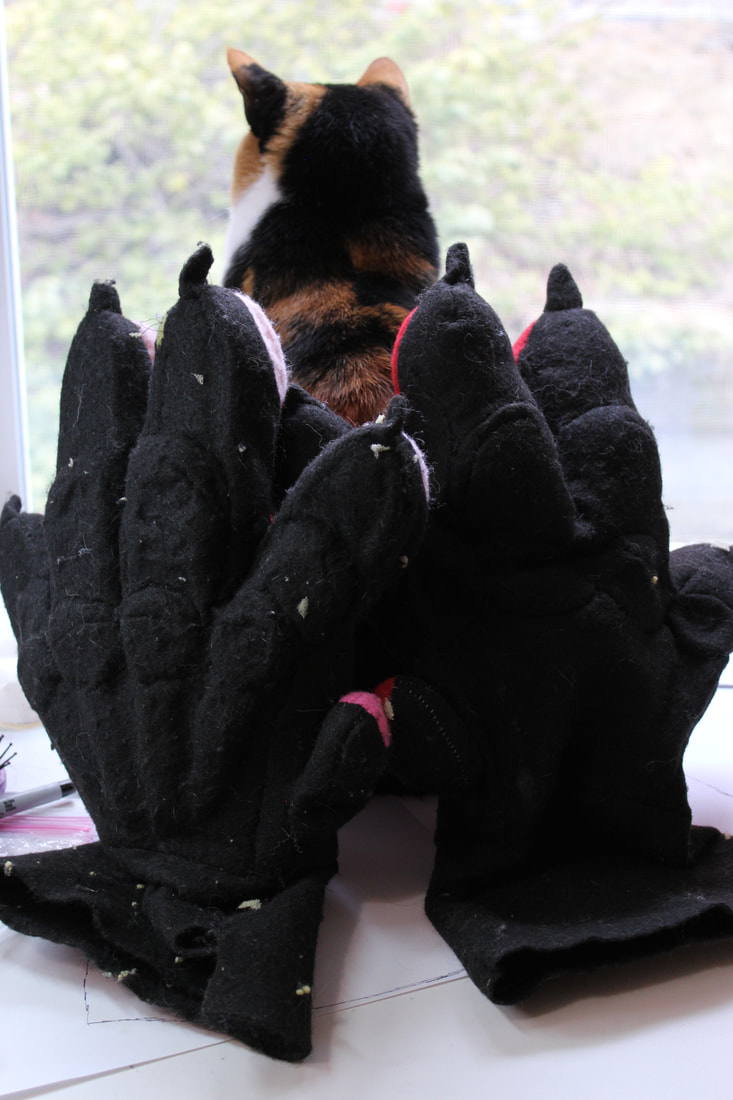
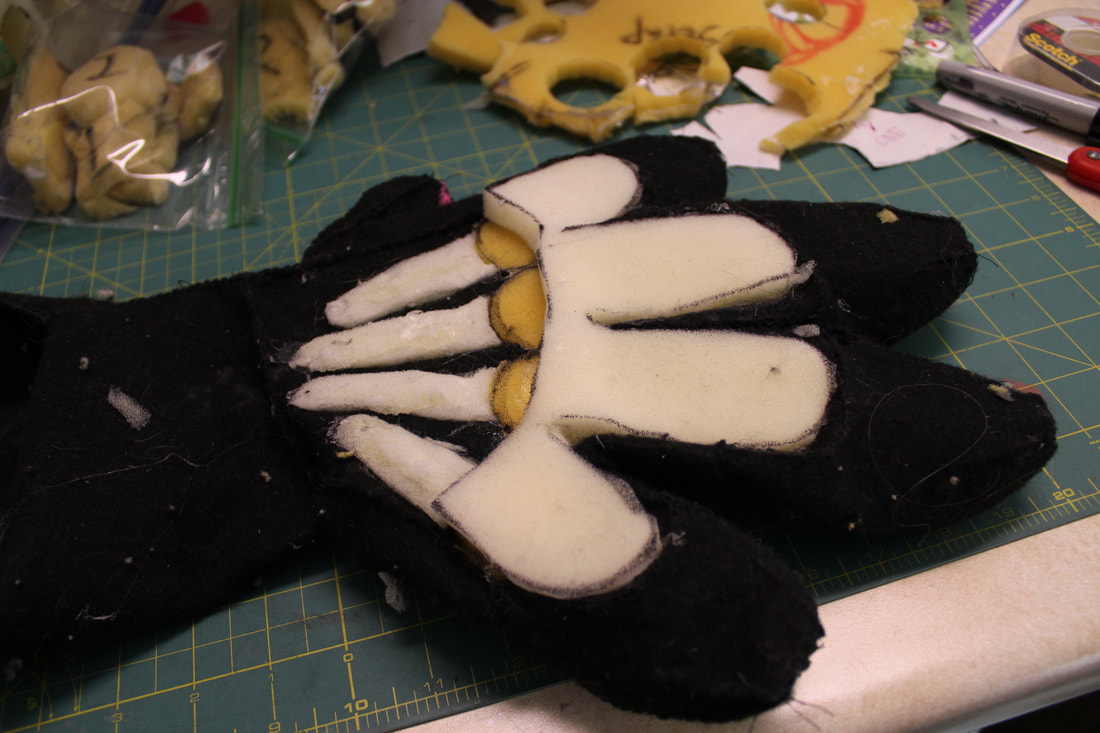
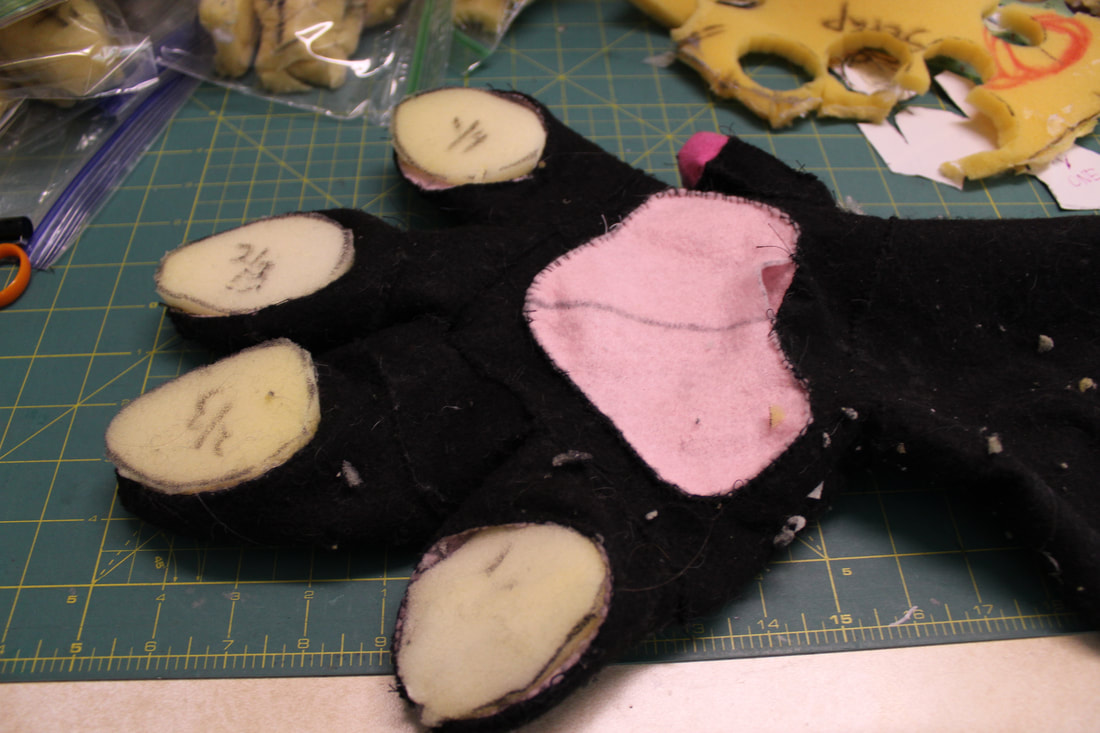
Here, building up the tendons in the inside of the freshly sewn paw, along with structure for toebeans, knuckles and the first joints of the fingers. I also wanted to improve upon draft #5 by making it a little, well, less lumpy and I thought foam cut to fit the paw might do this better than the simple polyfil stuffing I'd been using. I derived these foam parts by pulling apart the foam hand from which I'd made this pattern (shown in this blog post,) tracing and cutting out the appropriate pieces from foam and gluing them into the inside of the new hand. I could have probably just pulled the original hand apart and glued that in there instead, but I wanted to keep it for future reference. You can see this poor disassembled hand in these photos, in little plastic baggies labelled with which parts they were. 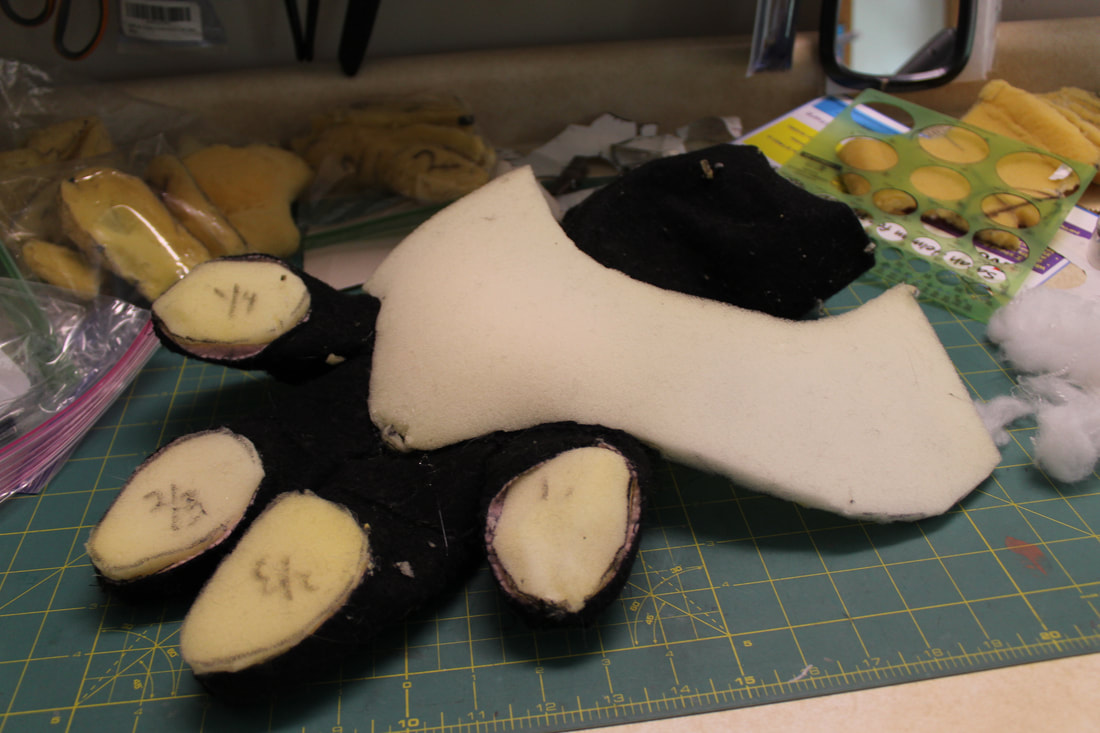 Shown here is the support for the palm and back of the hand, which wraps around the middle of the paw. The cut end you see in this photo will ultimately be glued to the other end (not visible in this picture) to make something of a tube, which will fit around the wearer's hand. I built up the parts of the paw in layers, working from the outer to the inner. The tendons, knuckles and palmar pad are under this big foam support now, but will be on top of it when the paw is turned right side out. I turned this paw inside out *a lot* which is one reason why it looks so pilled and tatty in these photos. That and because it is made of cheap felt. As you have seen I make a lot of these drafts, so no point in using good fabric just yet! 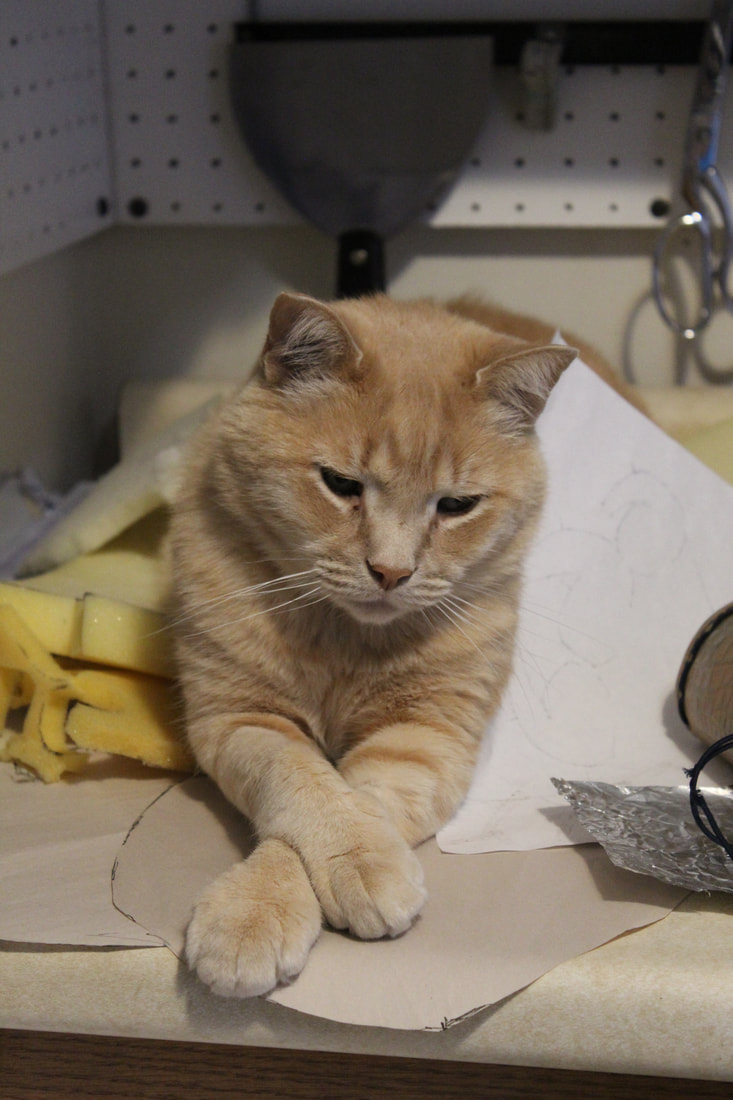 And here's Ezzy, watching the whole process and providing moral support. As well as modelling a very fine pair of paws. During my long day job induced absence from blogging, I've taken lots of cat pictures. Brace yourself...
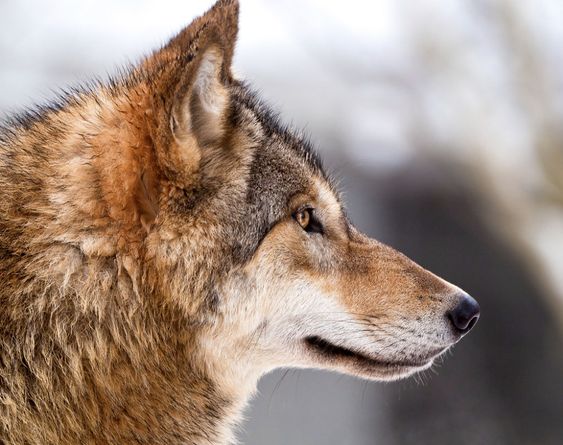
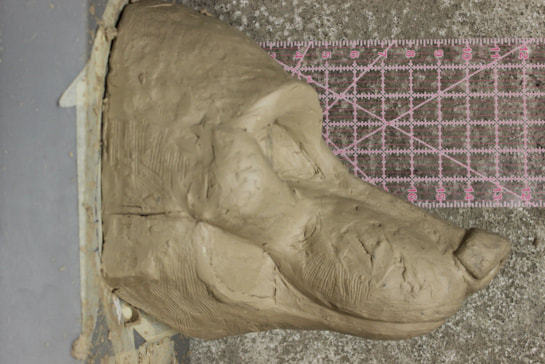
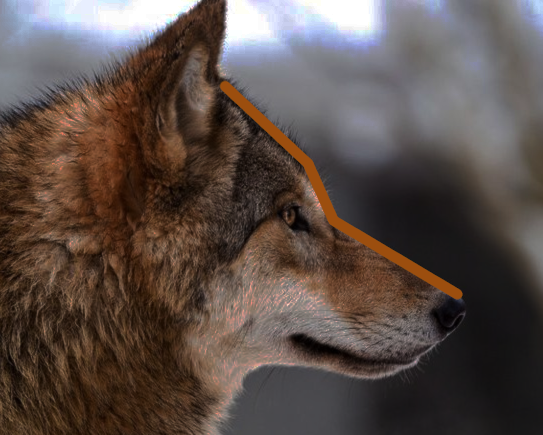
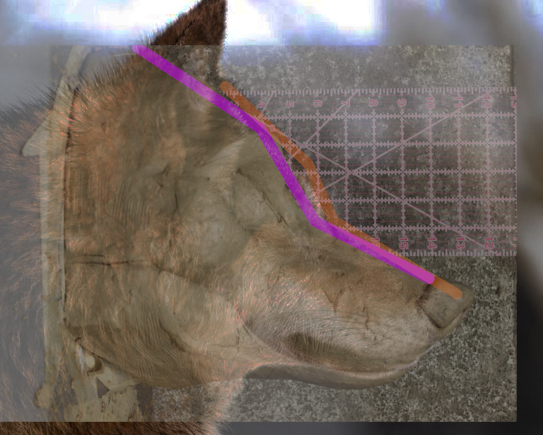
I started making this video in August, thinking I'd use it to review and assess my sculpt before going on vacation. I was imagining plugging the sculpt into my subconscious this way and mulling over it while out in the woods camping, returning to it inspired and reinvigorated. That's not what happened, as you might guess. I started flailing in the middle of this video, sculpting and resculpting the area around the eyes and the top of the nose, but not making any significant improvements. I think this flailing happens when the subconscious realizes something is off but conscious awareness can't yet put it into words and express it clearly as a problem to solve. I've been flailing with this blog post too, working on it on and off since August. I kept thinking I'd found The Problem with my sculpt and wanted to unveil The Solution here with great fanfare, along with the clever thinking that led to its discovery. But every time I set out to write this post I only found myself with more questions. Soooo.... I present to you here, The State of The Problem at this Moment, and The Steps I have Taken to Solve It So Far. I leave the Grand Conclusion for another post, hopefully one that I will write in the Near Future. Right now I feel like I just need to get something written! The common wisdom is that a sculpt, simply put, starts by establishing the relationships of the largest, most basic shapes to each other, then progresses to defining the relationships of smaller and smaller shapes within those big ones. The most common mistake a beginning sculptor makes, according to this wisdom, is working on fun little details before correctly establishing these big basic shapes. I wondered if this could be my problem. Three dimensional art can be slippery though, as the points of reference that establish where those shapes begin and end can seem to shift in relation to each other, especially as the sculpt is viewed from different angles. So I tried to find reliable, easily reproducible viewpoints from which to establish my points of reference, one being a 90 degree side profile, and others being straight on from the top and straight on to the underside. I might go into the latter two views in another post, but in this one, I'll stick with the 90 degree profile.
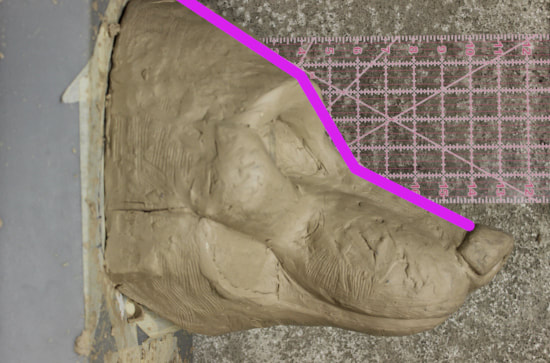
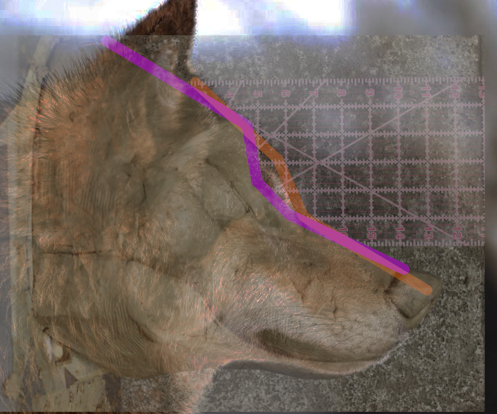
The question that comes to my mind now is, where will the ears- one of the biggest reference points of all- be placed on the base when a head is actually assembled? It's difficult to visualize now, as the ears are not a part of this sculpt and will be added later when the head is actually put together and furred. The placement of the ears could very much effect the apparent length of the forehead. If the ears were to be placed behind the back edge of the base, as they often are in furry head construction, the forehead could look **way** too long, and the muzzle **too short** in comparison, instead of too long the way the pictures above have led me to believe. Let's take a look...  Wow, placing that ear at the back of the head would make that muzzle look short and the forehead **really** long!! Now here's the point at which I second guess myself and wind up running and screaming back to the drawing board!! Away I go!!!
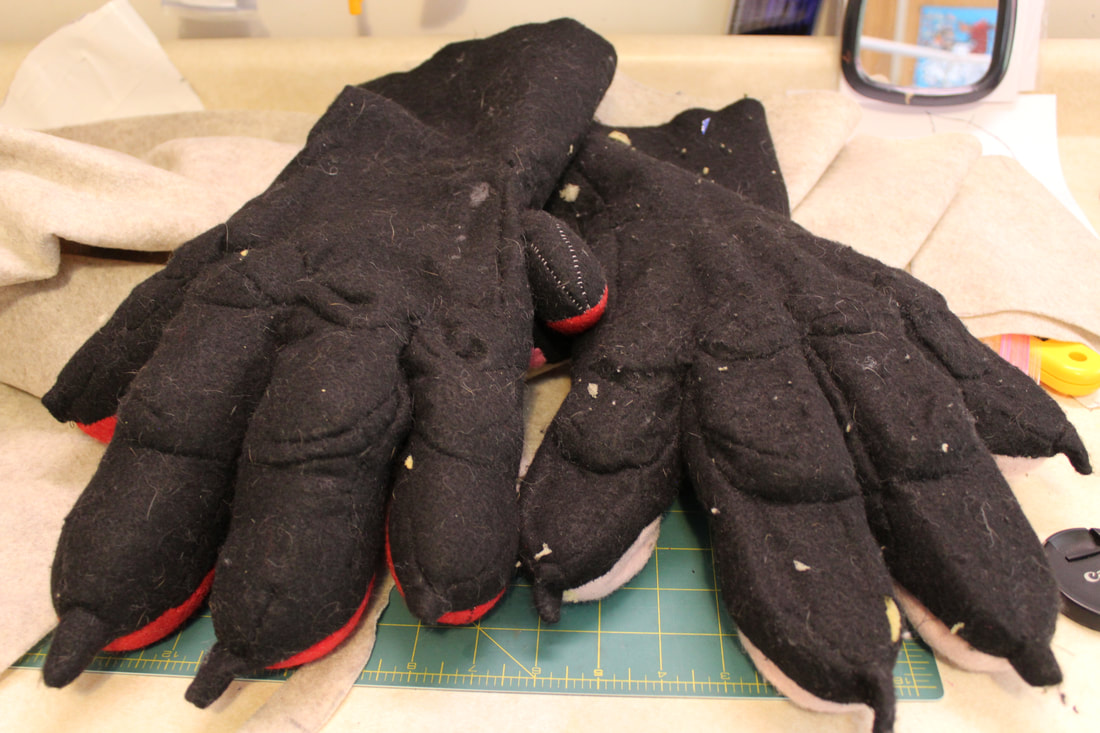
Stay tuned!!  It's been a while since I checked in about my paw project! My last update was in March, when I finished building my most recent Foam Foot from which to make a pattern. Since then I've sewn up Prototypes #4 (with pink beans) and #5 (with red beans) and hopefully have made some progress. As I've mentioned before, I have fantasies of selling this pattern as a download, and maybe actual finished handpaws too. I have been told that the furry world could use another good feral handpaw pattern and that there's probably untapped market demand there. 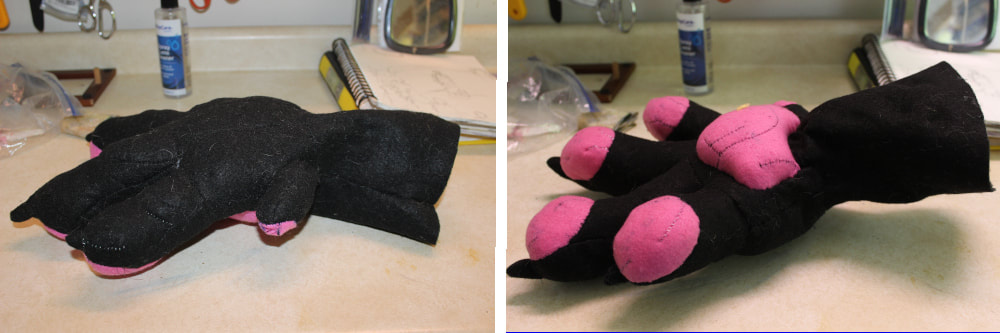 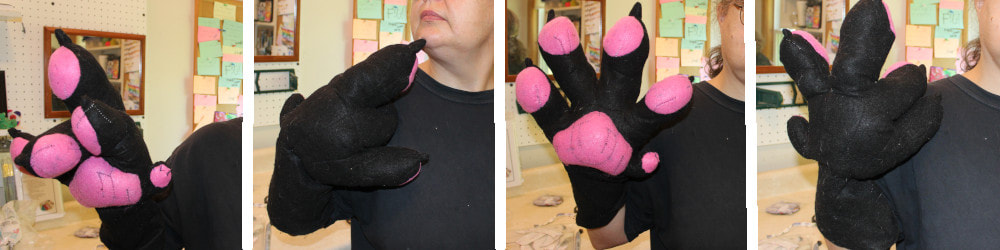 Above, Prototype #4 (I think?? I'm losing count.) My big problem here is the overly long toes and overly short palm/back of hand, most visible in the second picture from the right. Looks more like a lizard hand than anything canine. 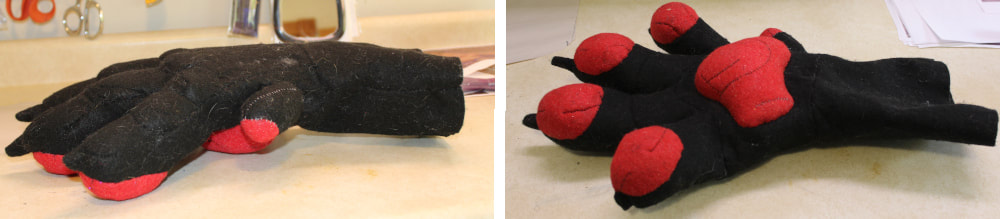  Above, Prototype #5. I still think the toes are too long, but I'm pleased with their overall shapes and that of the hand in general.  Side by side comparison of the changes between #4 and #5. I've lengthened the palm in #5 and smoothed out the juncture between that and the bottom of the toes. IMHO this curving, regular line is much more aesthetically pleasing than the previous version. I hadn't actually shortened the toes between the two versions, thinking lengthening the palm would be enough, but I can see that still needs tweaking. 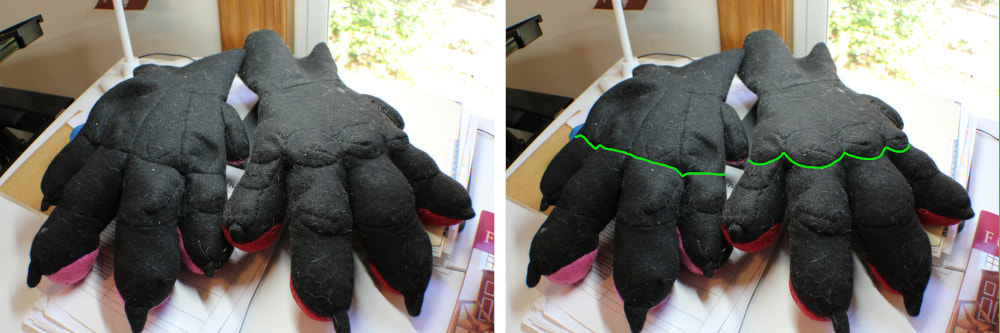 Another side by side comparison of #4 and #5. The seam going straight across the knuckles on #4 seems to flatten out and lumpify the paw. The scalloped seam on #5 in my mind is a great improvement. There are lots of other differences between the tops of these paws. I made an attempt at tendons in #4 (those vertical seams on the back of the hand) and a more detailed attempt at knuckles in #5. The jury is still out on where I'll go from here. One question is, how much does this add to the aesthetics vs how much work does it add to the project? Also, it remains to be seen if I can actually make tendons/knuckles **work** in this context. IMHO neither #4 or #5 is there yet. Onward! At least I have plenty of moral (and adorable!!) support!! 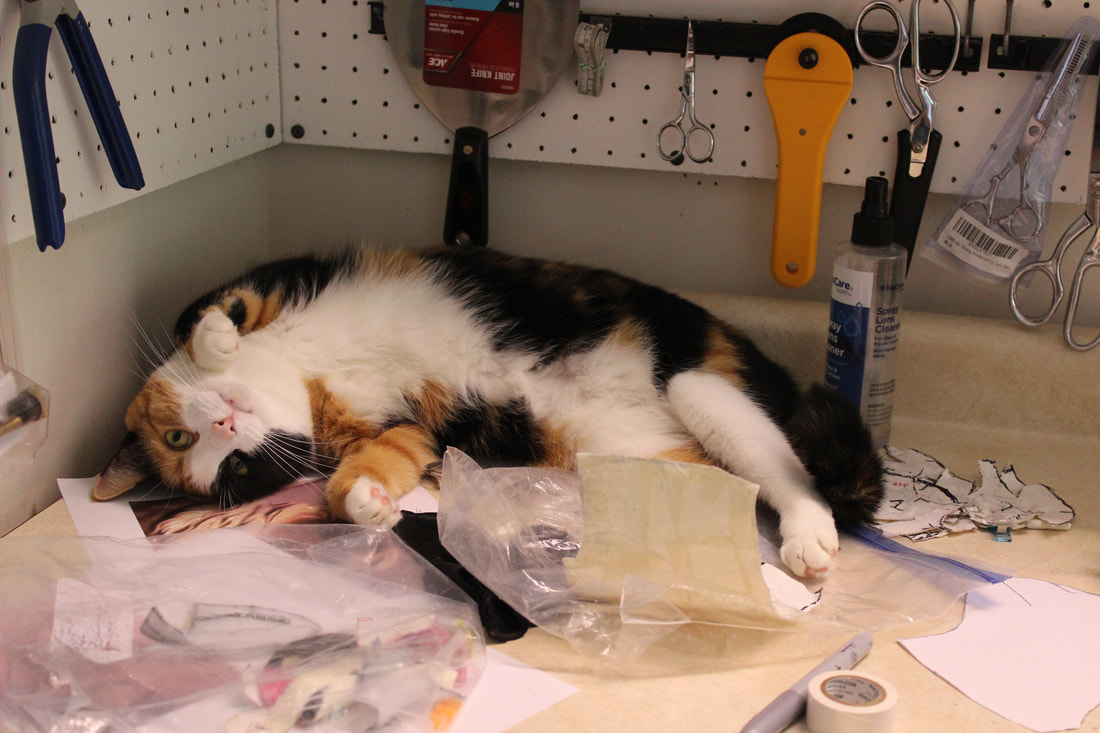 |
Categories
All
Archives
March 2023
|
 RSS Feed