But first, a flashback to our previous post! Here is a photo of previous guest's Sadie Rae's paw. Very basic observation here- the foot, viewed from the side, is largely oval in shape. Both of the top and the bottom of the paw have a curve to them. This is not a difficult concept, not in theory anyway. Shouldn't be too difficult to sculpt, right? (Cues theme from "Jaws"....) |
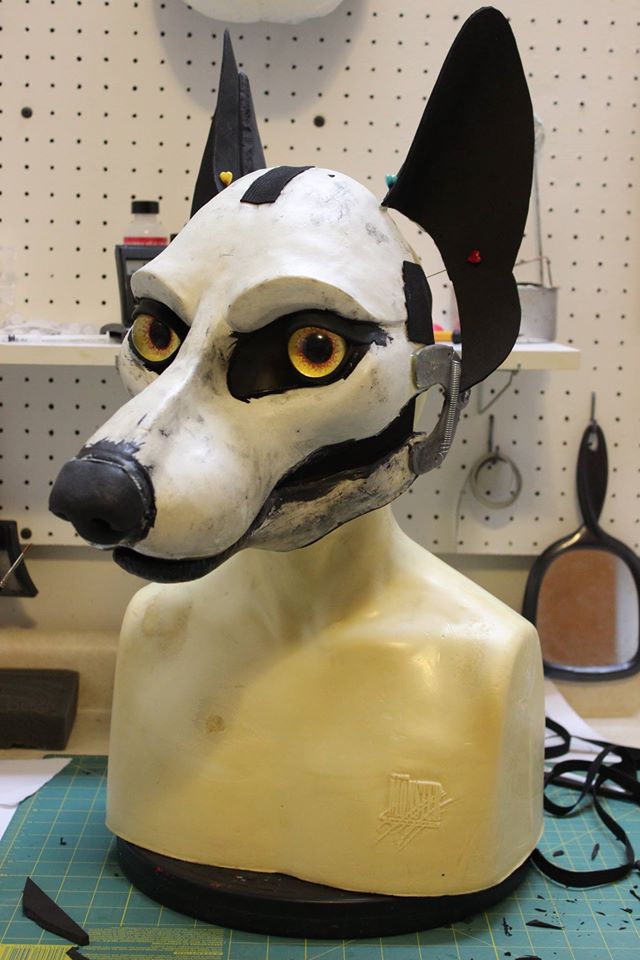
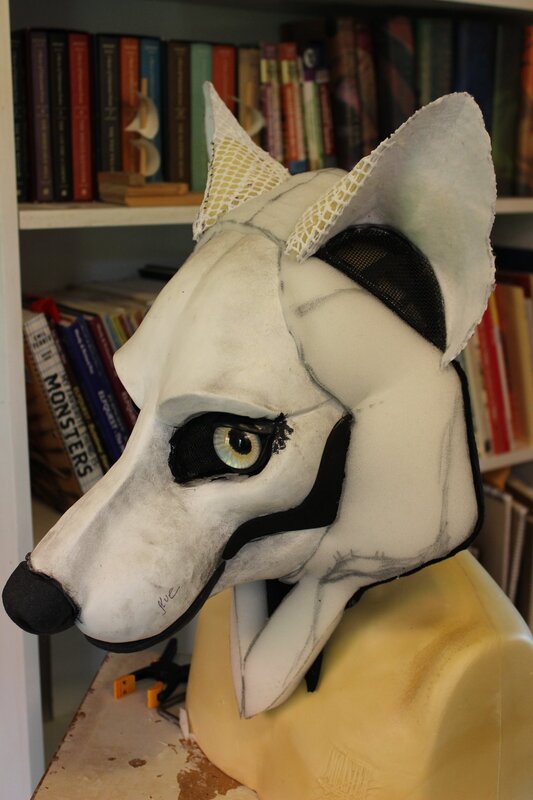
I have two goals in mind here. One to make my own handpaw pattern. The second is to use this really cool technique furry how-to goddess Matrices describes in this tutorial, in which a small clay model is made, a pattern is taken from the model, and the pattern is enlarged to the proper size with an overhead projector. I have fantasies of selling said pattern as a download, and maybe any actual handpaws I make with it too. I have been told that the furry world could use another good feral handpaw pattern and that there's probably untapped market demand there. Charge!
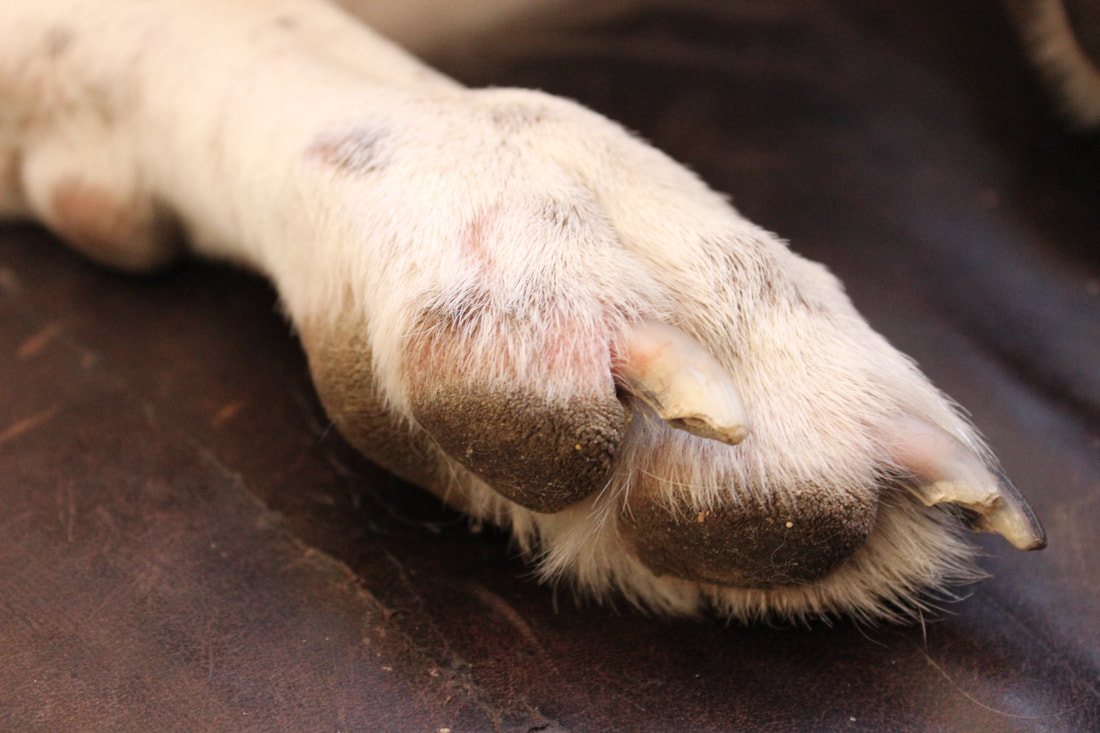
 For this first attempt I tried making a rough paw shaped chunk of clay and carving toebeans out of the bottom and knuckles and toes out of the top. This sculpt has a lot of problems but the worst in my mind is that the toebeans and palmar pad all wound up on the same plane, parallel to the wrist, making the paw look stiff and unnatural. For this second attempt, I tried to make the angles of the toe bottoms more natural. Closer, but not there yet. The top of the foot also leaves a lot to be desired, looking like a featureless cube of clay, especially when viewed from the top.
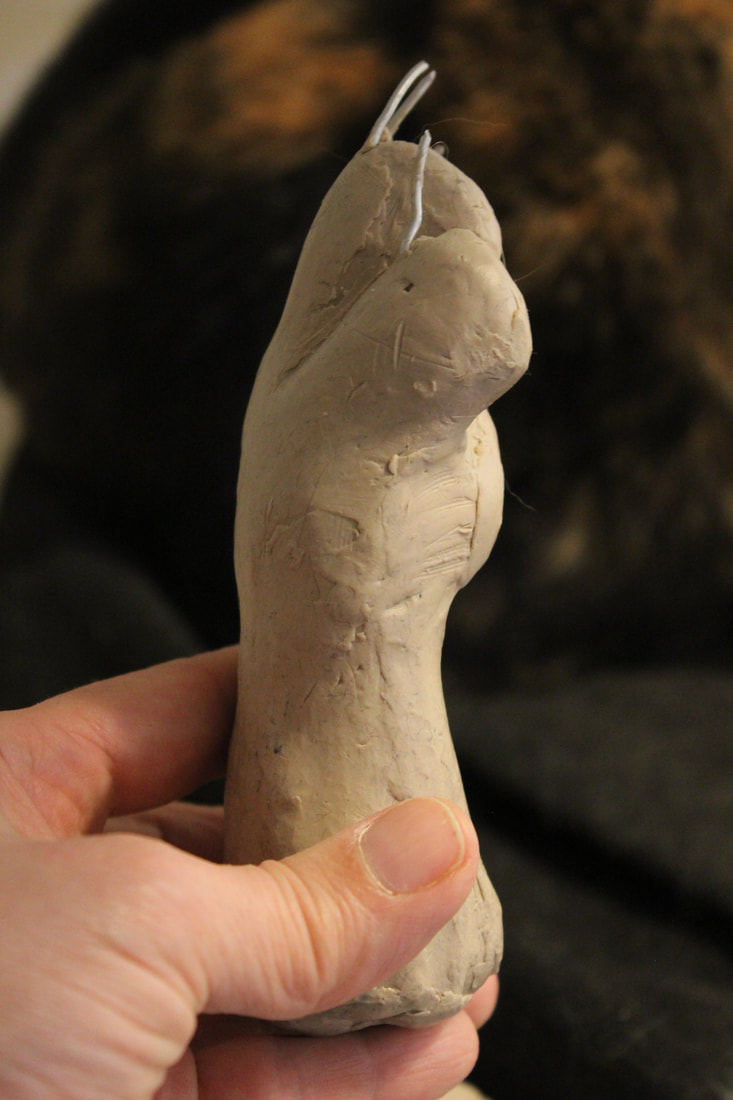
 Attempt number three, when viewed from the side, has a little more of that oval shape we're going for. The top of this foot also looks more shaped and natural than those in the previous two. However it also looks a little squished and disproportionate. When viewed from the top, the toes look too long and the back of the paw too short.
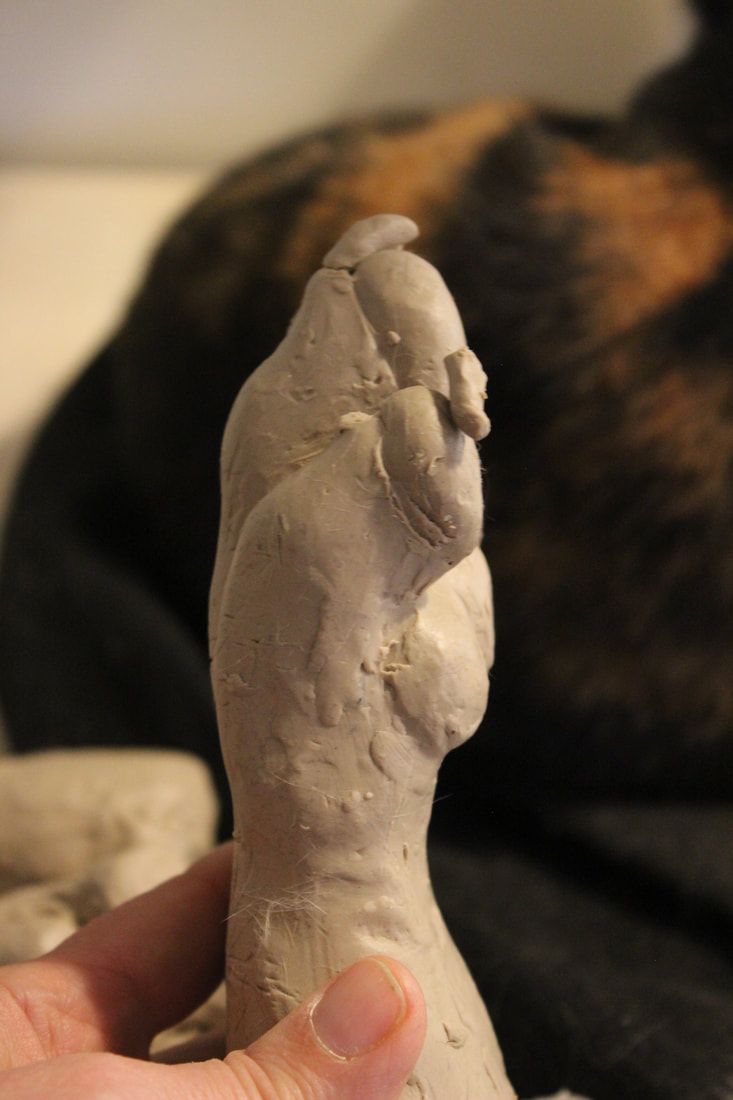
 
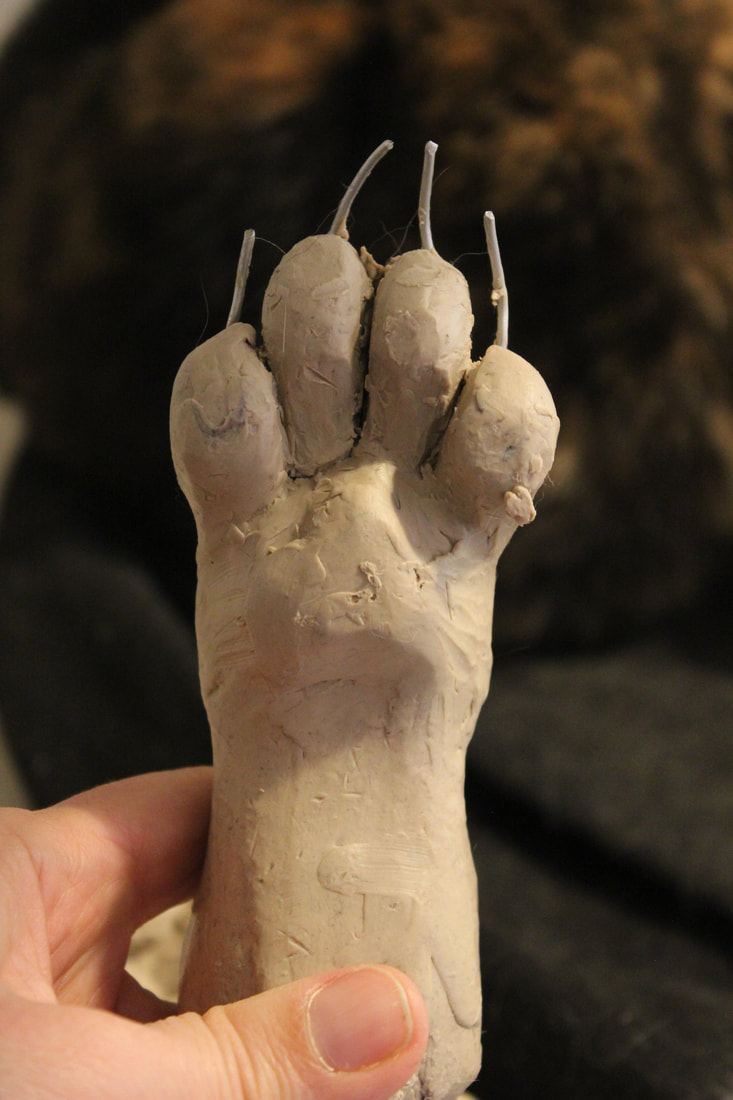
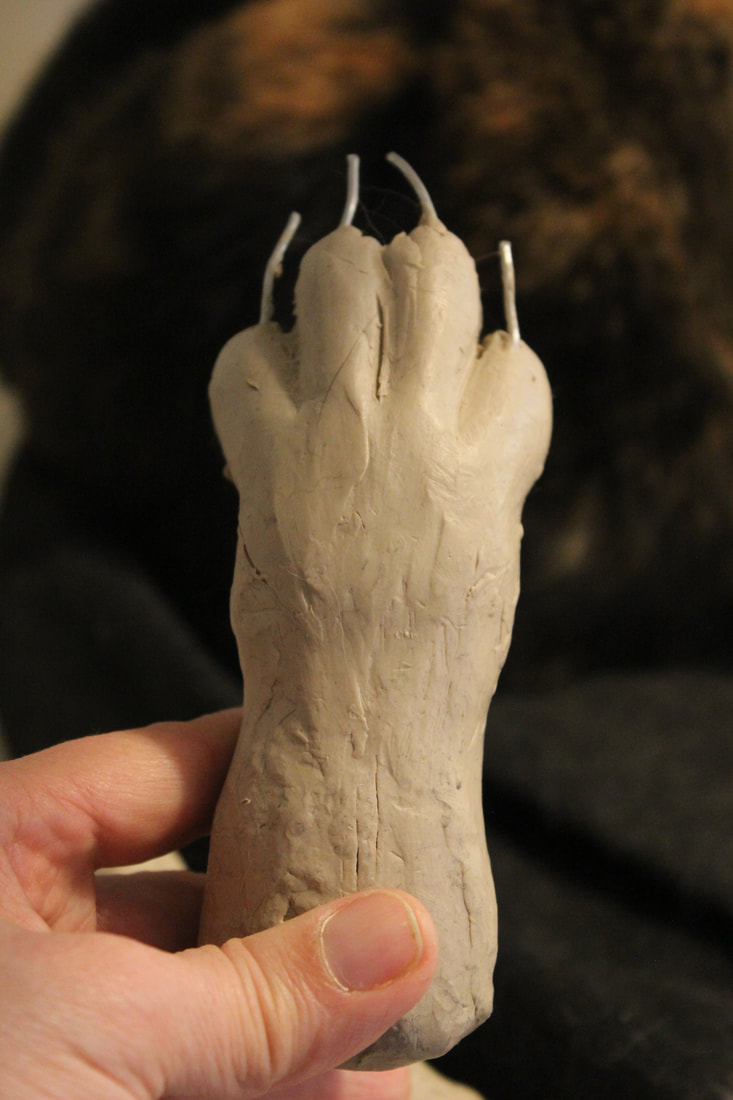
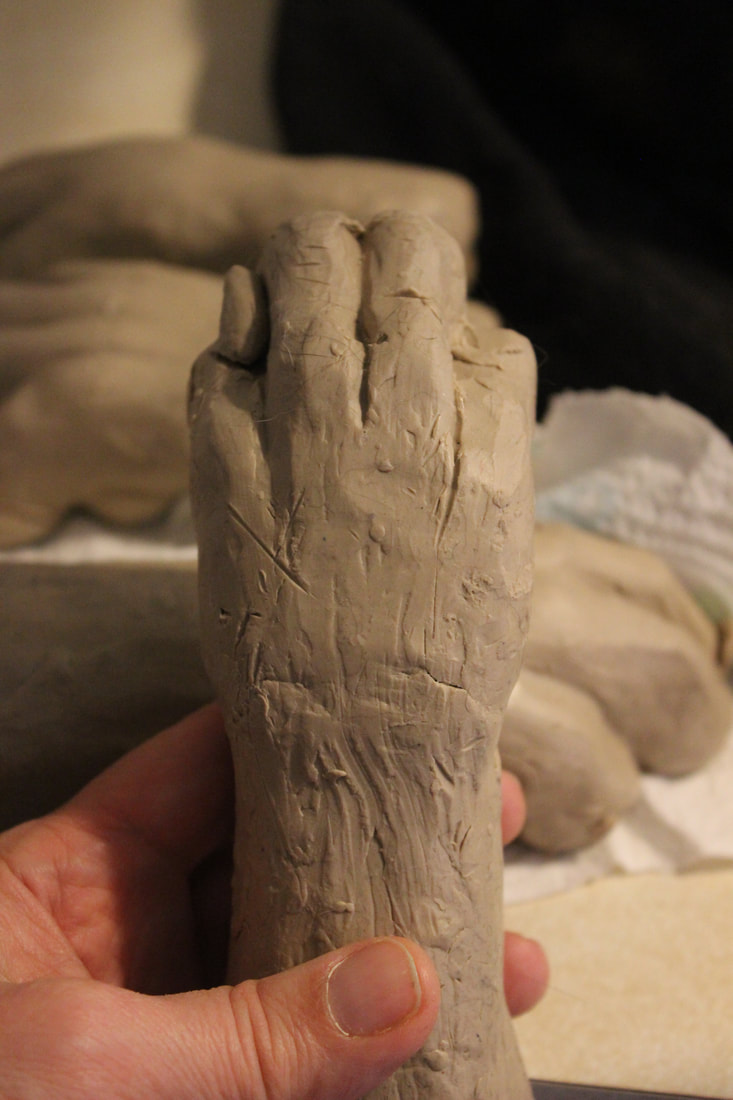
Attempt number four features... an armature! What a concept! Underneath the clay the armature looks like a little wire tree, with the trunk for the wrist and palm and four branches for the toes. The armature helps to hold the parts of the foot in place, keep them from getting squished out of shape, and maintain the correct proportions. The wire also makes it easier to bend the toes into the proper position without breaking them off. I'm happier with this foot, but I can't help but think the back of the paw looks a little swollen, like it was stung by a bee.
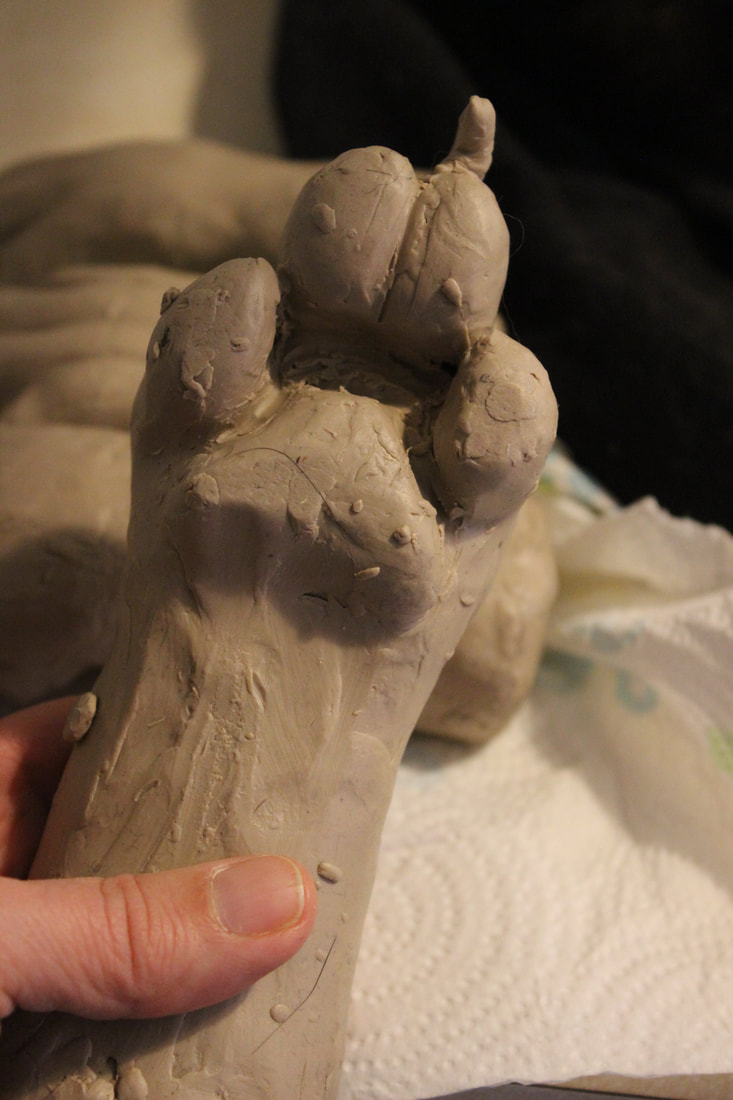
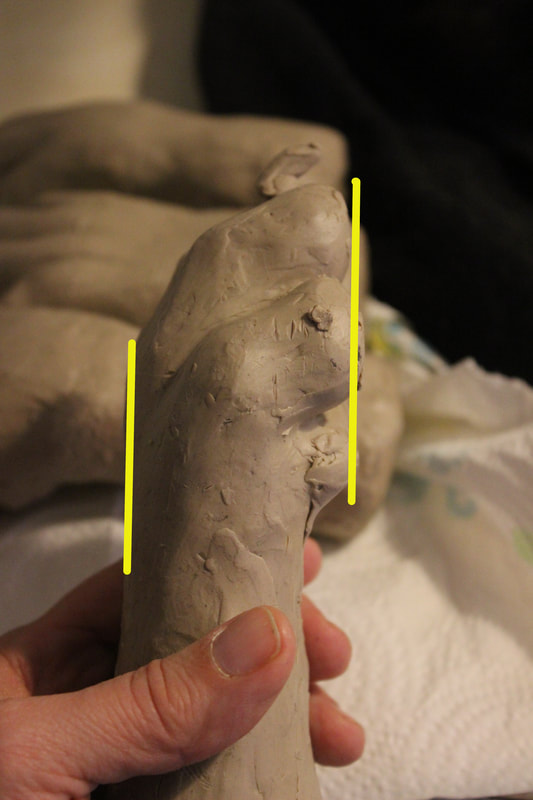
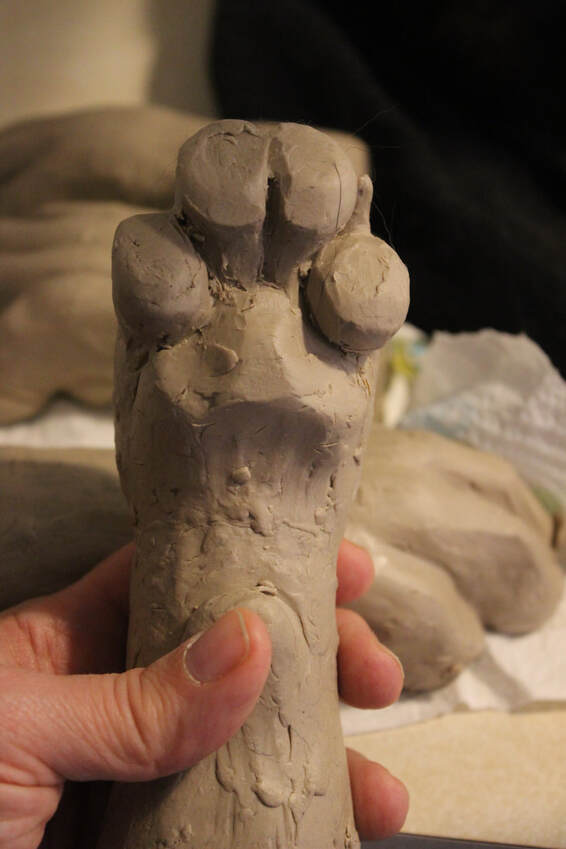
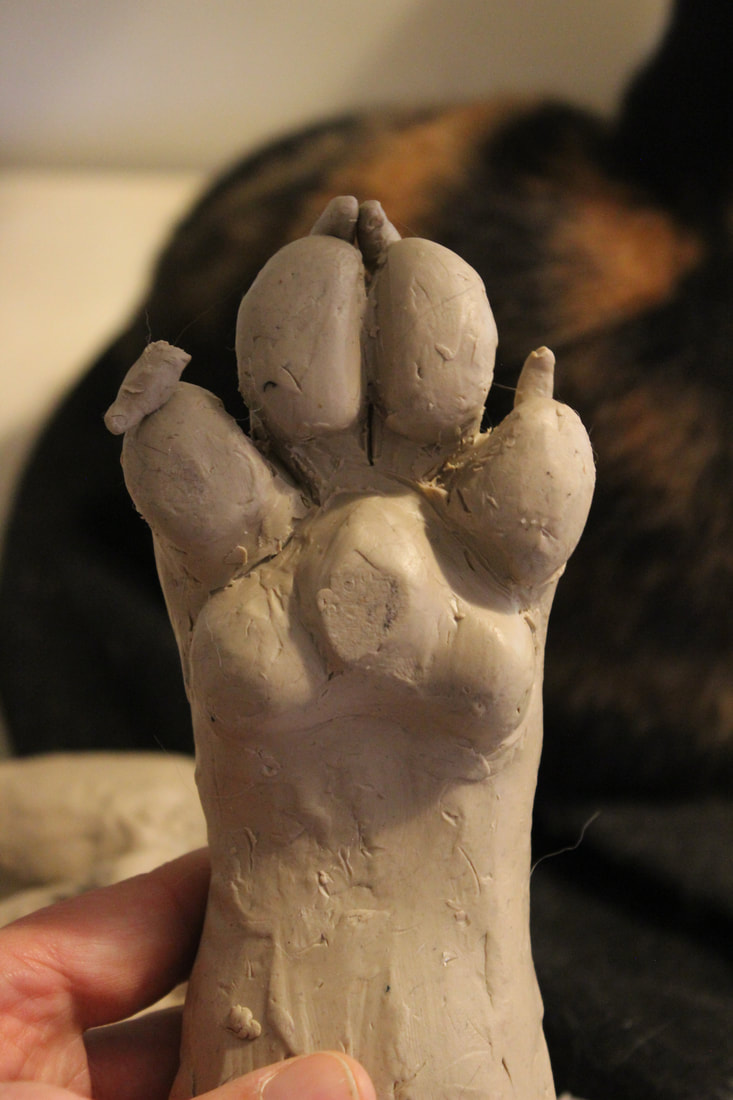
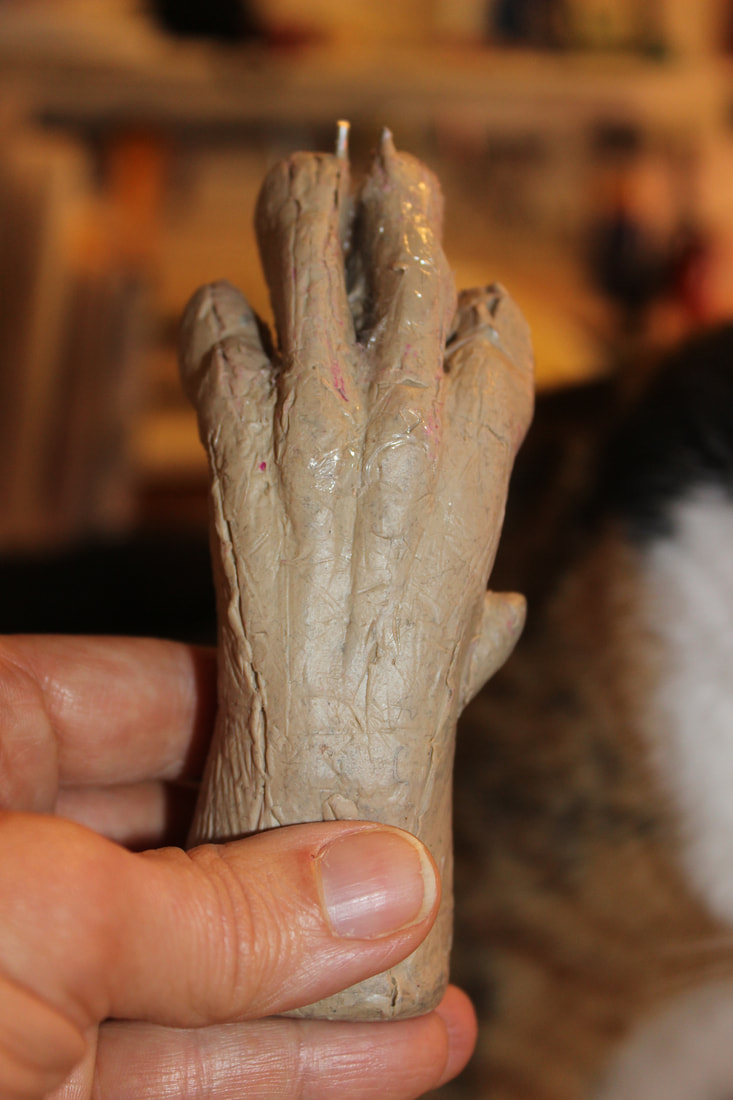
 
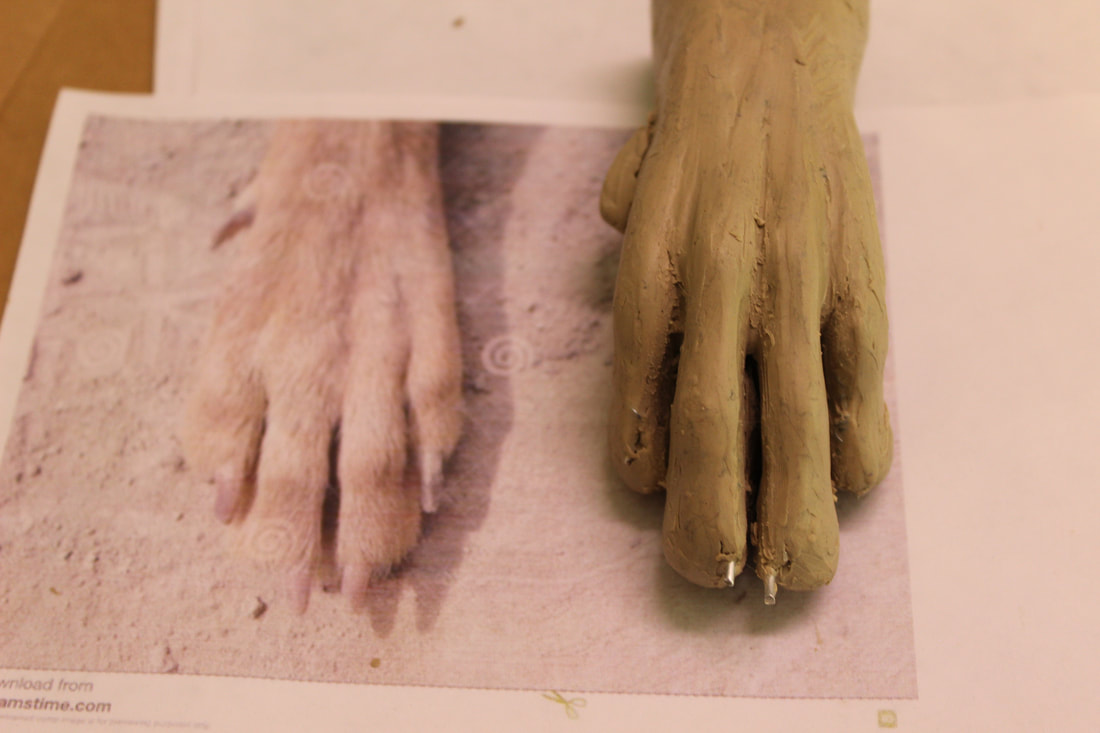
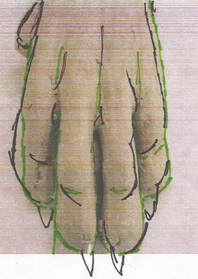
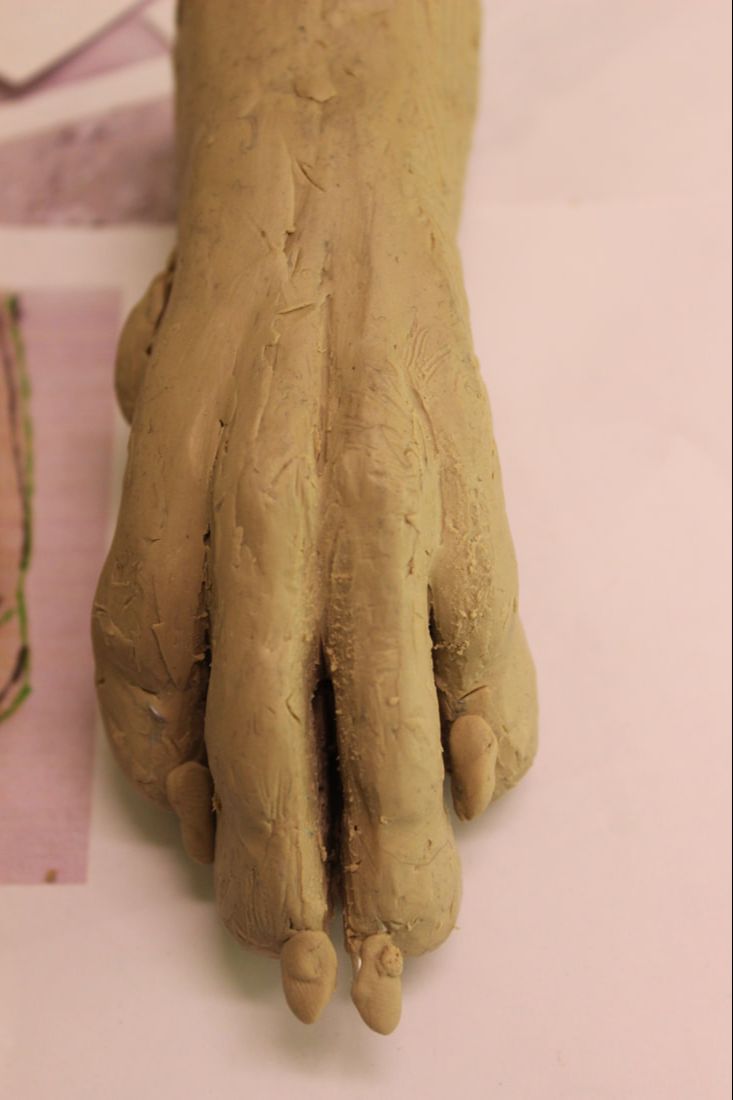
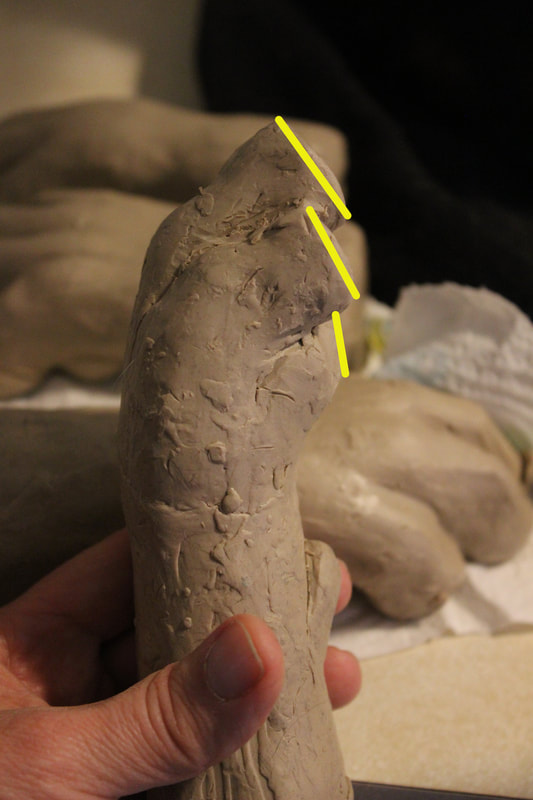
This group of photos shows a slightly earlier version of the last paw undergoing some last minute edits. The first photo shows the foot being checked against a favorite reference pic, and the second photo shows a tracing of this earlier version being checked against a superimposed tracing of the reference pic. (I especially love this tracing as it really shows how the two outer toes on a dog's foot are different sizes, with the "pointer" toe being larger than the "pinky" toe.) The third pic shows the finished foot, after all the edits have ben made. 
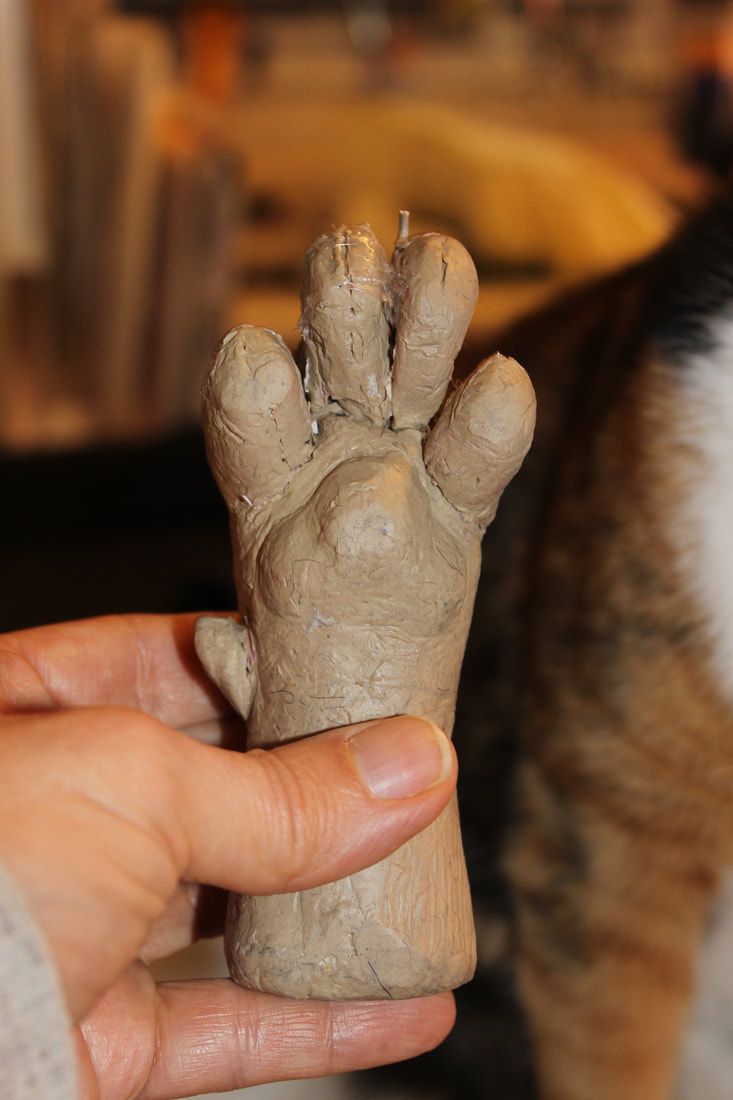
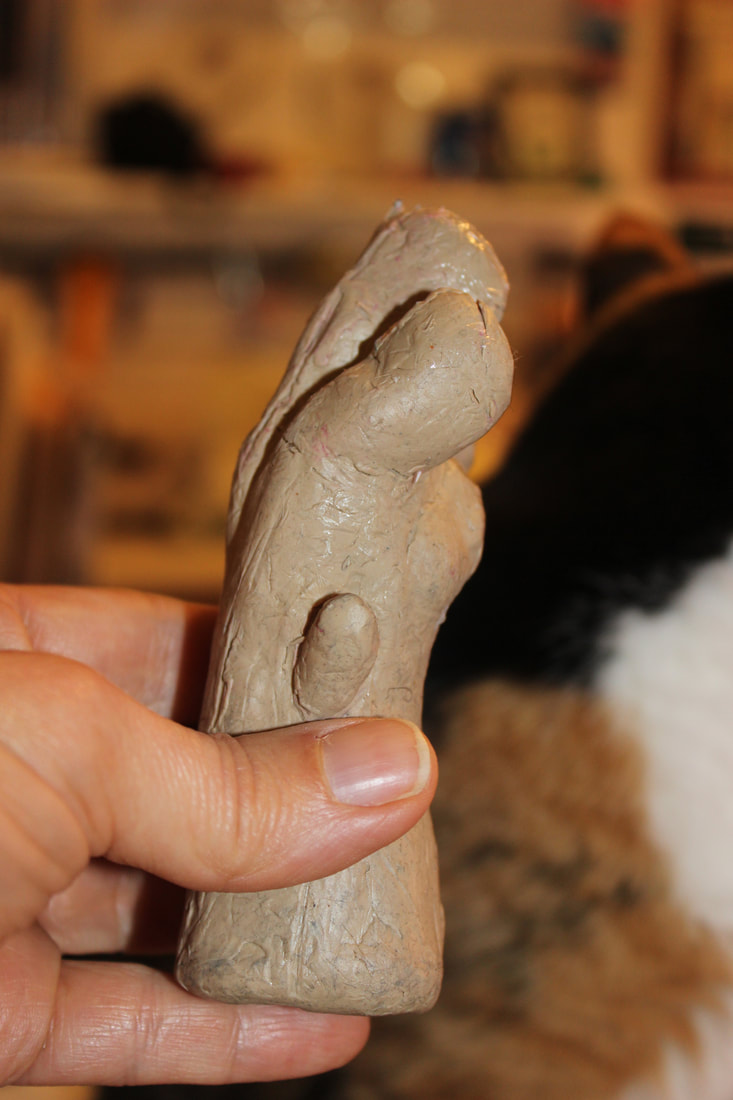
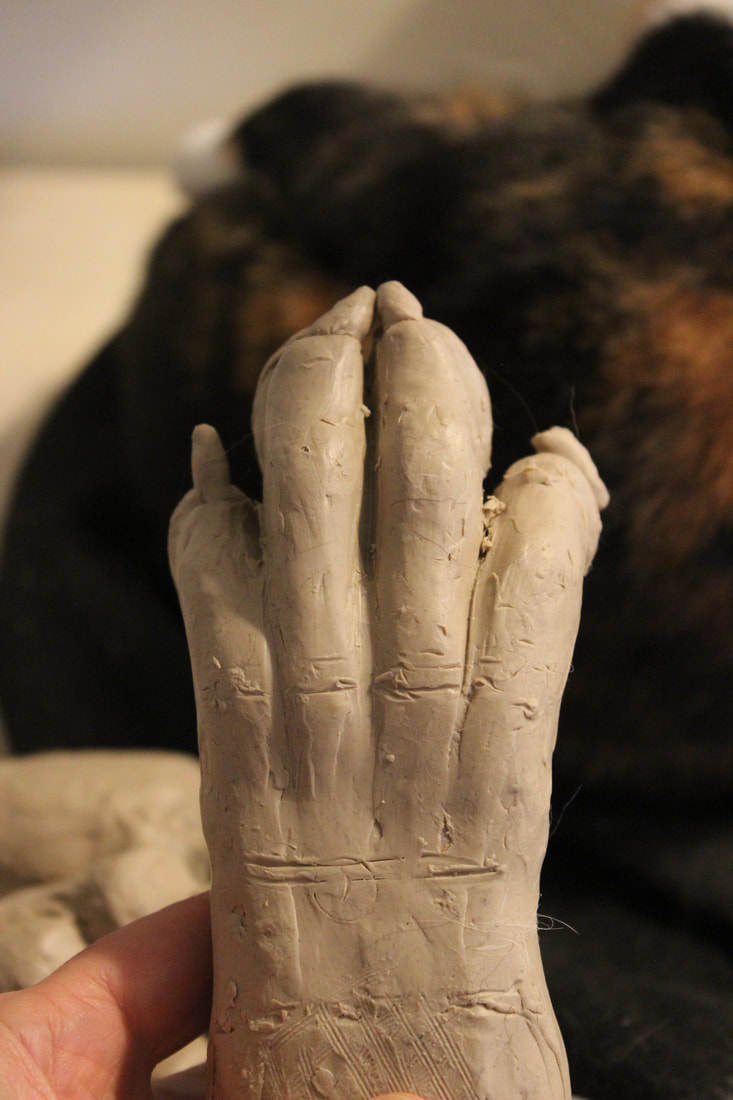
Above, a turnaround of this last paw, looking a little worse for wear from the pattern making process. (More on that later!) This paw is also built on an armature, similar to that in attempt number four. Perhaps more improvements can be made on this foot but at this point I was thoroughly sick of clay feet and wanted to get on with it. Charge!
0 Comments
I love both Silas and Artemis, don't get me wrong! But I'm also really entertained by the difference between these two, especially considering that they're built on identical resin bases, with identical resin and silicone parts. Here we get a little peek under the skin, as it were. For Artemis (and her brother Garm) I extended the top of the head back and made ruffs out of foam, made the ears out of Varaform and felt instead of Foamies, and used the ear vents as bases/supports for the ears instead of sewing the vents in afterwards. The ears are glued onto and supported by the foam instead of the resin base, which allows more flexibility with their size and shape. I got this idea from Stuffed Panda Studios, and the designs of the ears and ruffs are adapted from her designs. Credit where credit is due! Process pics. Ears freshly assembled, being inspected by the Feline Assistance and Cat Hair Distribution Department. Foam added to the top of the head, ears partially glued on. Does this dude look weird or what? Cheek fluffs added, and approved by the Feline Assistance Department. The triangular part under the chin helps with patterning the neck later on, and is cut off afterwards. Brother and sister with ears and foam added, ready for patterning!
Above, two straps made by cutting webbing (not elastic, we don't want these guys to stretch!) to about 12” lengths, feeding them through the two front clips, folding them in half and gluing the halves to one another. No glue on the clips, they need to be able to rotate on the straps. The suspension will be (well) suspended from these straps inside the head, allowing it to move and conform to the wearer's head. Now, to make the "slots". The short story is, these two new straps will be glued between two layers of foam inside the head. I imagine the straps could also be riveted inside, or perhaps just glued to the bare resin, but foam sticks really hard to the scored-up inside of a head with hot glue, and the straps stick really hard to the foam so… Plus the foam provides a much larger gluing surface and therefore more security, in my mind anyway. Above, the first layer of foam, visible underneath the browband, has been glued into the head. Then, the the correct placement for the suspension is found, with the browband going across the forehead just above the eyes. The clamps are only temporarily holding the suspension in the correct place, the browband will not actually be fixed to the mask like this but will be able to move inside the head somewhat. Next, the two new straps are glued on the foam directly underneath the two preexisting straps with which they share clips. I glue the straps all the way from the front of the mask to the back, where I trim off any extra. The more gluing surface the better. Again, no glue on the clips! I start working the top layer of foam before the suspension is glued in, and finish it afterwards. Above, making a pattern for this part using standard duck tape patterning procedures. I often use aluminum foil under the duck tape in place of the more standard plastic wrap as it is easier to handle, especially in a concave shape like this. Next, cutting the slots for the clips into the pattern. Cut a little bit, try sliding the pattern over the clips, cut a little more, slowly but surely. Worse comes to worst the slots can be taped over and started over again. Above, the finished pattern for the top layer of foam. Above, the second foam piece has been cut out, laid into the head over the freshly glued pair of straps, and held in place with Wonder Clips. Working from one end to the other I'll unclip one Wonder Clip, smear hot glue around underneath the foam, and press it down until it cools. I work my way systematically across the head, unclipping each Wonder Clip in turn, putting glue under the foam, and moving on. The Wonder Clips keep the foam in the exact correct position while it's being glued. I'll cover the entire underside of the foam with glue, paying special attention to the openings for the clips. Lots and lots of glue, but again, none on the clips!! Trying it out. I'm pleased with how it works. Above, the suspension in the finished head. From these pictures you can get an idea of how it "floats" inside the head. It also makes the mask nice to take off and on, as once the back strap is adjusted to the wearer it's a lot like putting on a baseball cap. No straps to fasten and unfasten. I hope that this has been helpful to you. If you have any questions please feel free to ask! Thanks for looking!
Usually I make masks by negative casting, that is, casting *inside* of a mold. But since I've been getting requests for rabbit masks faster than I can have a mold made, I've been making them by positive casting, ie, casting them *outside* of a form, in this case the original plasticene sculpture. Here's more about this method. First, I liberally apply Vaseline to the sculpture as a release agent. Then I mix Celluclay (a kind of commerial paper mache pulp) and roll it out into approximately 1/8" thick sheets between two pieces of wax paper. These I put into the freezer for 8 minutes to make them less sticky and easier to work with, and then I peel the wax paper off and apply the sheets over my sculpture. I blend the edges of the sheets together and smooth out any major lumps, but otherwise I don't fuss too much over the texture. It's much easier to deal with after the Celluclay is dry. The cast will need to be cut into pieces in order to remove it from the original sculpture. After I apply all the Celluclay, I make score marks along the parting lines with a clay tool. Otherwise, the Celluclay would be very difficult to cut apart when it is dry. Then I set the mask in front of a fan to dry. Usually after an hour or two the Celluclay will start to feel leathery and I'll be able to add a little more detail back in with a wooden clay tool. After a day or two it is usually dry enough to remove from the sculpture. Here's the beginnings of the cast, with the score lines pressed in: Here's the cast with one of the pieces removed and the original sculpture showing underneath: Here's all three pieces removed from the sculpture, ready for assembly: At this point speed is of the essence. I reassemble the pieces as quickly as possible, as if I leave them for any time they will warp out of shape and not fit together well. I make holes along the edges of the pieces, lining them up with each other on either side of the seams. If the pieces are still a little damp I can make the holes with a bamboo skewer, if they've dried more thoroughly I'll need to use a drill. Then I tie the pieces together using twist ties (I save these compulsively) and apply glue all along the seams: I dry the cast on a wig stand or stuff it with wadded up newspaper to help it keep its shape. Then I fill in the seams and any thin spots with more Celluclay and let it dry again. After I've gotten a sturdy shell on which to build, I begin to add texture and refine detail, both by adding back on with wet Celluclay or by carving with a Dremel. Here's the rabbit mask with the beginnings of hair texture, created by adding a thin layer of wet Celluclay and working it with a wooden clay tool: Here's the mask hairier and more refined. The brown marks around the eyes are scorch marks from the Dremel. Hairier and more refined still: Then painted and finished! The Celluclay will need to be sealed before it is painted, as it will absorb humidity and warp like a son of a gun otherwise. I brush on a layer, inside and out, of slightly diluted Weldbond (a kind of waterproof PVA glue) to do this. As you can see, in a positive cast, much of the original sculpture's surface detail (hair, wrinkles, etc) is lost and needs to be added back in. How much detail is lost depends on the material used- a lot with Celluclay, but less with leather and other types of paper mache. In a negative cast, surface detail is preserved by the mold. This is the major reason why I use molds to reproduce most of my masks. However the fur texture on this mask is fun to create by hand, and I play with the original rabbit sculpture a little every time I make a new positive cast, mostly tweaking its fit. Positive casting also allows me to go more quickly from an original sculpture to a wearable mask, since there isn't the intermediary step of having the mold made. Plus, it's always good to have more than one tool in the tool box!
During our last thrilling episode, our bold heroine had just finished a mask sculpture in a blazingly fast twenty one hours. Tune in this week to see if she can actually make a mask before Halloween! I positive cast the mask in Celluclay over the plasticine rabbit sculpture and let it dry with the help of a fan. Then I cut it off, reassembled it, filled the seams and added the hair texture with more Celluclay. I just got a new batch of Celluclay and don't know if it's because it's been reformulated or just because it's fresh and new, but it was so much smoother and took texture so much better than it has before. Here is the mask with texture freshly applied. The hair on the nose and muzzle looks rather schnauzer-ish, so I later sanded it down. Here is Brian the hapless hubby modelling the mask with the flash going off in his eyes. I've tamed the hair texture somewhat, as well as sanded down the eyes, the nose, and inside of the ears. At this point I deemed the mask was ready for paint! The customer sent me this wonderful traditional Aurthur Rackam illustration for ideas for colors. I love this color scheme, with the creamy/yellowy white, the sepia undershadings, and brownish/reddish eyes and nose. That is one seriously wierd looking bunny though! And.. (drumroll please).. the finished mask! I added just a tiny bit of metallic copper paint to the irises, so that the eyes will flash when the customer moves his head. Overall I'm really pleased with how this mask came out.
And... as an added bonus, this is the only Sans Souci mask to date that is really two masks for the price of one. What a deal! While I was getting this cutie ready for eBay, it occured to me I could snap some pictures and give a demonstration of my current method for hairing a mask. (This mask is available at auction on eBay until March 15, cheap because it's a materials test and too heavy to wear.) Equipment and materials needed: Wefted and perhaps bulk Kanekalon hair in choice of colors; glue (I use a tacky white craft glue, others I've spoken to prefer hot glue); cotton swabs; wax paper; sharp scissors, a pencil, and a small container of water. More on hair. I can imagine people out there scratching their heads and going, "wefted??" Essentially that means the hair is sewn onto long strips, which makes it much, much easier to apply. I've purchased just about all of my hair from African-American beauty supply shops, where it is sold as 'hair extensions'. I use the bulk hair for areas where I don't want the weft to show, ie, at and near hairlines, although I also use hair that has been cut from the weft on another mask during a bang trim or such. So far I have only found this hair to be available wholesale, so a wholesaler's number is needed to purchase it. However it is possible to buy repackaged (?) bulk hair for a somewhat greater cost from www.monstermakers.com. So essentially I divide areas to hair into three parts: the back of the mask, where I can use the wefted hair; an area roughly 2 or 3 inches away from the hairline where I will glue loose hair; and any actual hairline itself, for which I will construct a little 'hairpiece'. Here we see the mask looking something like a tonsured monk, with about half the wefted hair applied. Applying wefted hair is easy peasy. First I cut the weft to appropriate lengths. Then starting at the back of the mask and working forward, I apply a bead of glue to the weft and apply it in rows approximately 1 - 1 1/2 inches apart. Sometimes I'll need the hold the ends of the weft down for a few minutes until the glue starts to set, or worse comes to worst I'll reglue the ends down after the rest of it has dried. In this picture I have applied all the wefted hair and am now gluing on loose hair. To hide the weft, which is convenient but rather ugly, I switch from the wefted hair to the loose hair about three inches or so from the hairline. I apply a bead of glue to the mask, and then I pick up small (about 1 inch wide) and thin handfuls of hair, trim the edge square with a sharp pair of scissors, and lay it down into the glue. Then I press it down using a damp cotton swab. When the swab starts getting too gluey and the hair starts sticking to it instead of to the mask, I throw it away and get another. It helps to have a small container of water and a big pile of swabs nearby before starting this task. I am more likely to err on the side of making the handfuls of hair too thick instead of too thin. Too thick, and most of the hair will not stick in the glue, it will just come loose and make a mess. It is almost impossible to err on the side of making the handfuls too thin. I make the rows closer together with the loose hair than I do with the wefted hair, about 1/2" apart. The loose hair has to be applied more thinly, so the rows need to be placed more closely together to cover adequately. Above are a series of pics showing the creation of a hairline. I usually do this part first, before I do anything else with the hair on a mask, so that the pieces have time to dry and will be ready by the time I need them. (First pic.) I trace the hairline with a pencil on a piece of wax paper, lay down a line of glue, and then press loose hair into the glue using a damp cotton swab. Again, if the swab starts to get too sticky, and the hair wants to stick to it instead of the glue, I throw it out and start with another. I let this dry until the glue is clear (usually overnight) and then (second pic) trim along the pencil line. After this I (third pic) very carefully peel the finished hairpiece from the wax paper, and (fourth pic) glue it in place. Above is a pic of the nearly finished hairline in the front of the mask as well.
After the glue has dried overnight, I comb out the loose hair (there is always a lot of loose hair, don't worry too much about any shedding at this point) and then trim and style if I so desire. I put any big hanks of trimmed hair in a ziplock baggie to save for future hairing projects, and then to tone down any shininess, I color over the dried glue on the hairline with acrylic paint or a matching Sharpie. There it is! Any questions, please feel free to drop me a note at info@sanssoucistudios.com! As I've been casting different masks using papier mache strips, I've been noticing that the masks' overall shape has a lot do do with the degree to which they try to warp during drying.
Above I have posted pics of the backs and insides of a "Rip" mask, a "Rival" horse mask, and a little eyeball mask. The "Rip" mask really wants to warp during drying. I believe it's because the mask has an overall cylindrical/conical shape with a wedge cut out of the bottom. I think papier mache strips tend to want to pull along curved surfaces as they dry. There is nothing to stop that pull along the bottom of this mask, so it warps. You can see that I wound up putting a triangular "plug" in the jaw to prevent this. The horse mask "Rival" warps only a tiny bit during drying. I believe this is because the cylindrical/conical part of this mask is closed, and the open part on the bottom is circular. As the papier mache strips dry and try to pull, there isn't anywhere that they can move to. All the available space is filled. The little eyeball mask does not warp at all during drying. It doesn't have much of a curved shape to it, and besides, it has 1/4" lip at a roughly 90 degree angle to the mask all around the edges. I believe the pull of the papier mache strips on this little lip cancel out the pull of those on main mask as they dry. This lip, while a tremendous pain in the butt to cast, also adds a lot of strength to the edges of the mask, which also helps to reduce the number of layers of paper I need to use. In general, the more details a mask has (folds, wrinkles, bone structures, etc) the less likely it is to warp, as the details interrupt the pull of the strips as they dry. Conversely a smooth mask is more likely to warp, as little interrupts that pull. Technicalities... but let me tell you, a warped mask is no fun!!! I've spent the last month or so trying the papier mache strip method I'd practiced in my smaller 'eyeball' masks in larger, multipart molds. I've continued to use an initial detail coat layer of a Polyfilla/Weldbond mix, a second layer of cheesecloth with the Polyfilla/Weldbond mix, and subsequent layers of kraft paper and outdoor wood glue. Some differences I've found in making small masks and large multipart masks this way: 1) I need to use much more care in the cheesecloth layer in a large mask than in a small one. There is more opportunity for overlapping layers of cheesecloth to build up thickness in a large mask, which does not contribute anything to strength, and can prevent the Polyfilla/Weldbond mix from penetrating all the way through to the mold. This can leave many pits and holes in the surface of the mask that will later need to be filled. I use extra care around deep and very detailed areas, and I try to overlap the cheesecloth just to be sure there is no gaps in coverage, but no more. 2) I need to use more layers of paper in large masks than in small ones. How many? It depends entirely on the shape and level of detail in the mask, with very detailed areas (wrinkles, lips, gumlines, etc) naturally being stronger and very smooth ones (cheeks, etc) being comparatively weaker. I still use only two layers of paper in areas with lots of detail, and up to ten in very smooth ones. I also use eight to ten layers of paper around the edges of the mask. A mask with enough layers will have only a slight amount of flex to it. I have found one sure way to know that I need more layers- if I put sealer on the mask, and it becomes limp and rubbery and then warps all to hell, I haven't used enough. Waaaahhhh!!!!! 3) Obviously, I need to join the pieces somehow or another. I'm not sure I'm done experiementing with this, but here's what I do now. I cast each piece of the mask seperately. I overhang the cheesecloth just a little over the edges of the mold and glue it down tightly, using a weaker glue such as Elmer's (no point in using a stronger glue which I'll just have to trim off later!) I do the same thing with one layer of paper in areas which I won't be able to reach into when the mold is closed (ears, tips of noses and lips, etc.) (You can see this cheesecloth edge in the pic of the unassembled mold above, and see the resulting "fringe" in the pic of the raw cast.) I have found, much to my great suprise, that this little edge of paper and or cheesecloth will not interfere with the mold assembly, as long as it is smoothly and tightly pressed down, and it is fairly easy to trim off afterwards with a craft knife. I then apply a bead of straight Weldbond to paper edges, a Polyfilla/Weldbond mix to the cheesecloth edges, clamp all the pieces of the mold together, and apply two more layers of kraft paper over the seams I can reach. Then I anxiously wait for the whole thing to feel dry, and unmold it! In general, this method yields nice results. The masks are very light and strong, and the detail and finish are exceptional. The downside is that this method is extremely time consuming- it takes me fourteen hours to cast a "Rip" mask (the one shown above) this way, compared to eight for my infamous Paperclay slip/Sculpt and Coat method. I think the resulting quality is worth it, and I'm going to see if I can cut back on time spent elsewhere in production. I'm going to look into airbrushing, to see if I can spend less time painting! |
Categories
All
Archives
March 2023
|