
A quick little video showing how this newest handpaw draft looks while moving. So far so good!
|
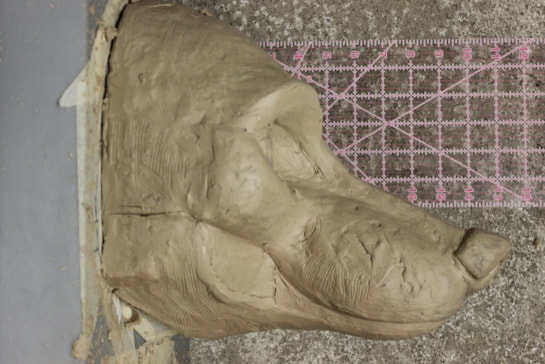
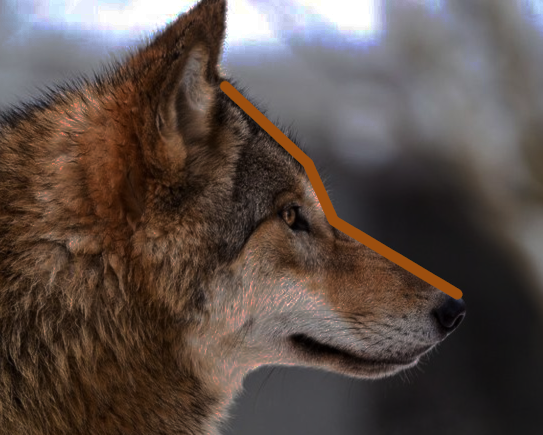
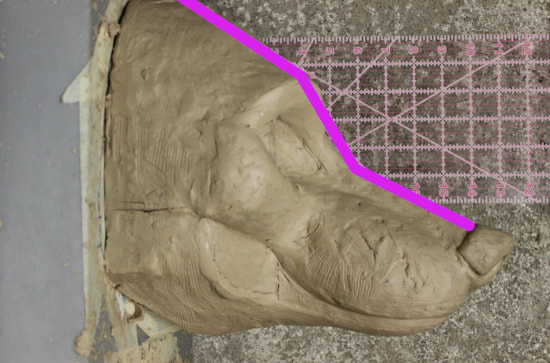
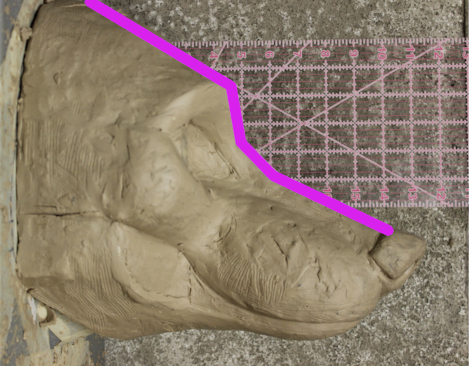
I started making this video in August, thinking I'd use it to review and assess my sculpt before going on vacation. I was imagining plugging the sculpt into my subconscious this way and mulling over it while out in the woods camping, returning to it inspired and reinvigorated. That's not what happened, as you might guess. I started flailing in the middle of this video, sculpting and resculpting the area around the eyes and the top of the nose, but not making any significant improvements. I think this flailing happens when the subconscious realizes something is off but conscious awareness can't yet put it into words and express it clearly as a problem to solve. I've been flailing with this blog post too, working on it on and off since August. I kept thinking I'd found The Problem with my sculpt and wanted to unveil The Solution here with great fanfare, along with the clever thinking that led to its discovery. But every time I set out to write this post I only found myself with more questions. Soooo.... I present to you here, The State of The Problem at this Moment, and The Steps I have Taken to Solve It So Far. I leave the Grand Conclusion for another post, hopefully one that I will write in the Near Future. Right now I feel like I just need to get something written! The common wisdom is that a sculpt, simply put, starts by establishing the relationships of the largest, most basic shapes to each other, then progresses to defining the relationships of smaller and smaller shapes within those big ones. The most common mistake a beginning sculptor makes, according to this wisdom, is working on fun little details before correctly establishing these big basic shapes. I wondered if this could be my problem. Three dimensional art can be slippery though, as the points of reference that establish where those shapes begin and end can seem to shift in relation to each other, especially as the sculpt is viewed from different angles. So I tried to find reliable, easily reproducible viewpoints from which to establish my points of reference, one being a 90 degree side profile, and others being straight on from the top and straight on to the underside. I might go into the latter two views in another post, but in this one, I'll stick with the 90 degree profile.
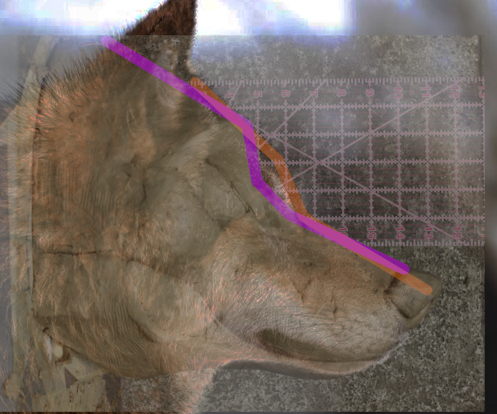
The question that comes to my mind now is, where will the ears- one of the biggest reference points of all- be placed on the base when a head is actually assembled? It's difficult to visualize now, as the ears are not a part of this sculpt and will be added later when the head is actually put together and furred. The placement of the ears could very much effect the apparent length of the forehead. If the ears were to be placed behind the back edge of the base, as they often are in furry head construction, the forehead could look **way** too long, and the muzzle **too short** in comparison, instead of too long the way the pictures above have led me to believe. Let's take a look... 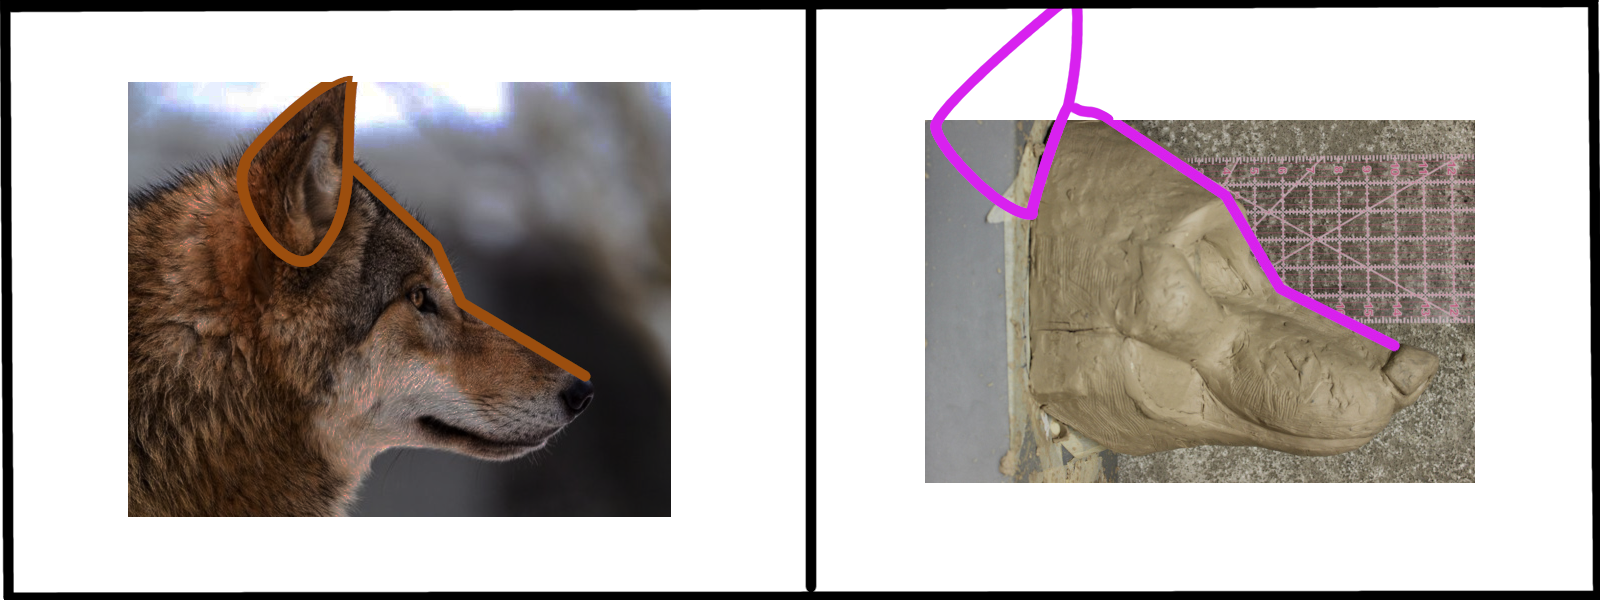 Wow, placing that ear at the back of the head would make that muzzle look short and the forehead **really** long!! Now here's the point at which I second guess myself and wind up running and screaming back to the drawing board!! Away I go!!!
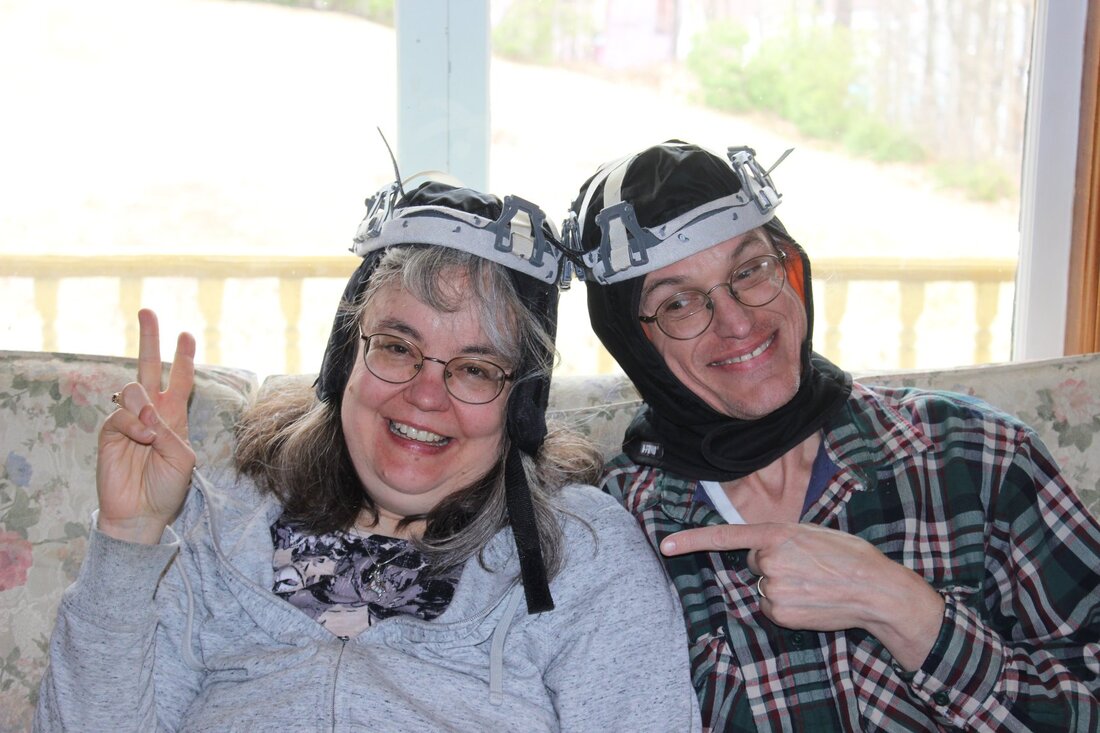
Stay tuned!! Patreon Launch!That was quite the summer project! I especially had fun making this video. I suspect my faithful and ever suffering husband (aka the man in the mask) probably had a good time too.
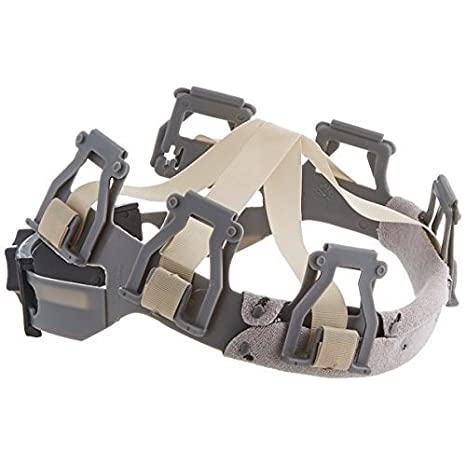
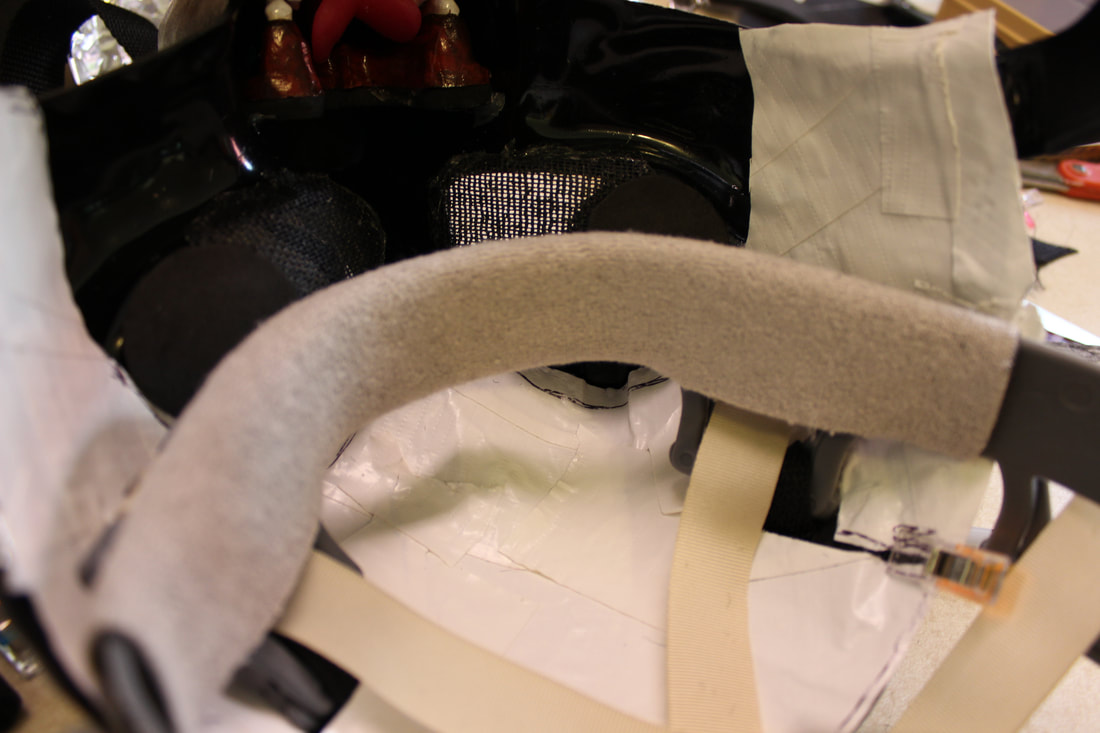
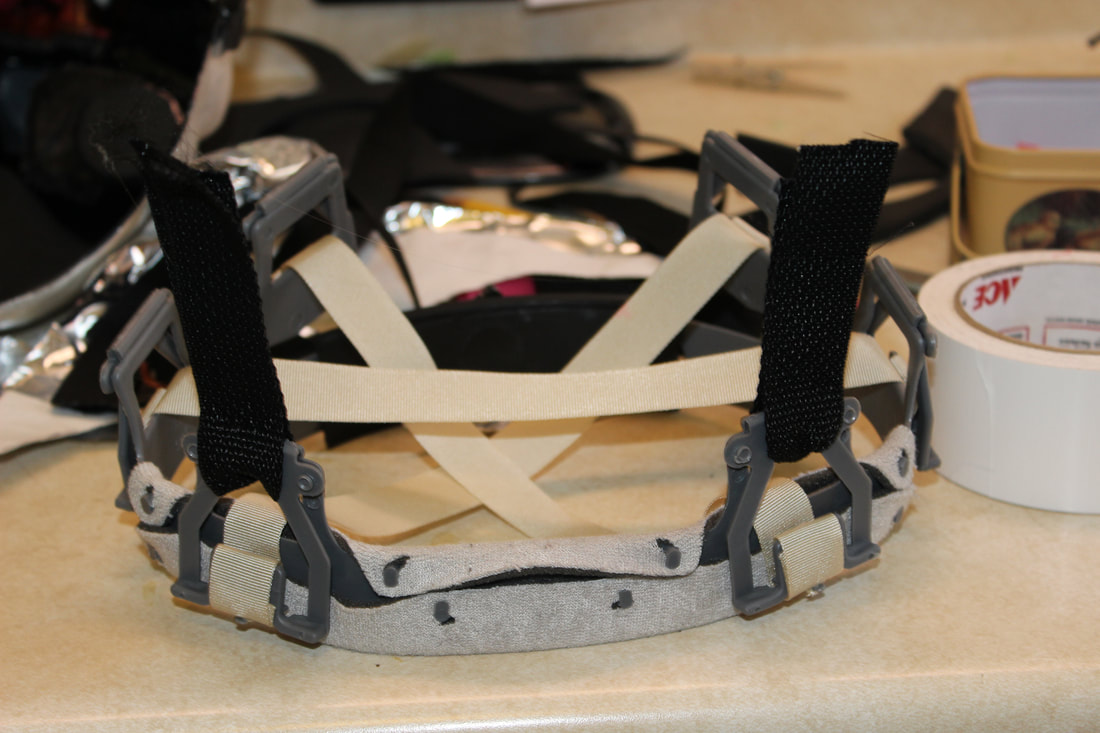 Above, two straps made by cutting webbing (not elastic, we don't want these guys to stretch!) to about 12” lengths, feeding them through the two front clips, folding them in half and gluing the halves to one another. No glue on the clips, they need to be able to rotate on the straps. The suspension will be (well) suspended from these straps inside the head, allowing it to move and conform to the wearer's head. Now, to make the "slots". The short story is, these two new straps will be glued between two layers of foam inside the head. I imagine the straps could also be riveted inside, or perhaps just glued to the bare resin, but foam sticks really hard to the scored-up inside of a head with hot glue, and the straps stick really hard to the foam so… Plus the foam provides a much larger gluing surface and therefore more security, in my mind anyway. 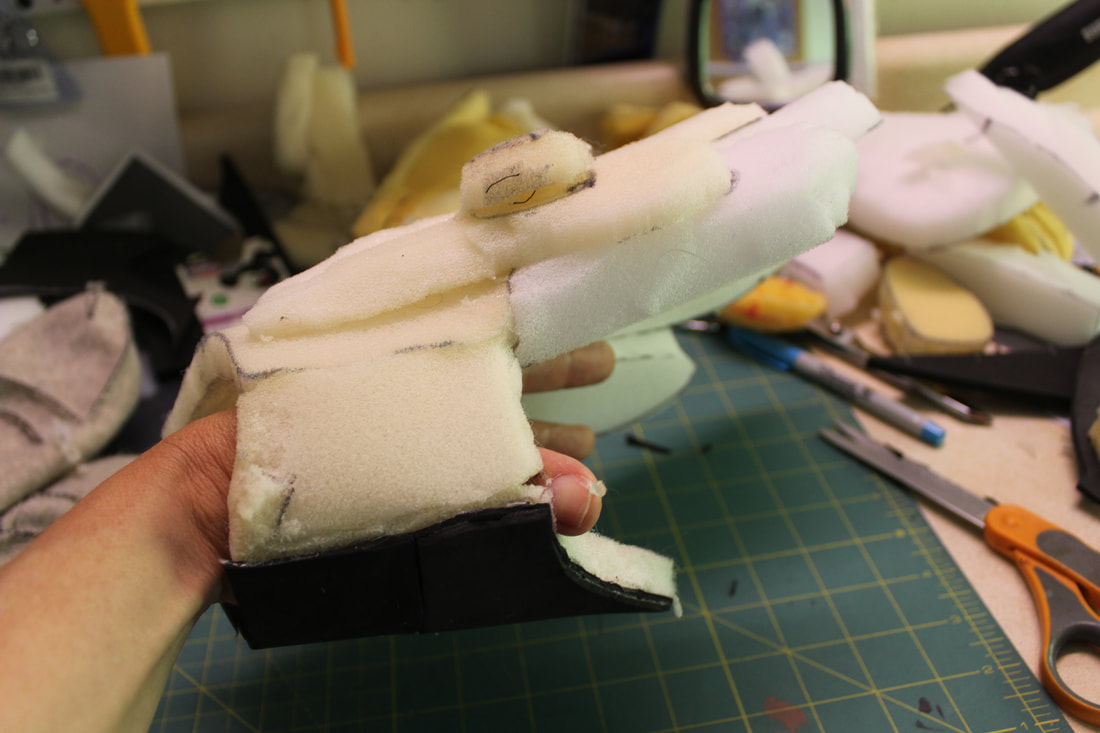 Above, the first layer of foam, visible underneath the browband, has been glued into the head. Then, the the correct placement for the suspension is found, with the browband going across the forehead just above the eyes. The clamps are only temporarily holding the suspension in the correct place, the browband will not actually be fixed to the mask like this but will be able to move inside the head somewhat.
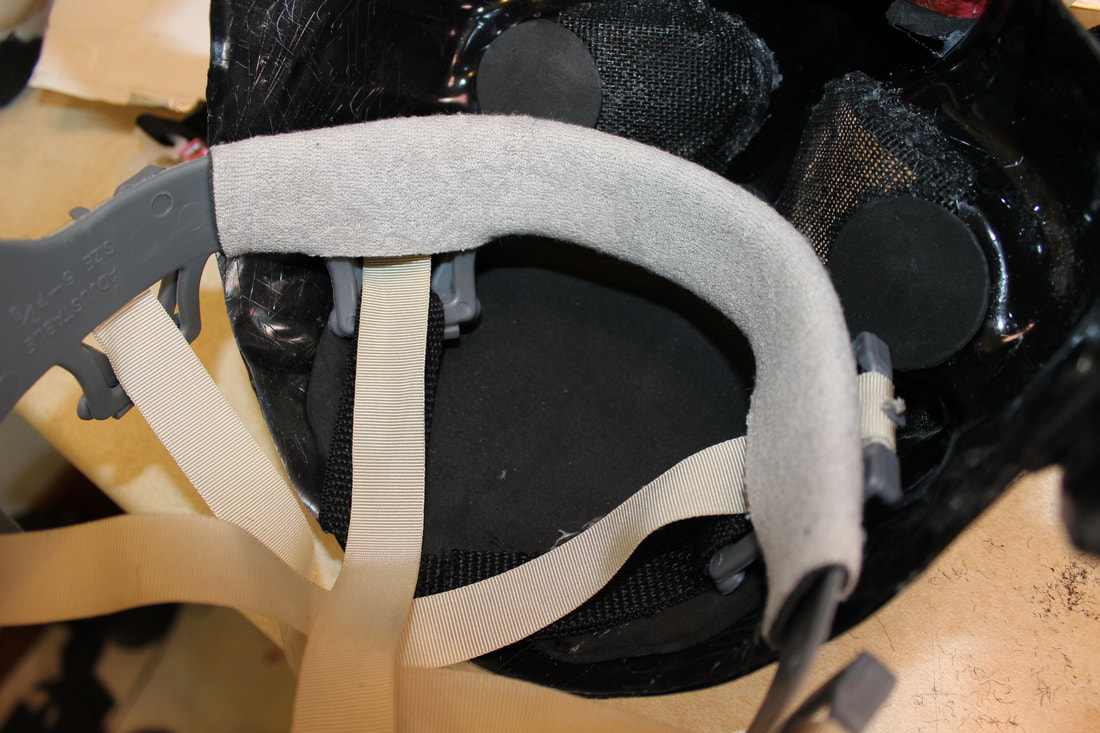
Next, the two new straps are glued on the foam directly underneath the two preexisting straps with which they share clips. I glue the straps all the way from the front of the mask to the back, where I trim off any extra. The more gluing surface the better. Again, no glue on the clips! 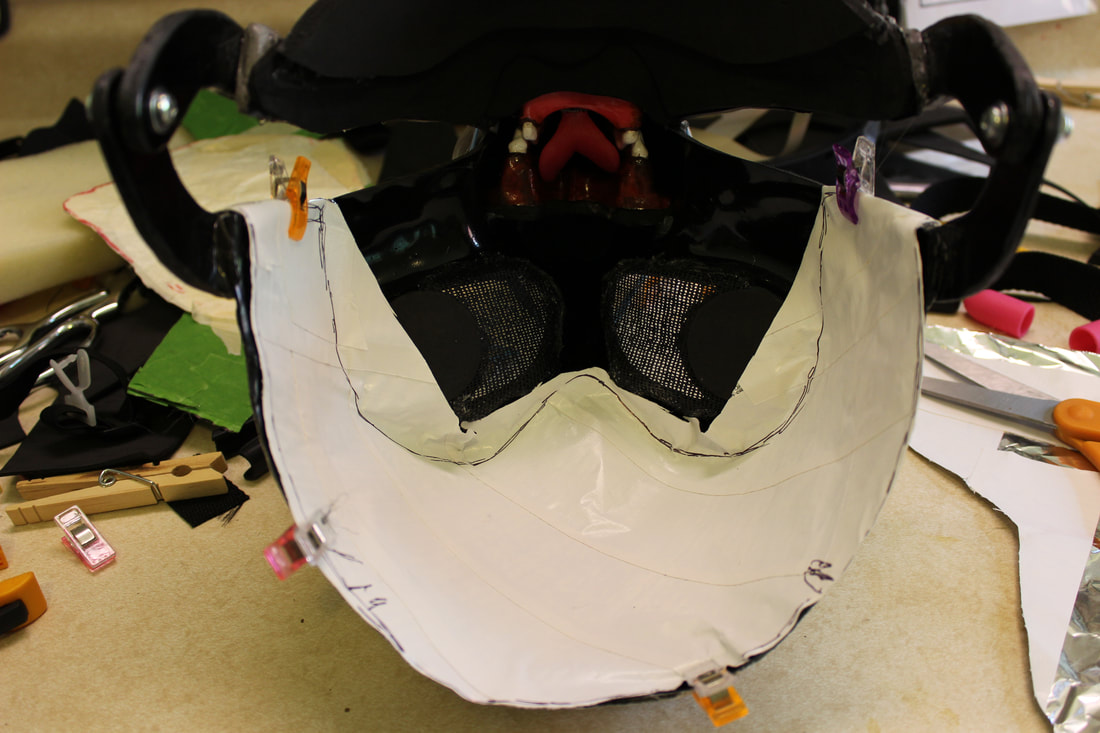 I start working the top layer of foam before the suspension is glued in, and finish it afterwards. Above, making a pattern for this part using standard duck tape patterning procedures. I often use aluminum foil under the duck tape in place of the more standard plastic wrap as it is easier to handle, especially in a concave shape like this.
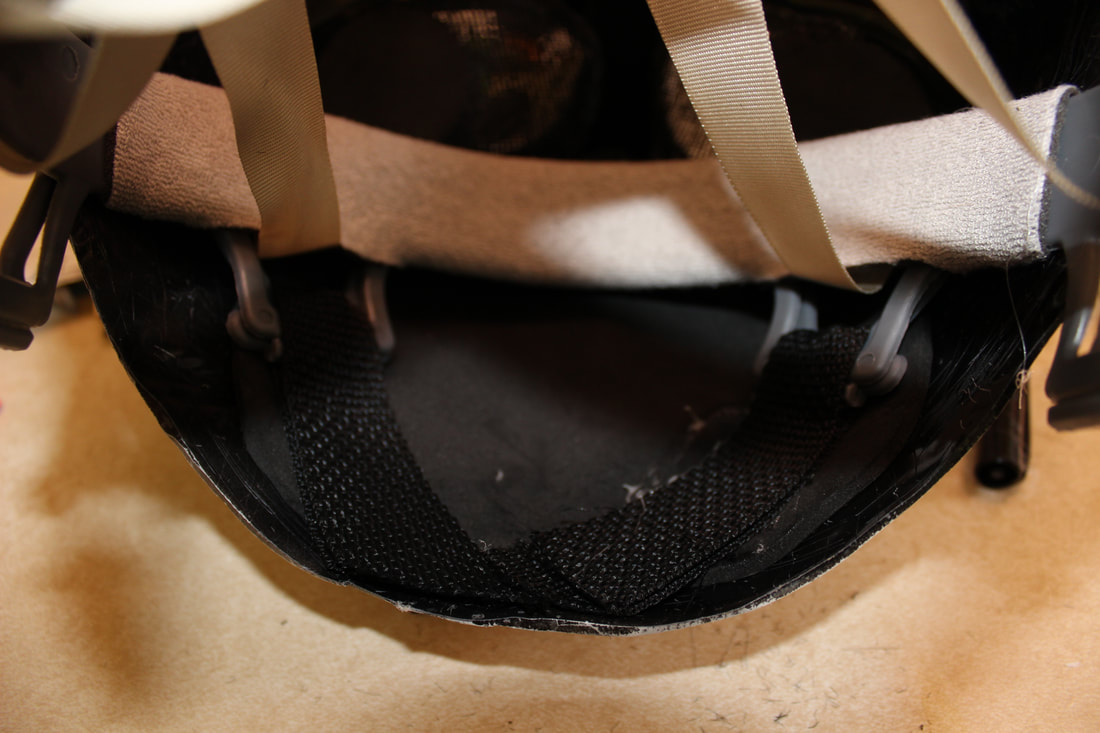
Next, cutting the slots for the clips into the pattern. Cut a little bit, try sliding the pattern over the clips, cut a little more, slowly but surely. Worse comes to worst the slots can be taped over and started over again. 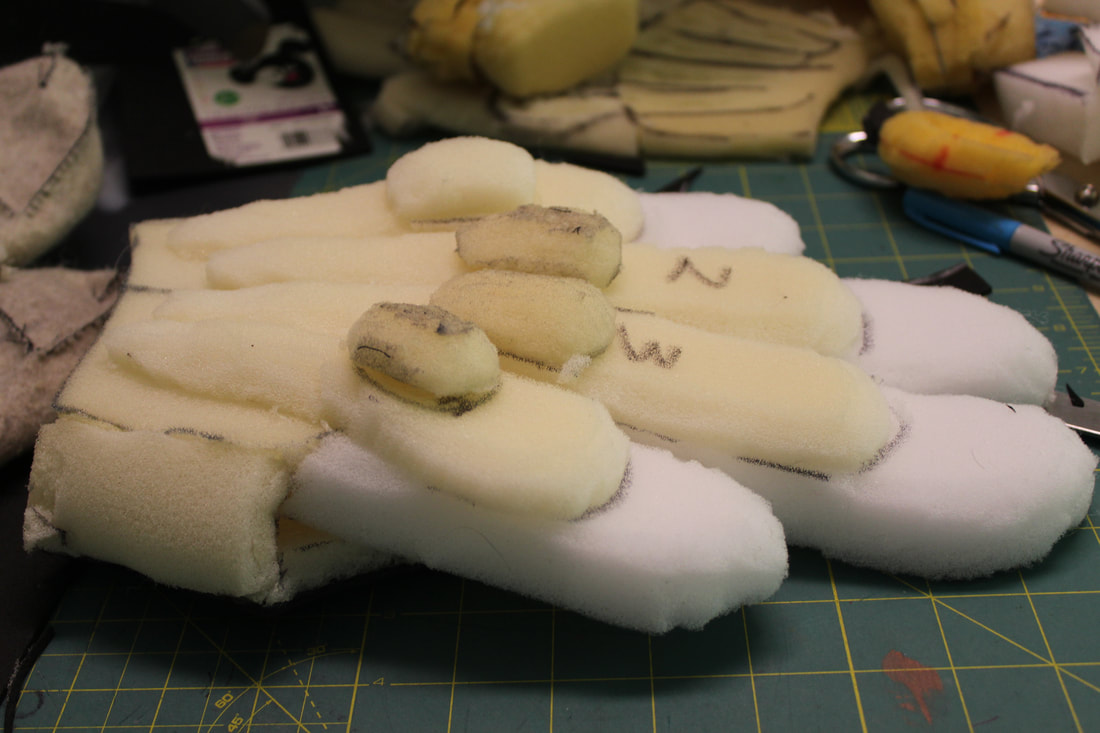 Above, the finished pattern for the top layer of foam. 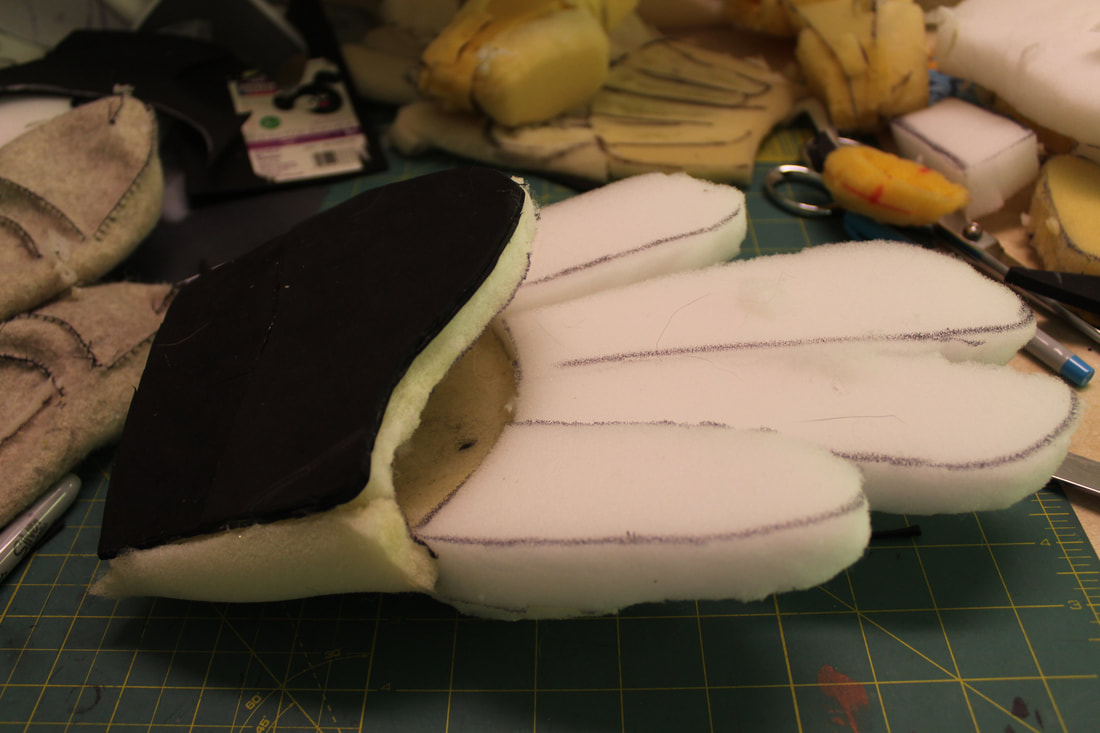 Above, the second foam piece has been cut out, laid into the head over the freshly glued pair of straps, and held in place with Wonder Clips. Working from one end to the other I'll unclip one Wonder Clip, smear hot glue around underneath the foam, and press it down until it cools. I work my way systematically across the head, unclipping each Wonder Clip in turn, putting glue under the foam, and moving on. The Wonder Clips keep the foam in the exact correct position while it's being glued. I'll cover the entire underside of the foam with glue, paying special attention to the openings for the clips. Lots and lots of glue, but again, none on the clips!! Trying it out. I'm pleased with how it works. 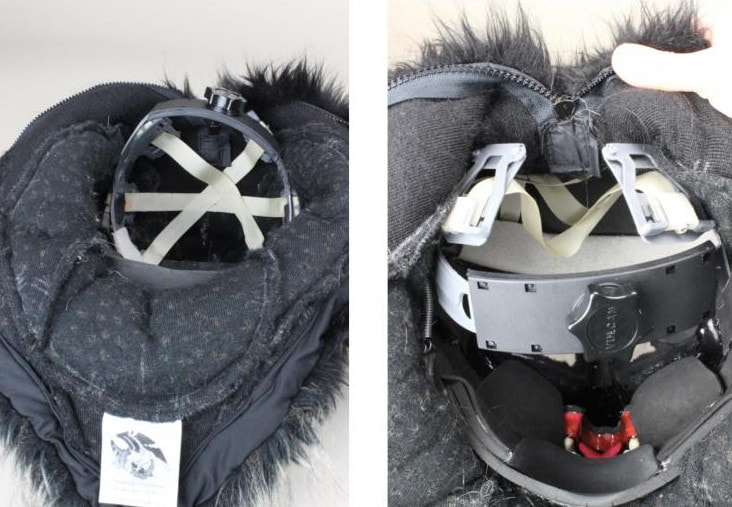 Above, the suspension in the finished head. From these pictures you can get an idea of how it "floats" inside the head. It also makes the mask nice to take off and on, as once the back strap is adjusted to the wearer it's a lot like putting on a baseball cap. No straps to fasten and unfasten. I hope that this has been helpful to you. If you have any questions please feel free to ask! Thanks for looking!
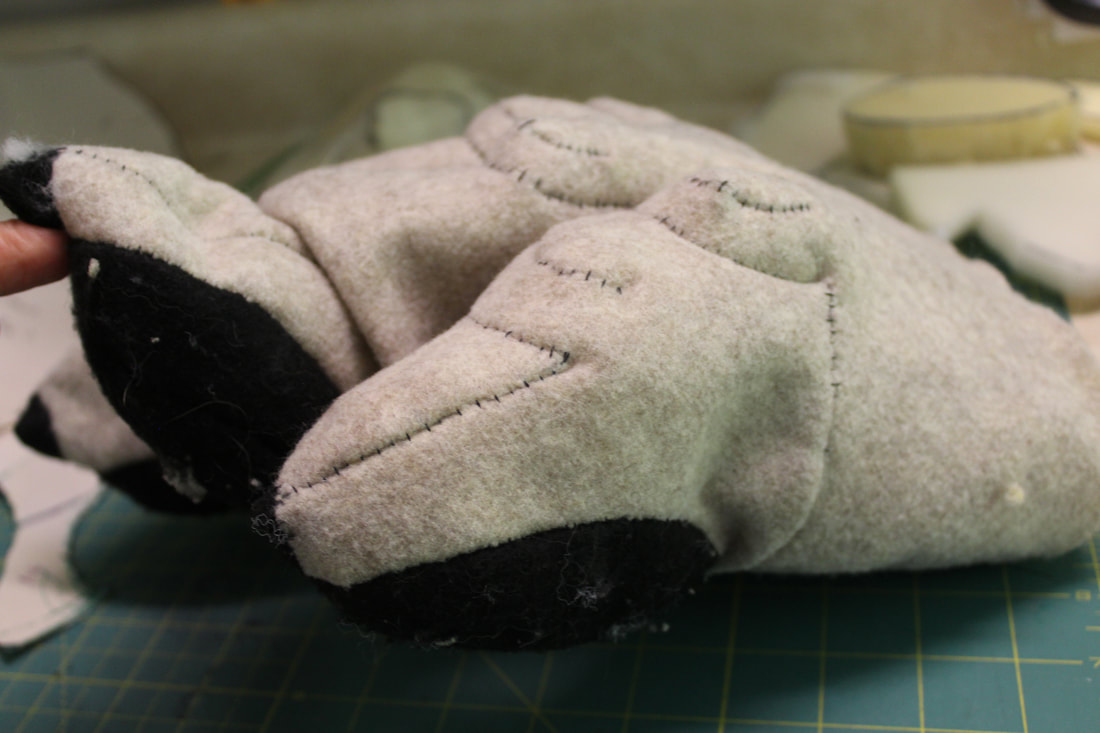
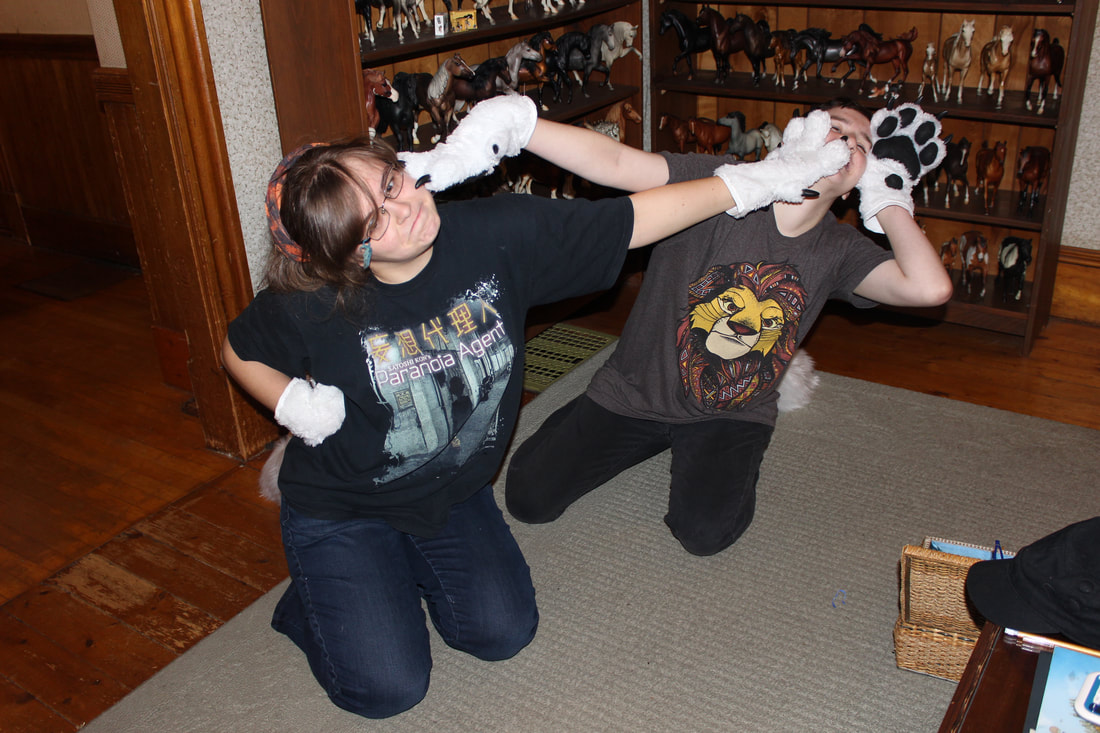
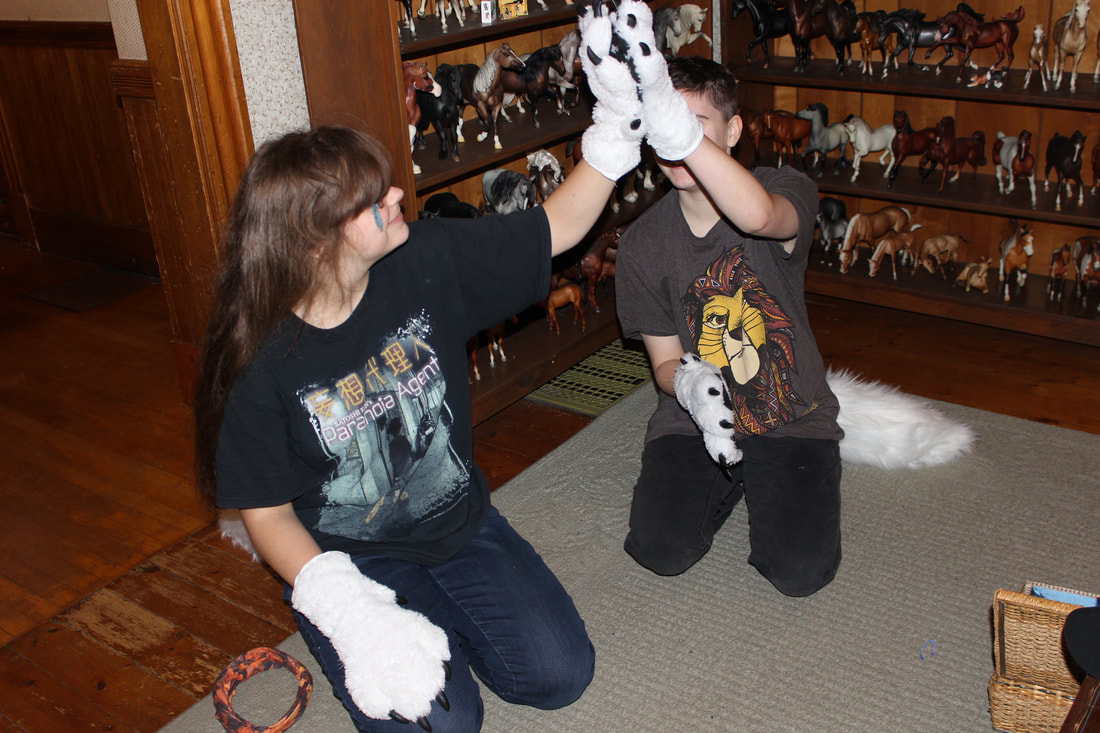
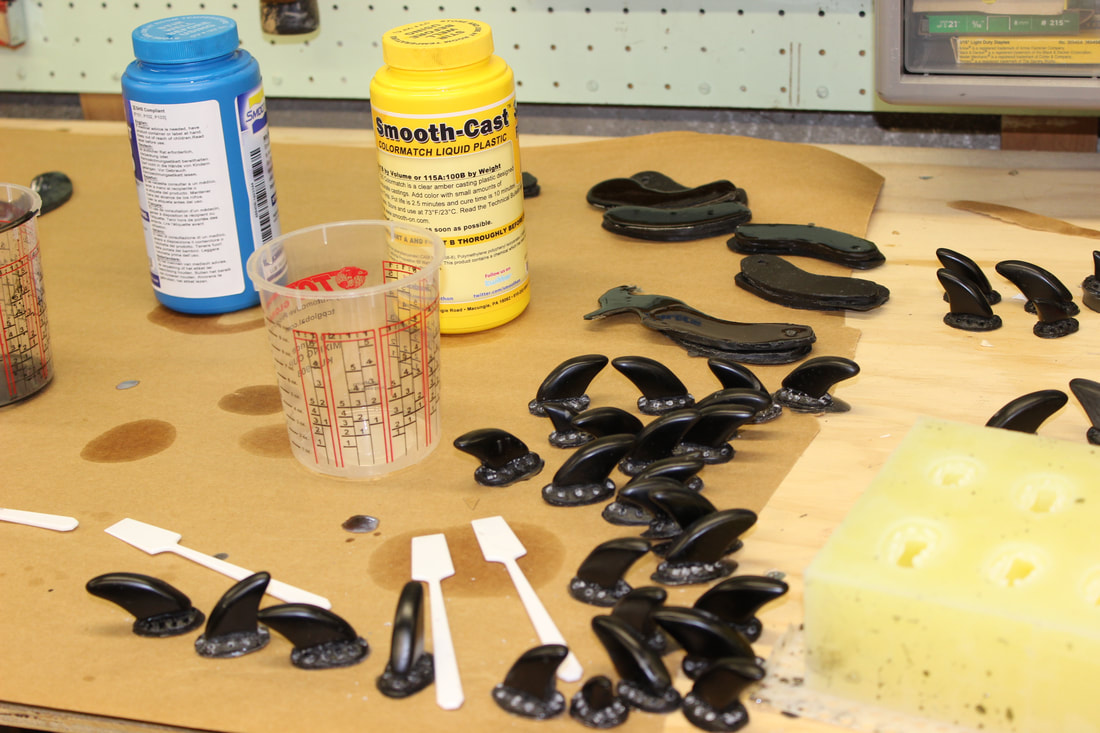
 My first pair of practice handpaws, made out of my "cheap" white fur. The toebeans are appliqued vinyl, the claws are resin. The cuffs have a bias tape edging and no lining, since early on in my online explorations I had read that linings were a luxury, good only for retaining sweat. However I found the resin claws made the tips of the fingers floppy and stuffing was helpful in stiffening them. And a liner is useful in separating the stuffing from the hands. Which brings me to... 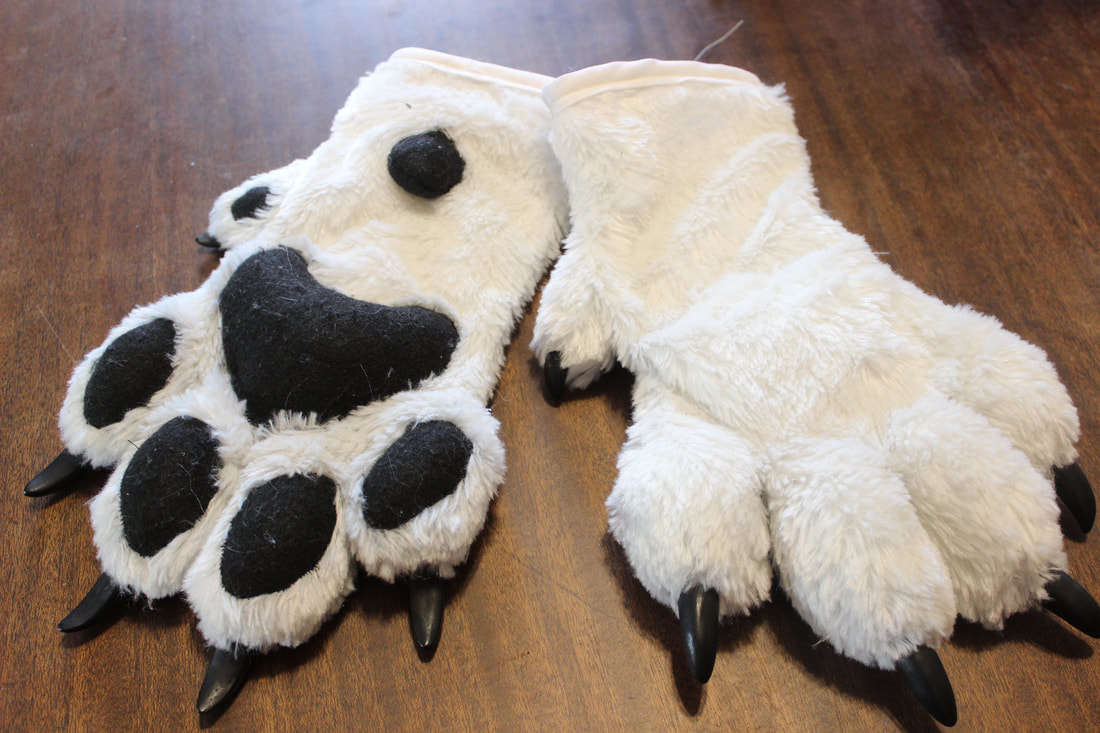 My second pair of practice handpaws. These do have a lining as well as the bias tape edging. The toebeans are felt "pillows" sewn into the white fabric, a method Kloofsuits describes in her tutorials above. This method needs less skill than applique to yield a very nice result, though it takes much more time and patience. (This is what podcasts are for!) Even though these were just practice handpaws I wish I had used fabric other than felt, as it pilled all to hell in about two seconds and looks awful. At this point I'm also feeling frustrated by the claws. They look crooked and haphazard in both sets of paws, pointing in whichever direction they feel like when I glue them in, no matter how careful I try to be.
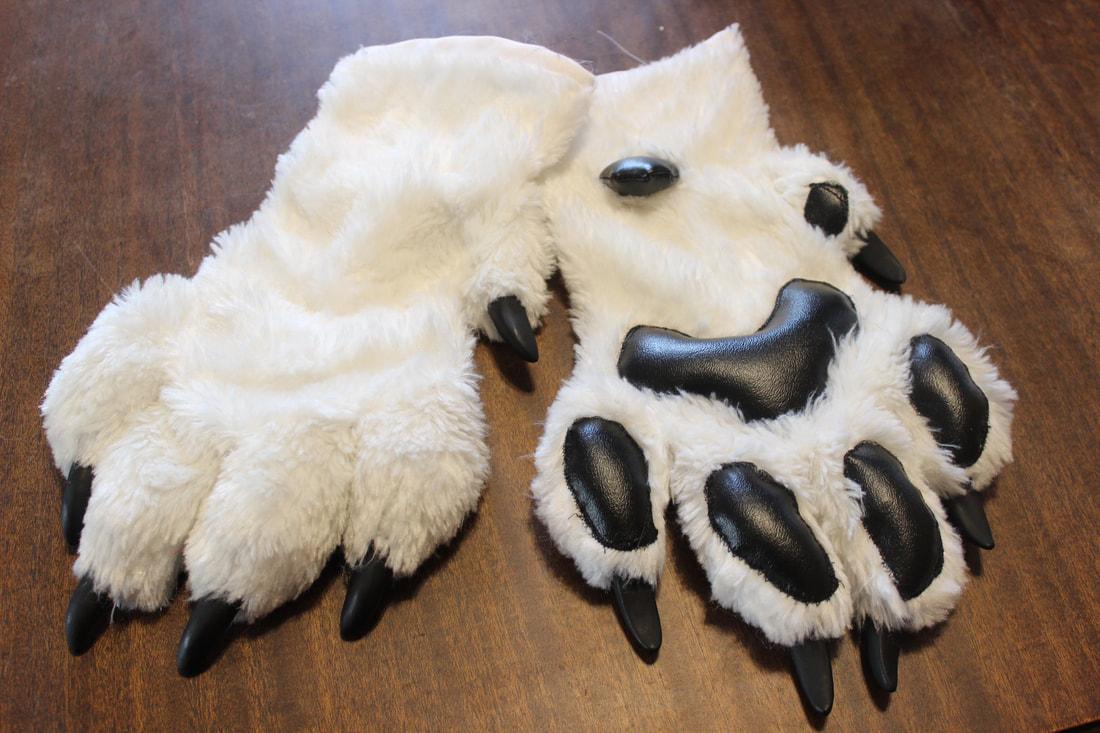
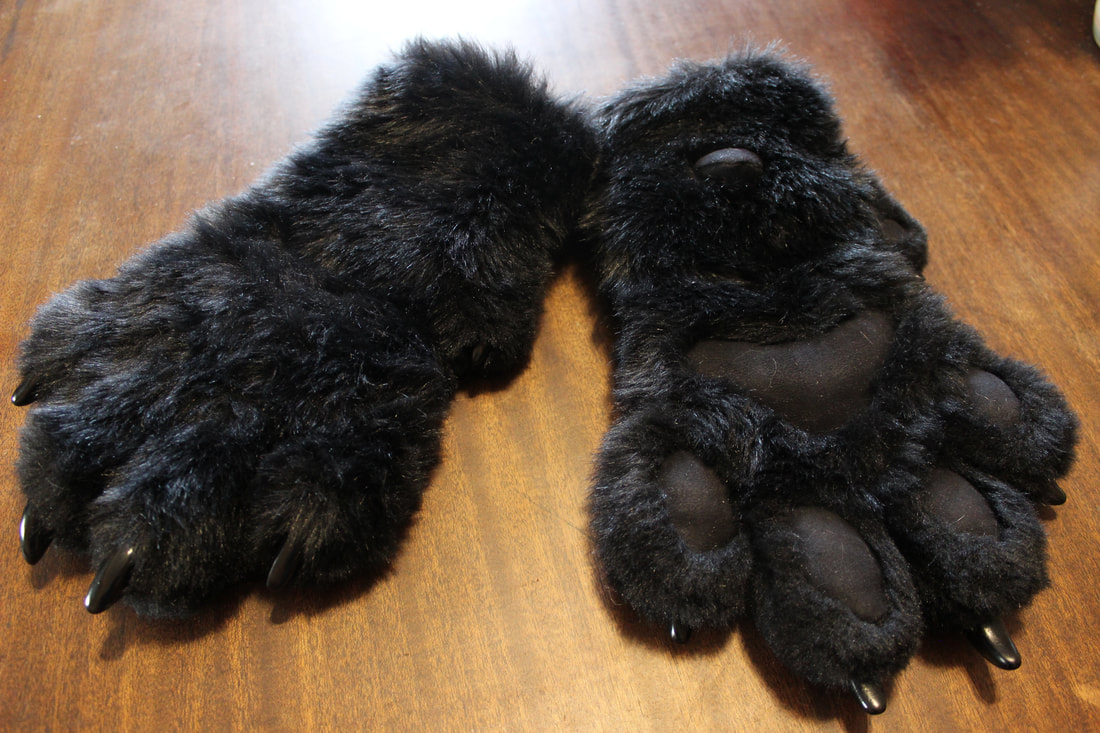 And the a third set of paws, this time made of "good" fabric, with faux suede sewn-in "pillow" toe beans and the new resin claws. I'm pretty happy with how these look.
And, giving the handpaws a try! A short little video showing the new jawset and tongue in one of my resin heads. Cool, huh??
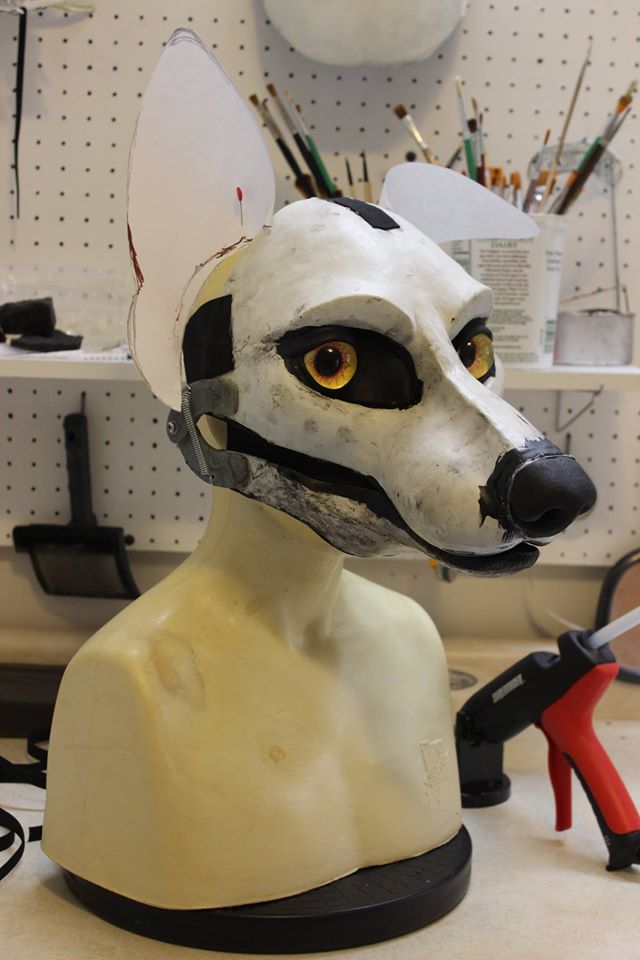
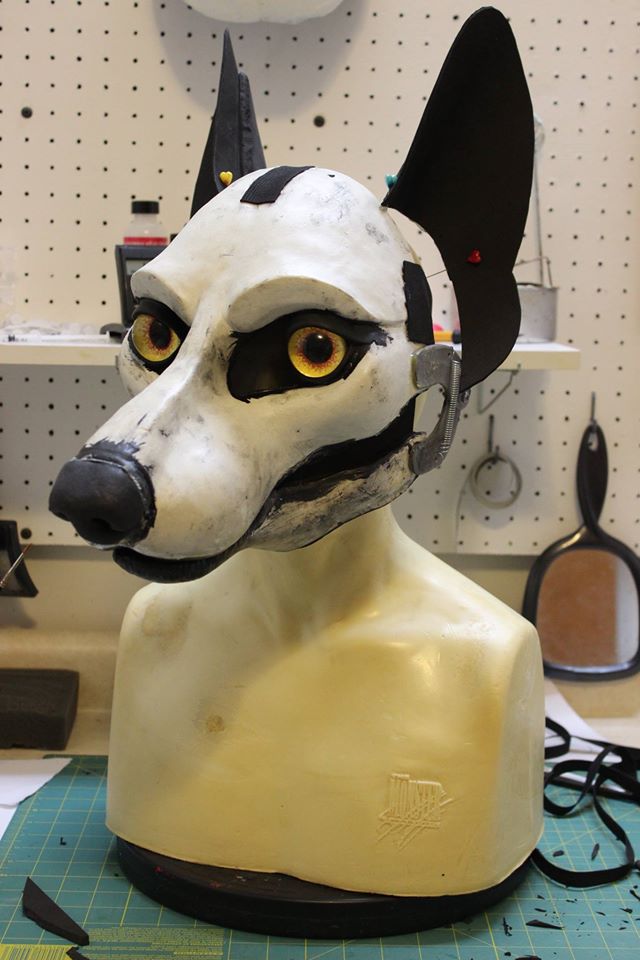
Below, a short video we made to showcase Maxine before her auction. Which never happened, as a visitor to the studio made an offer we couldn't refuse, and she went home with him. Still, it's a fun video, so we'll share it here. My daughter loves Max and so do I, but... I want Maxine's (aka Head #2's) ears to be better than Max's. This is at the top of the list of improvements I want to make this time around. Not only is the fur going the wrong way on Max's ears, growing towards the base instead of towards the tip (in spite of the fact I *did* mark the fur direction correctly on the pattern!) but IMO the ears... flap around... too much when the mask moves. You can see this especially clearly at .018 minutes in this video.  Above, the nascent Max with his freshly designed Foamy ears. (And the cat hair mustache my daughter made for him.) I think part of the issue is evident here- the ears have too much height in relation to their width at the base. Theory being, a wider base would provide more support and hopefully, less flapping.
Above, snips from one of Dream Vision Creation's ear making tutorials (used with permission.) I referenced these often making the patterns for Maxine's ears. The ears on this mask are a bit wider at the base than are Max's. If they were his ears, the bottoms would come to the point where the top half of the hinge is glued to the head, not to nearly the center of the hinge as they do.
Above, using a snip from a Dream Vision Creations tutorial (left) as pattern reference for Maxine's ears (right), aiming for the correct width at the base.
.Above left, the paper pattern in progress, and right, the finished Foamy ears. Looks like I initially made the patterns a little bit **too** wide at the base, and so narrowed them down a bit in the final version. 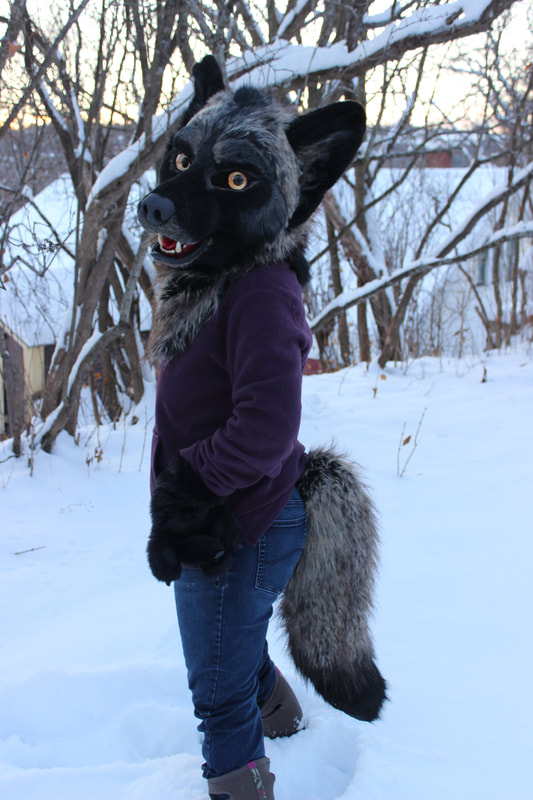 Above left, the pattern piece (tan) for the back of Maxine's ears, and right, the pattern piece (green) for Max's. (See, I DID mark the proper fur direction on Max's pattern piece!!) As it turns out, both pattern pieces are 6 1/2" high, but while Max's pattern piece is 7" wide, Maxine's is nearly 9" wide.
And since Maxine isn't finished yet, this is the closest thing I have to a side by side comparison of the two- Max is the green one and Maxine is the tan one. (Credit where credit is due- Max is made entirely with DVC parts, where Maxine is made with my own resin base and DVC nose, teeth, tongue and eye blanks.) So far I like the ears with the wider base much better! I think there'll be other things I'll need to do to prevent flapping, however... stay tuned!!
Moving jaw test for Maxine the Mask. Thank you to the long suffering hubby for his patience!!! I'm pretty happy with it.
|
Categories
All
Archives
March 2023
|


 RSS Feed