Sans Souci Studios
Follow us on Facebook!
  • Home
  • Gallery
    • Furry Masks
    • Paper Mache Masks
  • Blog
  • About
    • Why I Make Masks
    • Embarking on the Road to Furry Fandom
    • Resume
    • WCAX Interview
  • Contact

Down the Rabbit Hole, Part 1

3/28/2012

0 Comments

 
Picture
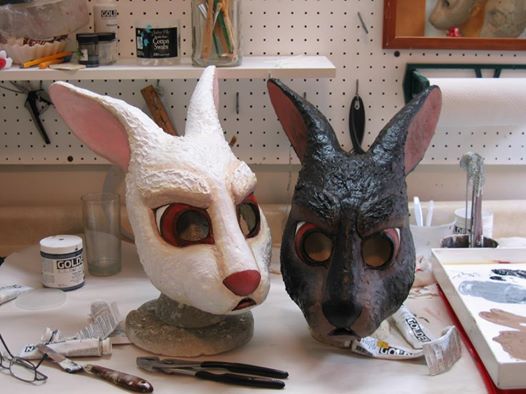
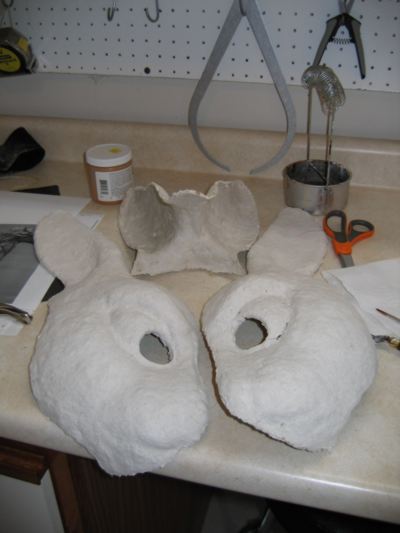
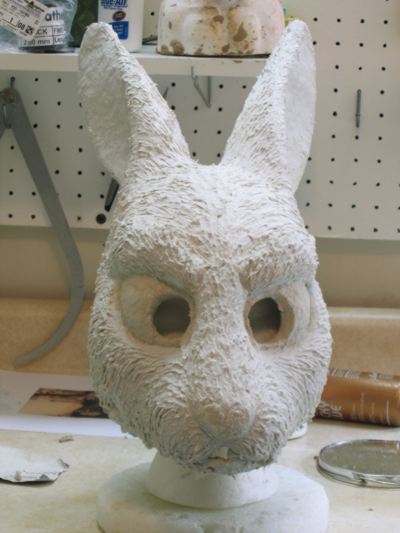
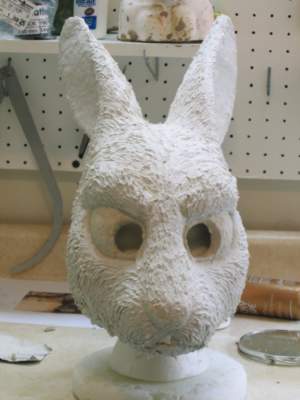
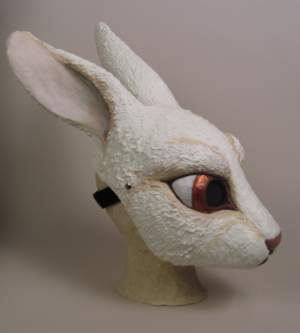
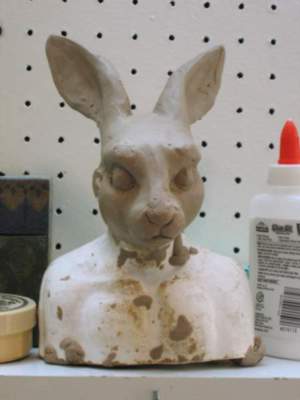
Bunny masks on the workbench. The one on the right is the only non-white rabbit mask I've made so far.
Between the fall of 2009 and the fall of 2012, I made just about nothing except bunny masks. And with only one exception, *white* bunny masks. And with only one exception, all of these were commissioned pieces, by customers who found me through Facebook and Google searches. I'm afraid to actually list these masks for sale because I'm *sooooo* ready to start making other things! What was it about The White Rabbit and Alice in Wonderland anyway?

Somehow, I think the first thing that comes to most people's minds is drug induced hallucinations a la "Jefferson Airplane".
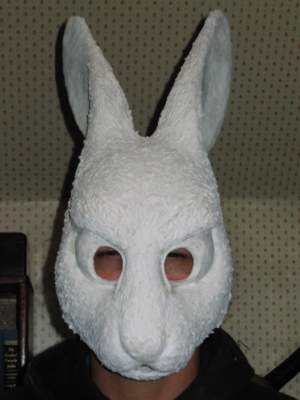
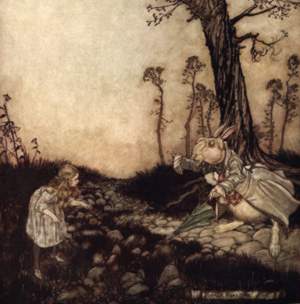
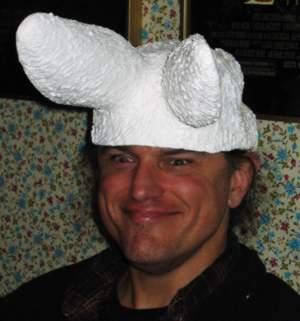
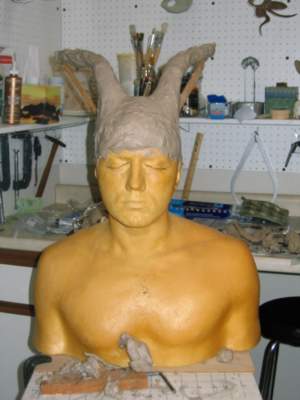
 According to good ol' Wikipedia, Lewis Carroll meant for The White Rabbit to be a foil to Alice. In his article "Alice on the Stage," Carroll wrote "And the White Rabbit, what of him? Was he framed on the "Alice" lines, or meant as a contrast? As a contrast, distinctly. For her 'youth,' 'audacity,' 'vigour,' and 'swift directness of purpose,' read 'elderly,' 'timid,' 'feeble,' and 'nervously shilly-shallying,' and you will get something of what I meant him to be. I think the White Rabbit should wear spectacles. I'm sure his voice should quaver, and his knees quiver, and his whole air suggest a total inability to say 'Boo' to a goose!"
 
Good ol' Wikipedia lists other interpretations of The White Rabbit's character. In the 1951 Disney movie version
, the White Rabbit plays the straight man to all the other crazy Wonderland residents. In the 2010 Tim Burton film he is a leader of an underground resistance while he works for the Queen. The most interesting one in my book is in the 1999 movie "The Matrix" where the White Rabbit and Wonderland serve for metaphors for "waking up" (Neo is told to follow the White Rabbit, he finds a woman with a tattoo of a white rabbit on her shoulder, and Morpheus offers him a red pill to "find out just how deep this rabbit hole goes.")


Picture
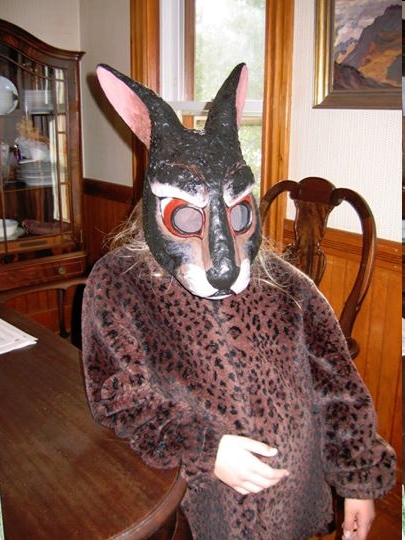
My poor kid had the same size head as the customer. Here I'm trying the mask on her for size after she got home for school, before she has a chance to take her coat off.
Picture
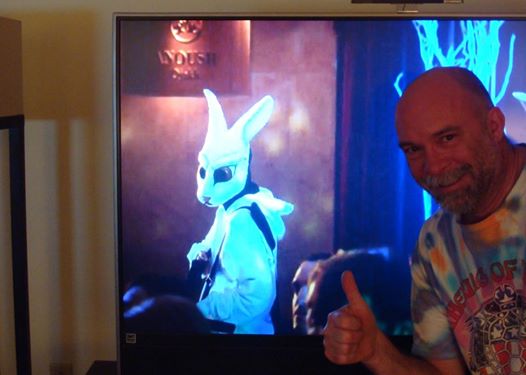
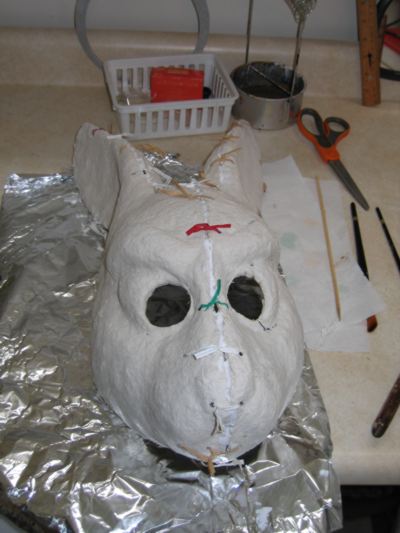
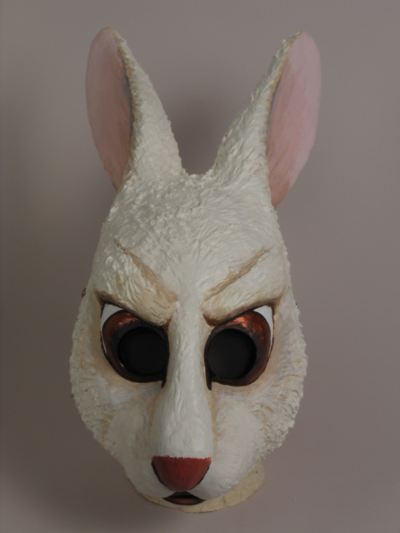
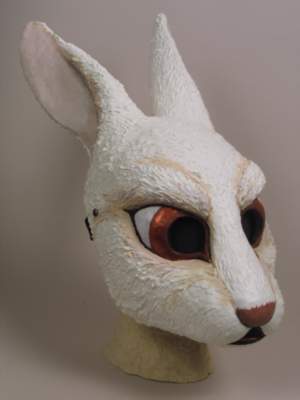
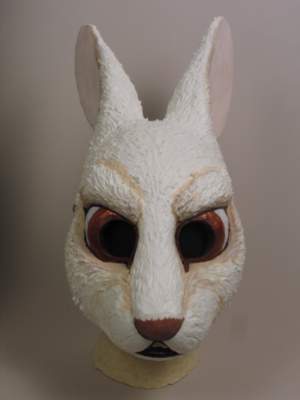
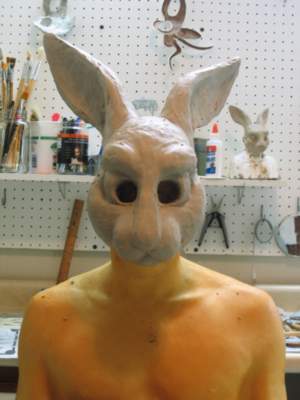
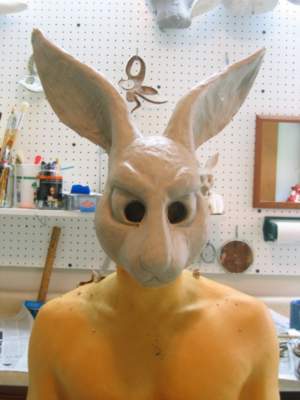
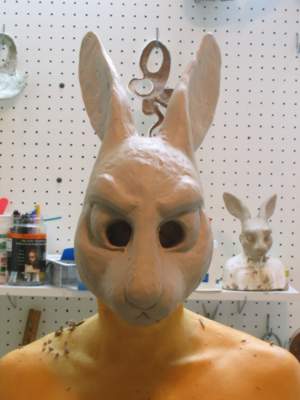
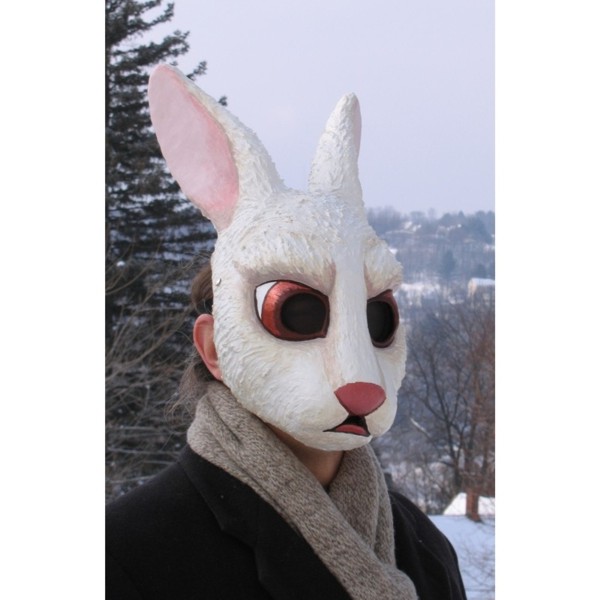
The way I myself saw the White Rabbit was something of an inspiration, a muse to follow on unplanned and unexpected adventures, especially of a creative, artistic, and just a little bit goofy kind. The customer who commissioned the original sculpture, however, wanted something intimidating, vaguely threatening, not in the least bit goofy or (God forbid!) cute and cuddly. I can't help but think that it is this vaguely threatening expression that has contributed so much to the success of this mask. Maybe it's unsettling or even frightening to follow our inspirations, and God knows where we might wind up. Hopefully in the end the Red Queen will at least let us keep our heads!  

0 Comments

Down the Rabbit Hole, Part 2

3/27/2012

0 Comments

 
Picture
Bunny on the set!
On an evening in the middle of February and completely out of the blue, I  got a phone call from a costume designer at CBS studios who said they'd found my work while doing Google image searches for rabbit masks for an upcoming episode of CSI. Only my mask would do. Only trick was, could I make one and have it in the mail in a week? My first thought was, who would prank me like this? my second thought was, dangit no anime for me tonight, it's back in the studio I go! After a week of high drama (my in laws were coming to visit the day the mask was supposed to be in the mail, the bunnies of the dust variety threatened a revolt and every last pair of scissors in the house vanished except my daughter's left handed ones) the mask arrived safely and on time in Hollywood.
   The episode "Malice in Wonderland" aired on March 23, 2012, the 18th episode of Season 12. While I enjoyed my five seconds of fame part of me wondered where did I go wrong as a parent? One of my artistic offspring had gone on to be a porn star (Uniporn) and now another had gone on to be a murderer! In any case,  the episode can be rented here:  http://www.amazon.com/gp/product/B007NEZD8A/ref=dv_dp_ep18 Enjoy!
Picture
Screenshot of the Bad Bunny, taken by my high school classmate Brian Vakiener. Thanks Brian!
0 Comments

Positive Casting A Rabbit Mask in Celluclay

9/1/2010

0 Comments

 
Usually I make masks by negative casting, that is, casting *inside* of a mold. But since I've been getting requests for rabbit masks faster than I can have a mold made, I've been making them by positive casting, ie, casting them *outside* of a form, in this case the original plasticene sculpture. Here's more about this method.

First, I liberally apply Vaseline to the sculpture as a release agent. Then I mix Celluclay (a kind of commerial paper mache pulp) and roll it out into approximately 1/8" thick sheets between two pieces of wax paper. These I put into the freezer for 8 minutes to make them less sticky and easier to work with, and then I peel the wax paper off and apply the sheets over my sculpture. I blend the edges of the sheets together and smooth out any major lumps, but otherwise I don't fuss too much over the texture. It's much easier to deal with after the Celluclay is dry.

The cast will need to be cut into pieces in order to remove it from the original sculpture. After I apply all the Celluclay, I make score marks along the parting lines with a clay tool. Otherwise, the Celluclay would be very difficult to cut apart when it is dry.

Then I set the mask in front of a fan to dry. Usually after an hour or two the Celluclay will start to feel leathery and I'll be able to add a little more detail back in with a wooden clay tool. After a day or two it is usually dry enough to remove from the sculpture.

Here's the beginnings of the cast, with the score lines pressed in:
Picture
Here's the cast with one of the pieces removed and the original sculpture showing underneath:
Picture
Here's all three pieces removed from the sculpture, ready for assembly:
Picture
At this point speed is of the essence. I reassemble the pieces as quickly as possible, as if I leave them for any time they will warp out of shape and not fit together well. I make holes along the edges of the pieces, lining them up with each other on either side of the seams. If the pieces are still a little damp I can make the holes with a bamboo skewer, if they've dried more thoroughly I'll need to use a drill.

Then I tie the pieces together using twist ties (I save these compulsively) and apply glue all along the seams:
Picture
Picture
I dry the cast on a wig stand or stuff it with wadded up newspaper to help it keep its shape. Then I fill in the seams and any thin spots with more Celluclay and let it dry again.

After I've gotten a sturdy shell on which to build, I begin to add texture and refine detail, both by adding back on with wet Celluclay or by carving with a Dremel. Here's the rabbit mask with the beginnings of hair texture, created by adding a thin layer of wet Celluclay and working it with a wooden clay tool:
Picture
Here's the mask hairier and more refined. The brown marks around the eyes are scorch marks from the Dremel.
Picture
Hairier and more refined still:
Picture
Then painted and finished! The Celluclay will need to be sealed before it is painted, as it will absorb humidity and warp like a son of a gun otherwise. I brush on a layer, inside and out, of slightly diluted Weldbond (a kind of waterproof PVA glue) to do this.
Picture
As you can see, in a positive cast, much of the original sculpture's surface detail (hair, wrinkles, etc) is lost and needs to be added back in. How much detail is lost depends on the material used- a lot with Celluclay, but less with leather and other types of paper mache. In a negative cast, surface detail is preserved by the mold. This is the major reason why I use molds to reproduce most of my masks. However the fur texture on this mask is fun to create by hand, and I play with the original rabbit sculpture a little every time I make a new positive cast, mostly tweaking its fit. Positive casting also allows me to go more quickly from an original sculpture to a wearable mask, since there isn't the intermediary step of having the mold made. Plus, it's always good to have more than one tool in the tool box!
0 Comments

White Rabbit Mask Commission Part 2

10/22/2009

1 Comment

 
During our last thrilling episode, our bold heroine had just finished a mask sculpture in a blazingly fast twenty one hours. Tune in this week to see if she can actually make a mask before Halloween!

I positive cast the mask in Celluclay over the plasticine rabbit sculpture and let it dry with the help of a fan. Then I cut it off, reassembled it, filled the seams and added the hair texture with more Celluclay. I just got a new batch of Celluclay and don't know if it's because it's been reformulated or just because it's fresh and new, but it was so much smoother and took texture so much better than it has before.
Picture

Here is the mask with texture freshly applied. The hair on the nose and muzzle looks rather schnauzer-ish, so I later sanded it down.
Picture
Here is Brian the hapless hubby modelling the mask with the flash going off in his eyes. I've tamed the hair texture somewhat, as well as sanded down the eyes, the nose, and inside of the ears. At this point I deemed the mask was ready for paint!

The customer sent me this wonderful traditional Aurthur Rackam illustration for ideas for colors.
Picture

I love this color scheme, with the creamy/yellowy white, the sepia undershadings, and brownish/reddish eyes and nose. That is one seriously wierd looking bunny though!

And.. (drumroll please).. the finished mask!
Picture
Picture
Picture
I added just a tiny bit of metallic copper paint to the irises, so that the eyes will flash when the customer moves his head. Overall I'm really pleased with how this mask came out.

And... as an added bonus, this is the only Sans Souci mask to date that is really two masks for the price of one. What a deal!
Picture
1 Comment

Rabbit Mask Commission Part 1

10/21/2009

0 Comments

 
A challenge! A customer asked me if I could make an Alice in Wonderland White Rabbit mask for Halloween. I had only a month, and I usually need around a hundred hours to finish a sculpt, often more, and at least twenty or thirty to make an actual mask. I really didn't think I had time, but I had also wanted to make a rabbit mask anyway and see if perhaps, in the two or more years it's been since I've started a new sculpt, I'd become more proficient. So I took it on.
Picture
First, I made a clay sketch on a miniature armature, to get a basic idea of masses and shapes without having to shove around pounds of plasticine. I then used this little sketch as a reference for the full sized sculpture.
Picture
Here we are fifteen minutes into the big sculpt, and Arnold the Armature is picking up your signal loud and clear. Those little bitties on the sculpting table in front of him are snails, frogs and slugs that Isabelle sculpted after sneaking into my studio one day.
Picture
End of Day One. The armature is covered and the resulting lump is somewhat rabbit shaped.
Picture
End of Day 2. Looking a little more rabbit shaped. The little clay sketch I made at first is visible in the background.
Picture
End of Day 3. Ready for liftoff! Muzzle and brows have also been refined.
Picture
End of Day 5. Per customer's request, ears restrained, cheeks narrowed down and eyebrows refined some more. At this point I am pretty much satisfied with the sculpture.

During this project I discovered some amazing new time saving sculpting tools- the digital camera, the scanner, the printer and my lightbox. At the end of each day I would take pics of the mask, print them out in black and white, and sketch changes over them I'd want to make the next day. This helped me stay focused and saved hours of needless fiddling.
Picture
Picture
These are two sketches I did to show my customer ideas for new ears and cheeks. He opted for ears somewhat between these two possibilites.

I also found that if I took pics of the mask on one side and then kept the tripod and the stand in one place, I could spin the stand around and get a picture of the other side of the mask that when flipped over, would line up very closely to the first. Then I would print out both pictures, trace around the major lines in red, flip one picture over and then lay them down on my lightbox to see any significant differences between the two sides. This was very helpful if one feature looked "right" one one side but "off" on the other, I could tell right away what the difference was.
Picture
A pic of the right hand side of the mask, outlined in red, with an area from the left hand side superimposed in green over part of the ear.
Picture
A pic of the left hand side of the mask, outlined in red, with an area of the right hand side of the mask superimposed in green over the eye.

So I had a sculpture I liked after only twenty one hours of work, which is far as I'm concerned is unprecedented.

Next, casting and painting the mask!
0 Comments

    Author

    I make masks. Because art is more fun when you put it on your head.

    Categories

    All
    A Day In The Life
    Airbrushing
    Casting
    Cat Masks
    Color Design
    Deer Mask
    Ears
    Eyes
    Fur
    Handpaws
    Head Base
    Horse/unicorn Masks
    Jawsets
    Lips
    Maxine
    Methods And Materials
    Moldmaking
    Moving Jaw
    Noses
    Painting
    Paper Mache
    Patterning
    Photography
    Rabbit Masks
    Resin
    Rip
    Sculpting
    Sewing
    Shaving And Trimming
    Silas
    Silicone
    Studio Announcements
    Tails
    Tongues
    Videos
    Wolf Masks

    Archives

    July 2020
    November 2019
    March 2019
    January 2019
    December 2018
    June 2018
    April 2018
    March 2018
    December 2017
    June 2017
    May 2017
    April 2017
    February 2017
    January 2017
    December 2016
    November 2016
    October 2016
    July 2016
    August 2014
    June 2014
    February 2014
    November 2013
    October 2013
    March 2012
    October 2011
    September 2011
    March 2011
    November 2010
    September 2010
    August 2010
    June 2010
    October 2009
    September 2009
    March 2009
    February 2009
    February 2008
    June 2007
    April 2007

    Enter your email address:

    Delivered by FeedBurner

    RSS Feed

Proudly powered by Weebly