
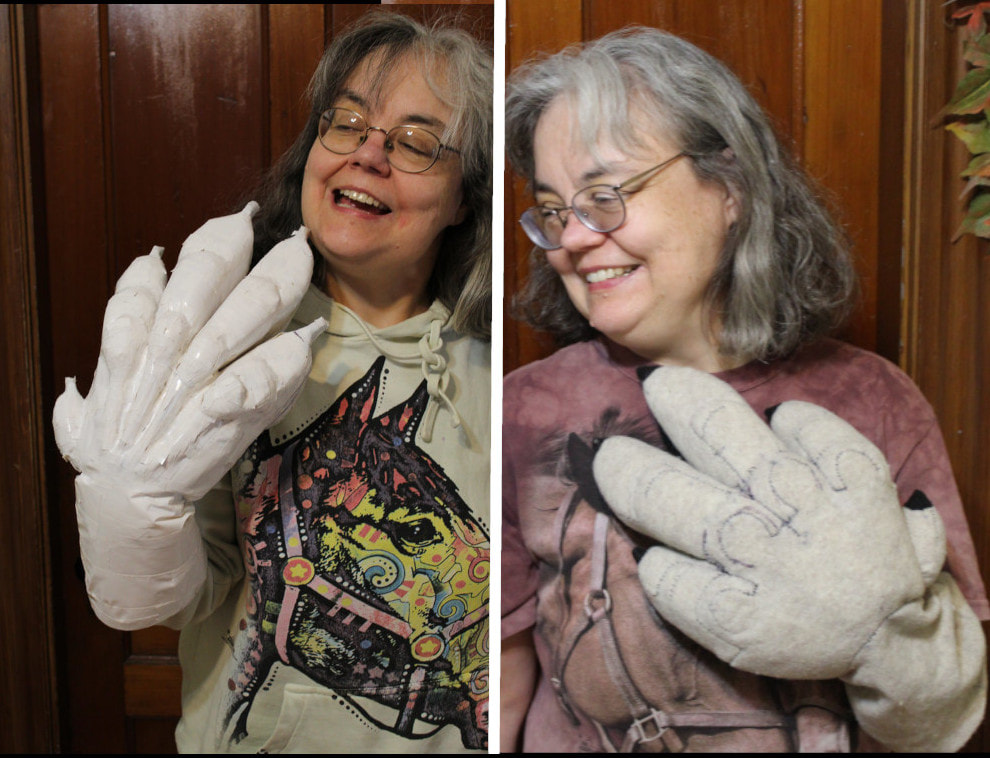
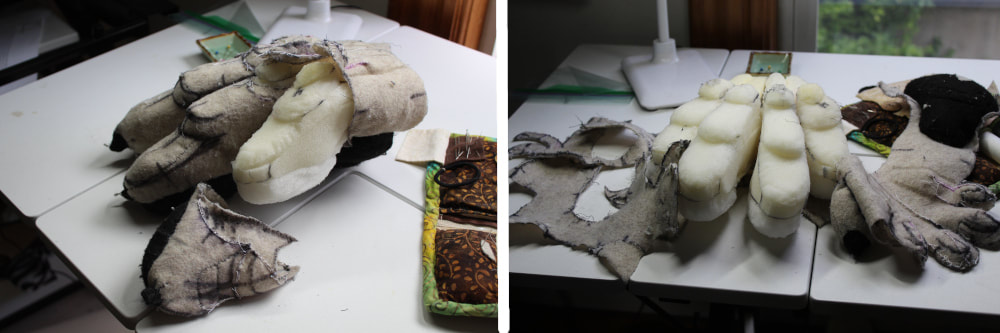
Ah, such high hopes. Previously I'd posted about my glorious latest paw draft, shown above taped up and ready for patterning. And also above, the paw I sewed up from that pattern. You can see the one does not look anywhere near as good the other. The sewn up paw looks short, chunky and blobby.
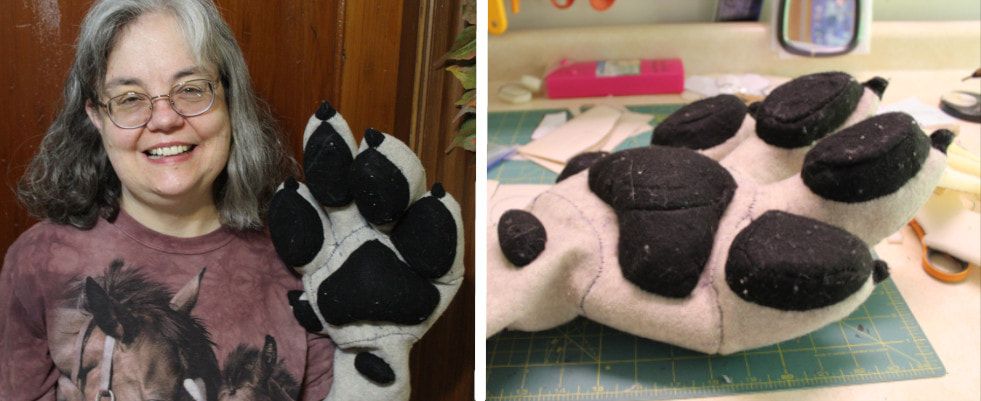
Well, at least the underside looks pretty good, though I think the wrist could use either some padding or other support.
I came to the conclusion there were two issues here, one with the fiberfill used for support and another with the duct tape used for patterning. The duct tape often sticks to itself before it sticks to the model, so It's hard to get a pattern with any kind of fine detail. I had problems with the tape sticking to itself especially around the knuckles and tendons and in between the fingers. This post will be about the solution to this problem with the tape. Look for more about the issue with the fiberfill in my next post.
I came to the conclusion there were two issues here, one with the fiberfill used for support and another with the duct tape used for patterning. The duct tape often sticks to itself before it sticks to the model, so It's hard to get a pattern with any kind of fine detail. I had problems with the tape sticking to itself especially around the knuckles and tendons and in between the fingers. This post will be about the solution to this problem with the tape. Look for more about the issue with the fiberfill in my next post.
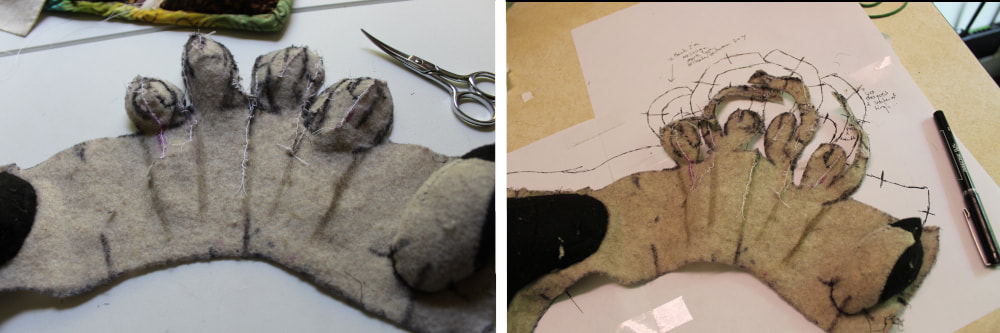
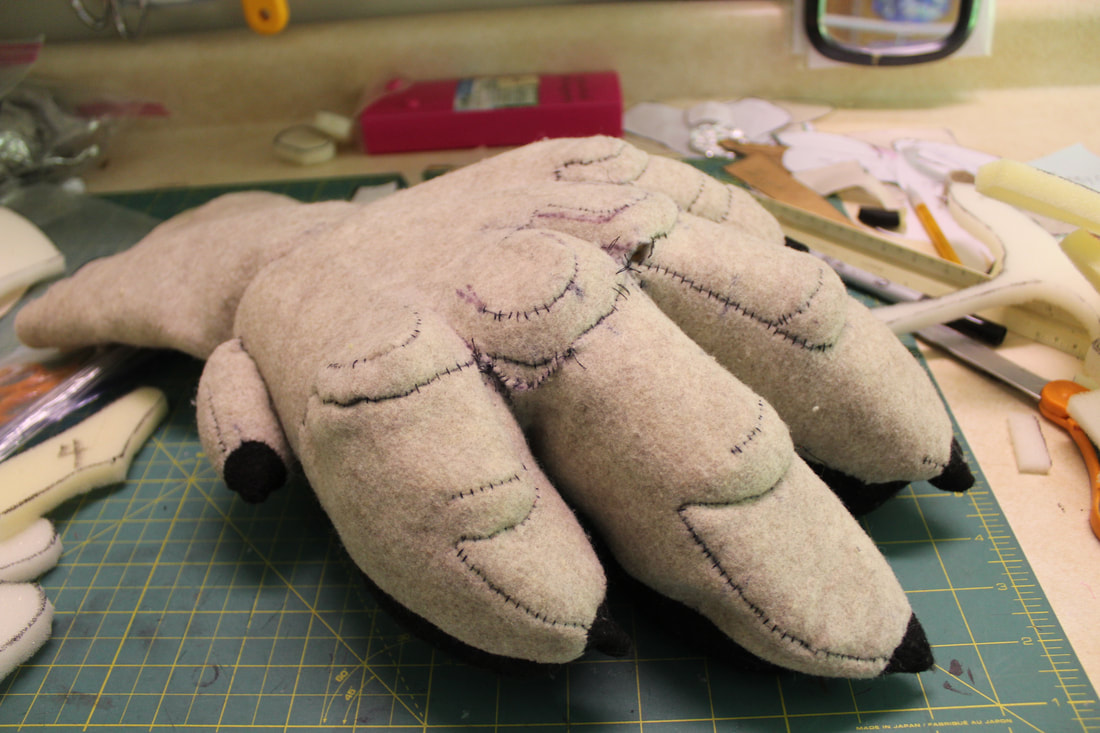 | At this time I got the idea to redo a pattern directly from the felt handpaw, sketching out potential changes in Sharpie, cutting and resewing, disassembling the paw afterwards and making the new pattern directly from that. Before, I felt a finished handpaw was something of a holy relic and I would carefully stash it in my ever growing pile of drafts. I recall the oft repeated art mantra, sometimes you must murder your darlings. Here, a few tentative changes can be seen around the knuckles. I'm still pretty cautious in my changes here. |
I combined this newfound willingness to work directly from a paw with the rediscovery of an overlooked supply in my studio- temporary fabric adhesive- and invented a new patterning method, which I dubbed... Frankensteining! Scary!!!
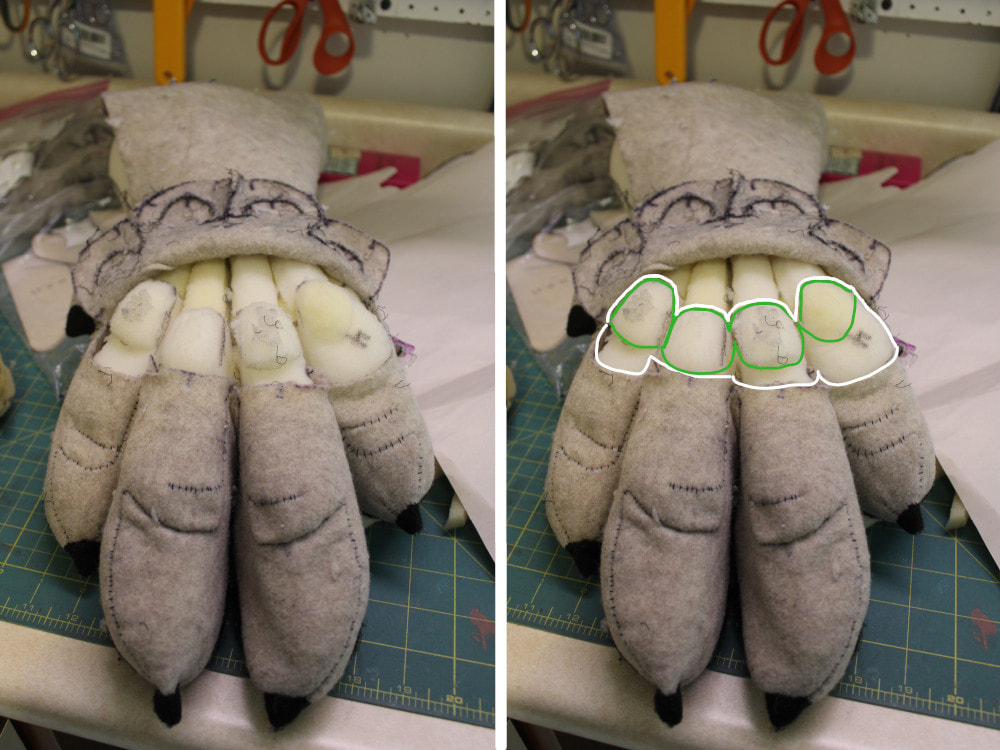
Starting the edits to the paw for realz. Here, I've cut the top of the paw along the line between the knuckles and the first joint of the fingers. Easy to see how the knuckles grew larger and shifted forward from the original foam paw to the fabric paw. (The original knuckles are outlined in green, the shifted fabric knuckles outlined in white.) It also appears that the knuckle and first joint of the pinky finger (here marked with a 4) merged completely.
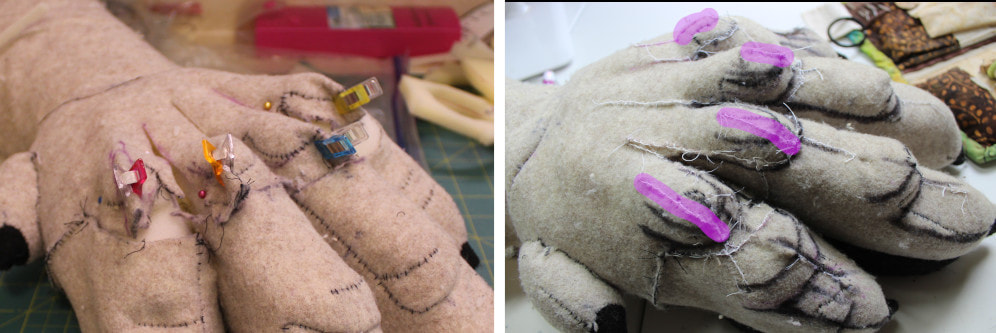
Reining in the oversized knuckles. I've pinched up the excess fabric with sewing clips, cut it off, and stitched it back together again with a blanket stitch, highlighted here in pink.
(What are all the random thick black marks on the paw on the right hand side, you may ask? These are where I'm anticipating cutting the revised paw apart to make the new pattern.)
(What are all the random thick black marks on the paw on the right hand side, you may ask? These are where I'm anticipating cutting the revised paw apart to make the new pattern.)
Tightening up the toes. Again, I pinched up the extra fabric, trimmed it off, and sewed the new edges together. I've highlighted those seams in pink. I like how this process made the finger joints more clearly defined.
Now it's time for the temporary fabric adhesive! I sprayed some adhesive onto scraps of felt to make patches of sorts. I laid these patches over any gaps in the fabric on the paws, tucking the edges of the patches under the preexisting fabric. Then I traced along the edges of the fabric onto the patches with a Sharpie, cut off the excess, and stitched the patch onto the paw using a blanket stitch.
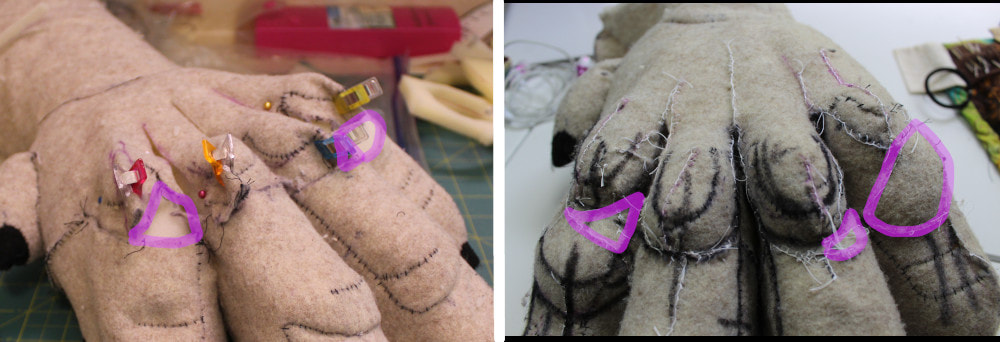
Above, showing the before and after of this process. There are gaps in the fabric between the knuckles and the first joint on the first, third, and fourth fingers. These gaps are outlined in pink in the picture on the left, and the finished patches outlined in the same manner on the right.
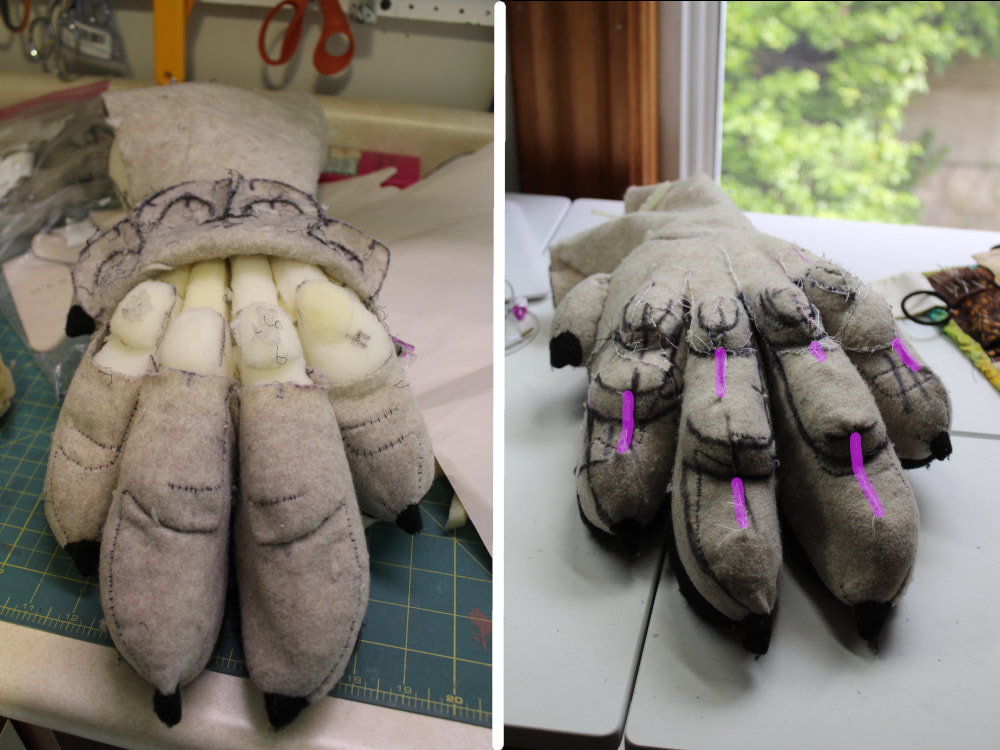
This next change was a critical one, though it's hard to see in photographs. The duck tape was too sticky to allow it to be positioned as far back between the fingers as it needed to be, which totally threw off the relative proportions of the fingers and the back of the hand in the resulting pattern. In other words, the back of the hand turned out too long and the fingers turned out too short and stumpy when I stitched them up!! You can see how much further back into the back of the paw the fingers join now.
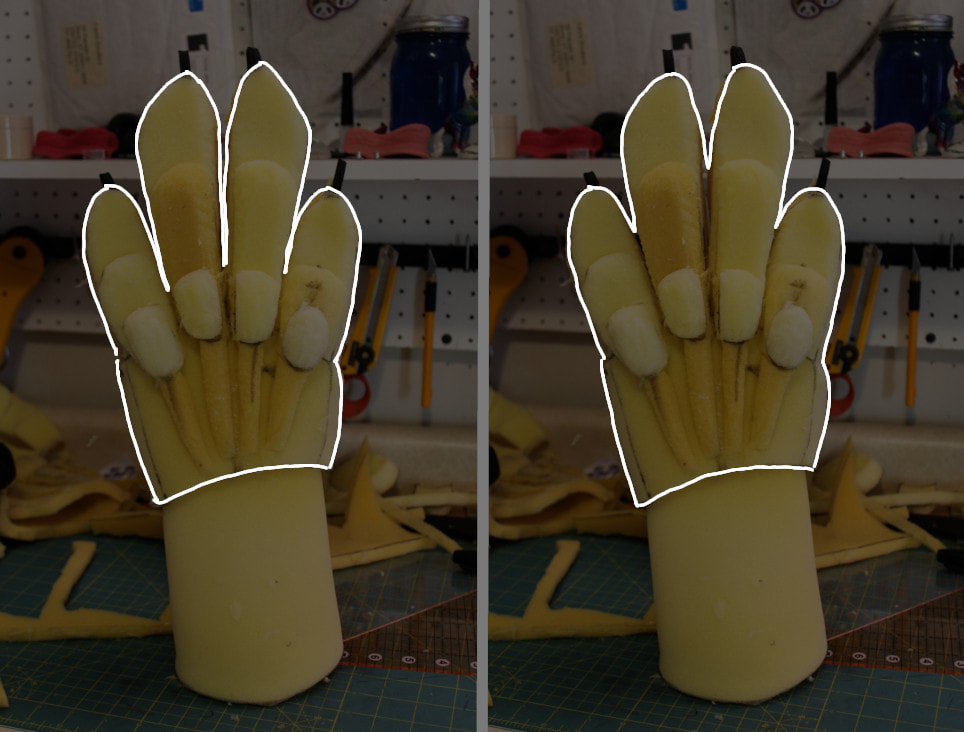
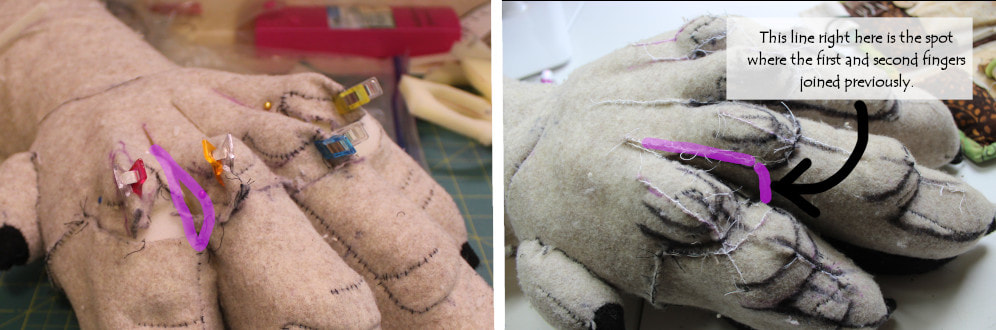
Here's another visual to help illustrate the problem with the fingers attaching to each other in the incorrect spot. The photo on the left hand side shows the fingers joined correctly and in the proper proportions to the back of the hand. The photo on the left shows the fingers joined incorrectly and too short in proportions to the back of the hand.
Imagine also, how the two different paws would move. The one on the left could wiggle its fingers more easily, and spread them more widely than the one on the right.
Imagine also, how the two different paws would move. The one on the left could wiggle its fingers more easily, and spread them more widely than the one on the right.
All edits made! Now, disassembling... cutting the Frankensteined paw into pieces in order to make the new, refined pattern.
The various pieces need to be cut in a way that they'll lie flat in order to make a proper pattern. Here I've made the knuckles lie flat by cutting them into some pretty groovy shapes. Then I've traced this piece onto paper. I am planning to scan the traced patterns for all the handpaw pieces into the computer, make them pretty with GIMP, and make the whole thing available as a download.
You can see the palmar pad and dew claw still attached to this piece. I am happy with the patterns I have for these parts already, and since whether or not they're there doesn't effect whether or not this piece lies flat, I've left them there.
You can see the palmar pad and dew claw still attached to this piece. I am happy with the patterns I have for these parts already, and since whether or not they're there doesn't effect whether or not this piece lies flat, I've left them there.
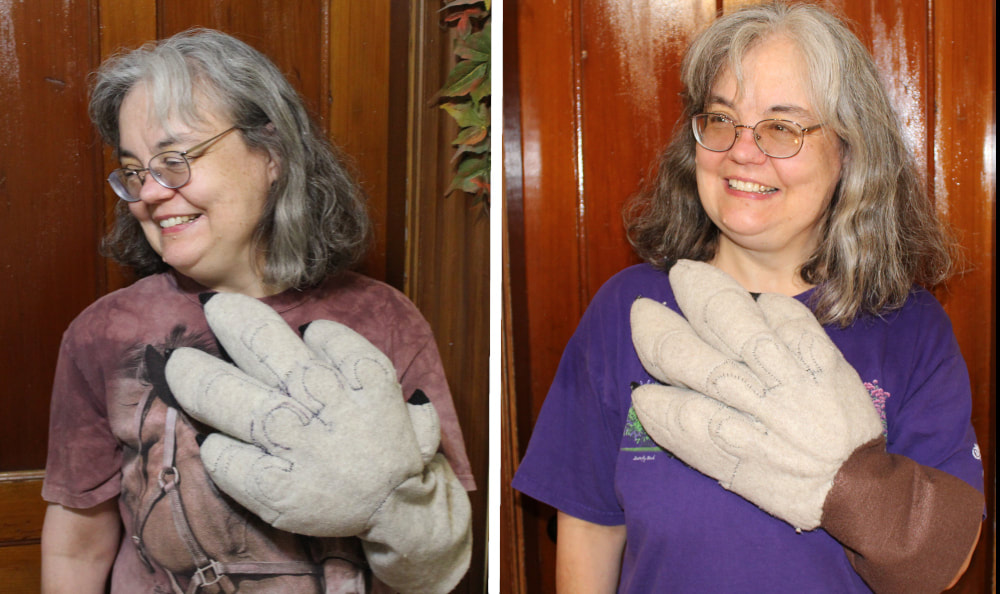
And here we have the official Before And After! The original blobby paw on the left, and the edited, refined paw on the right. I'm very happy with this progress.
 RSS Feed